
READ THIS BEFORE USING OIL-BASED POLY FINISHES!
Oil-based polyurethane is a durable, versatile finish that can give your woodworking projects a beautiful, long-lasting surface if applied correctly. This guide walks through surface prep, brushing versus wiping techniques, thinning, sanding between coats, and tips for a flawless, glass-smooth finish.
There are a lot of great finishes out there, but many people are intimidated by the whole finishing process. That’s why we’ve been making videos to help the average hobbyist woodworker get great results using common wood finishes. These videos are the best out there, in my opinion, because they cover a lot of important points that others often skip over. Below this article, I’ll link to a playlist of the finishing videos we’ve made so far.
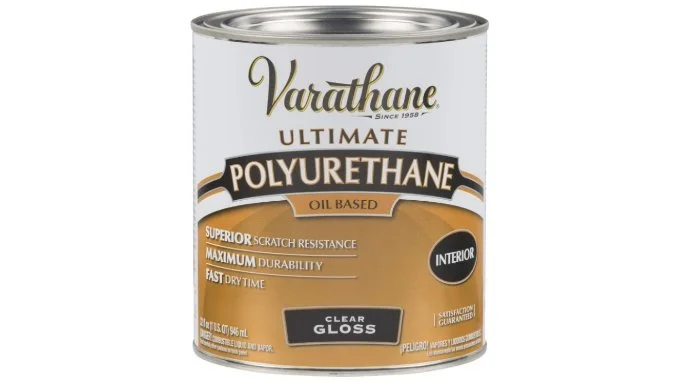
Today, I want to talk about oil-based polyurethane. It’s a very durable finish that’s well-suited for both indoor and some outdoor projects. It’s not difficult to apply, but I think my method will give you the best results.
Surface Prep
First, prepare your surface by sanding well. We’ve made a comprehensive sanding tutorial that explains how to properly sand and with what grits.
For the sake of this article, I suggest sanding no higher than 150–180 grit if you plan to apply a wood stain, or 220–240 grit if you're applying polyurethane directly. Anything finer than 240 is a waste of time with this type of finish. I also recommend hand-sanding the final grit and going with the grain. This disguises the fine scratches left behind.
Safety First
As mentioned before, in this article I’m focused on oil-based polyurethane. If you’re applying this in an enclosed space, you should wear a respirator with activated charcoal filters. If you're in a well-ventilated area, it’s up to you. Honestly, if you’re going to be working around oil-based finishes for more than a few minutes, it’s probably a good idea to protect yourself—unless you have an excess of brain cells to spare.
About Polyurethane
The application process for water-based poly is very similar to oil-based, but we’ll make a separate video on that later.
Oil-based poly typically comes in three sheens: gloss, semi-gloss, and satin. All must be mixed thoroughly. Semi-gloss and especially satin require not just a good initial stir but also mixing between coats—and periodically while you work—if it’s taking you more than 30 minutes to apply a coat. These finishes contain flattening agents that must stay suspended in the liquid, or you’ll get an uneven sheen.
Important: Do not shake polyurethane. You don’t want a bunch of air bubbles in the finish. Stir it well, then stir it again—and stir it often.
Strain It
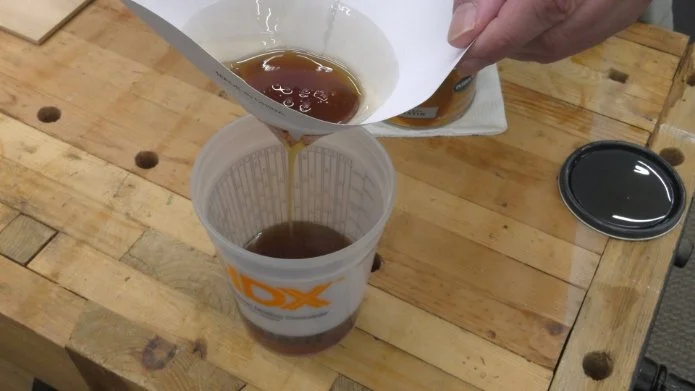
I never like to use poly straight from the can. You want to eliminate any crud or partially crystallized finish that may be inside. Get yourself some disposable strainers—available wherever you bought your finish. After mixing, pour some through a strainer into a clean container and let it slowly run through the mesh. This helps with air bubbles too. You don’t have to strain the whole can—just what you need for the coat you’re about to apply.
To Thin or Not to Thin
You can thin any poly. Water-based versions with water; oil-based with mineral spirits or another compatible thinner. Whether to thin—and how much—depends on a lot of factors.
Simply put:
If you're brushing, you probably don't need to thin it—unless it's an old can that's thickened.
If you're wiping, you'll need to thin it by as much as 50%.
Brush or Wipe?
If you’re new to finishing, I suggest wiping on your poly. It’s easier and more forgiving. But since you need to thin it a lot, you’ll need to be more careful to avoid runs—especially on vertical surfaces—and you’ll need more coats overall.
Brushing on poly takes a bit more technique, but it's worth learning. I’ll discuss both methods in this article.
Brushing Polyurethane
Make sure you're using a brush designed for oil-based finishes—typically a natural bristle brush like white China bristle. These hold the finish well and won’t break down like synthetic brushes.
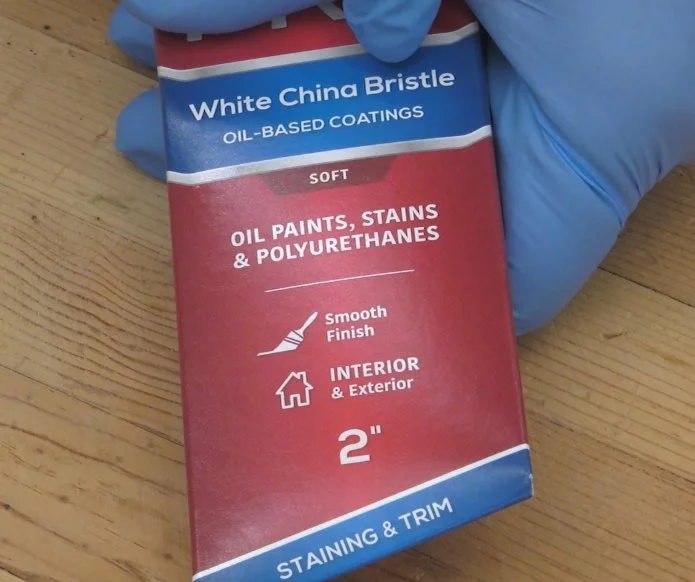
Make sure your brush is designed for oil-based finishes.
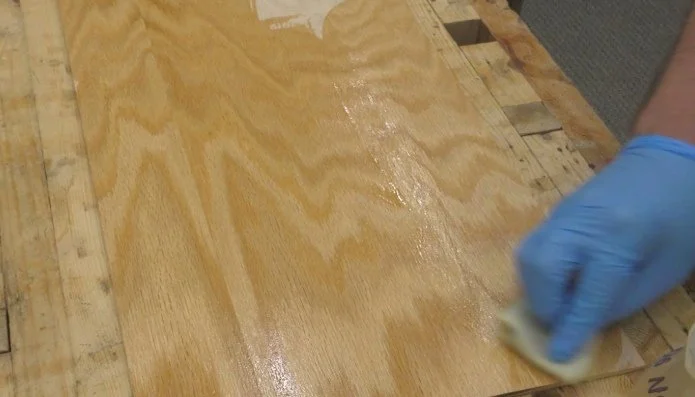
For this demonstration, I worked on a scrap of plywood. I assume you've sanded and cleaned up the dust. I use denatured alcohol for that, but a water-dampened cloth works too. If you're in the same space you sanded in, let the dust settle for a couple hours before wiping it down.
Application Tips
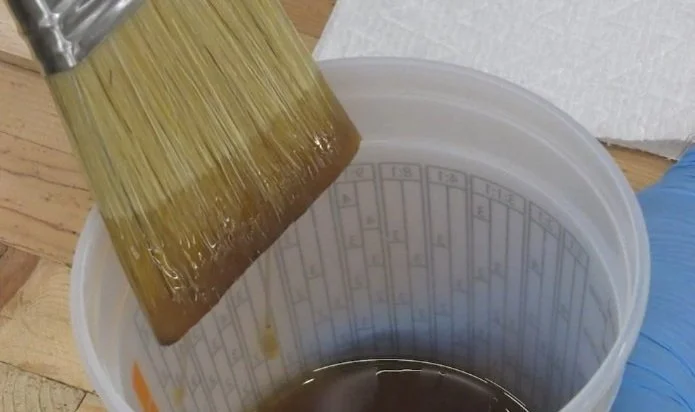
Dip the brush no more than halfway.
Wipe off excess.
Apply thin coats—three thin coats are better than two thick ones.

Always brush with the grain.
Always work wet. Don’t try to brush new poly over a spot that’s already begun to dry.
I like to work in narrow sections down the length of the surface so I can overlap before the previous stripe starts to tack up.
Once everything’s leveled, leave it alone. Brushing over tacky poly will ruin the coat. Missed a spot? Get it on the next coat.
Between coats, clean your brush with mineral spirits or brush cleaner and return it to its cardboard sleeve.
Wipe-On Polyurethane
You can make your own wipe-on poly by mixing polyurethane 50/50 with mineral spirits or another compatible solvent. I store mine in a sports drink bottle—it’s easy to pour, just make sure to label it properly.
Use a lint-free cotton cloth—either a store-bought wiping cloth or an old T-shirt. Fold it into a small pad.
Application Tips
Pour some on and spread it with the cloth.
Apply in any direction, then finish with the grain.
Add more where the wood soaks it up.
No leveling required—wipe-on poly evens out beautifully.
Wipe-on poly dries faster, so you can often sand and recoat within a few hours. But because each coat is thinner, you'll need more of them—typically 4–6 compared to 2–3 with brushed-on poly.
Sanding Between Coats
Use 400-grit sandpaper. Sand lightly—just enough to knock down the bumps. Feel the surface with your hand as you go. It should be perfectly smooth.
If your sandpaper gums up, give the coat more drying time.
Wipe off the sanding dust with a lightly damp cloth (water is fine), then apply the next coat. Repeat this process for each layer.
Final Touch
After the final coat is dry, grab a brown paper bag and use it just like sandpaper to buff the surface. Feel for any remaining bumps. This will leave the surface smooth as glass—and you’ll have a finish you can be proud of.
Sanding and Wood Finish Tutorials
Need some cool tools for your shop? Browse my Amazon Shop for inspiration.
(This link is an affiliate link. If you make a purchase, I may receive a small commission.)