
HOW TO UTILIZE UGLY WOOD - VENEERING BASICS
With clever techniques like book-matching, veneering, and using plywood backers, even flawed or sapwood-heavy lumber can be transformed into stunning furniture panels. This article shows practical tips for making the most of every board, creating balanced and eye-catching designs from pieces many woodworkers might discard.
In today’s article I have some great tips that will help you turn ugly wood into beautiful wood, so you can get the most out of your lumber.
I don’t take on much commissioned work these days, but a good friend of mine does from time to time. He had a customer who wanted a credenza made from walnut cut down from a tree in his own backyard. I said, “Let’s build it in the shop,” because I knew it would be a great opportunity to show you how to make the best use of the wood you have—even the stuff you might be tempted to throw away.
I made a video before on how to turn rough lumber into project parts, but this time we didn’t have enough lumber—or at least, not enough that matched.
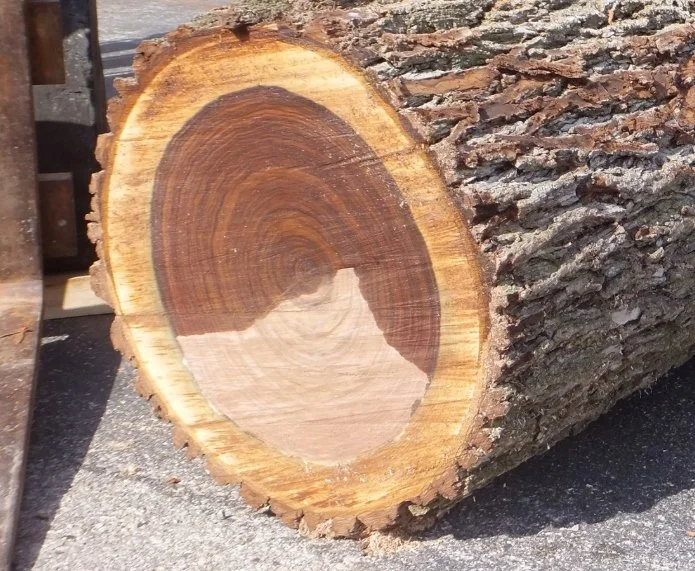
The rings of a walnut treat.
Here’s the issue: the outer rings of a walnut tree are pale sapwood, often discarded in favor of the rich, dark heartwood that woodworkers go nuts over (pun intended). But in this case, we couldn’t afford to toss any of it. The customer wanted to use it all.
Embracing Sapwood Through Book-Matching
Instead of hiding the sapwood, we embraced it by making it a design feature through a technique called book-matching.
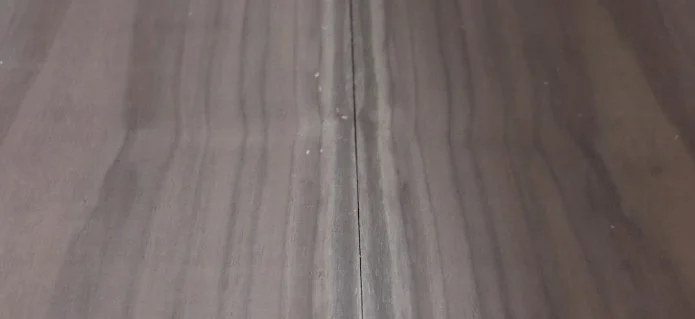
A panel created through book-matching.
Book-matching involves slicing a board down the center and opening the two halves like a book. The grain on one side becomes a mirror image of the grain on the other. In this case, narrow boards with unattractive sapwood on the edges were transformed into wider boards with a balanced look—light sapwood on both edges and down the center, creating beautiful striped panels.
But there was a new problem: while the panel was now wider, it was also thinner—too thin for the credenza's side panels. To thicken it back up, we glued the book-matched pieces onto plywood, essentially treating them as veneers. Since the panel edges would be hidden by legs, nobody would be the wiser.
What If the Edges Are Visible?
That was a problem when it came time to make the drawer fronts. We needed four matching boards, but only had a mismatched mix—some with sapwood and knots, others a milky brown that didn’t blend well.
Instead of discarding them (which many woodworkers would do), we sliced open the sapwood-rich boards, arranged them into book-matched pairs, and made them the feature. The grain became balanced and eye-catching.
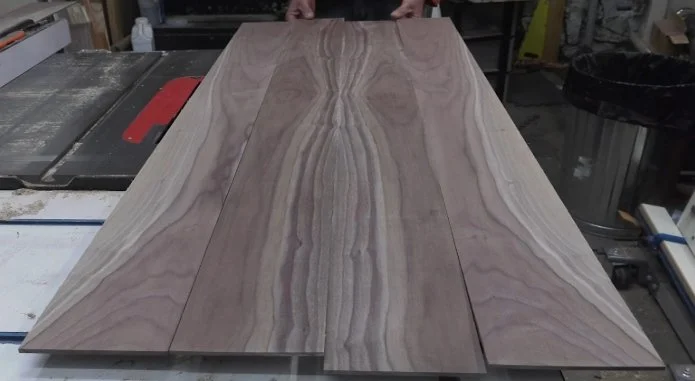
Book-matched pieces for the front of a credenza.
But again, they were too thin to use as-is, and unlike the side panels, the drawer edges would be visible. We couldn’t just slap them on plywood. Edge banding was an option, but we decided to use the other "ugly" boards—the ones with knots and odd coloring—as backers. This effectively turned our veneers back into thick boards.
Now we had drawer fronts that looked like they came from one wide, continuous board—all from mismatched, flawed lumber.
Veneering Tips for Success
If you're inspired to try this yourself, here are some veneering tips:
Use a Bandsaw for Resawing: While you can use a table saw, a bandsaw is best—especially for boards wider than 4–5 inches. Cut slowly and let the blade do the work. If you have to push hard, your blade is either dull or you're overfeeding.
Expect Waste: From a ¾" board, you’ll rarely get more than two ¼" veneers after planing and sanding. If you're starting with rough-sawn 4/4 stock and your saw is set up well, you might get four ⅛" veneers.
Flattening Veneers: A drum sander helps with thin veneers. If you don’t have one, attach your veneers to MDF with double-sided tape and use a planer—taking very light passes.
Prevent Warping: Wrap your veneers in plastic after prep to avoid cupping before you glue them.
Choosing Substrates: For hidden panels like the credenza sides, we used plywood with ⅛" thick veneers. We used tape as clamps and added weight to keep things flat while drying. This also prevents the seam from opening up, when gluing the veneers to the panel.
Gluing with Contact Cement: Great for large panels, contact cement eliminates the need for clamps. Just roll it onto both surfaces, let it dry to the touch (test with the hairs on your arm—yes, really), and press the layers together with a roller or block.
Veneer Both Sides (Usually): Normally, you should veneer both the front and back of plywood to balance moisture movement. Why? Because the veneer is likely to shrink and expand with moisture, so a veneer on the opposite side is often needed to keep the panel flat. In this case, the panel was locked into a plywood box, so it couldn’t cup even if it wanted to.
Solid Glue-Ups for Drawer Fronts
The drawer fronts were veneered with ¼" thick slices—too thick for plywood backing. Instead, we glued them to those less-desirable walnut boards. For this we used yellow glue, since contact cement wouldn’t hold up to constant drawer pulls.
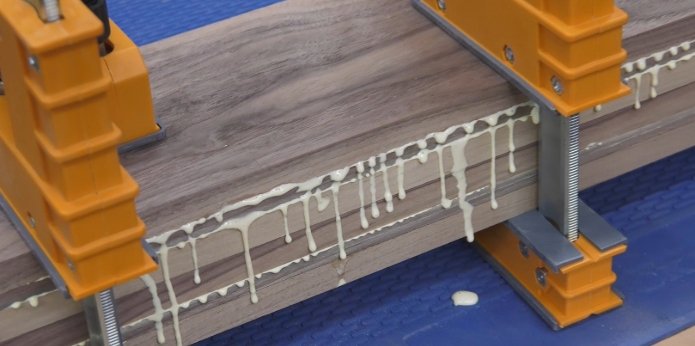
Pro tip: Only apply glue to the thicker backer board. Yellow glue has a lot of moisture, and applying it to thin veneer will cause it to curl, making alignment tough. As long as you use plenty of glue and even pressure with clamps, you’ll get a strong joint without the headache.
If you don’t see glue squeeze-out, you didn’t use enough glue.
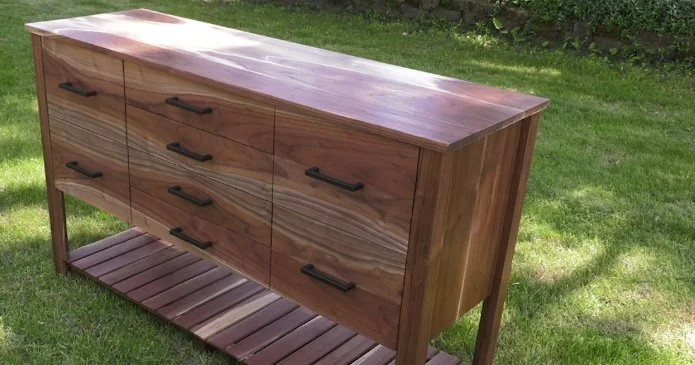
With some clever resawing, book-matching, veneering, edge-banding, and plywood, we built a large piece of furniture from surprisingly few boards—many of which most woodworkers would’ve thrown out.
I hope this inspires you to give it a try with your next project!
This post may contain affiliate links. If you make a purchase, we may receive a small commission.
Need some cool tools for your shop? Browse my Amazon Storefront for inspiration.