
HAMMERS AND MALLETS WOODWORKERS NEED TO KNOW ABOUT
Choosing the right hammer or mallet for the task can make woodworking safer, more precise, and more efficient. From cross-peen and ball-peen hammers to dead-blow, lump, and brass mallets, each tool has unique uses that every woodworker should understand.
I bet you never thought a tutorial about hammers would be as interesting as this one. But believe it or not, there's a lot you may not know about this essential tool—and matching the right hammer to the job can make a surprisingly big difference.
In this article, I'm going to walk you through the types of hammers and mallets I use and why—including a few I bet many of you have never used, but probably should.
The Cross-Peen Hammer
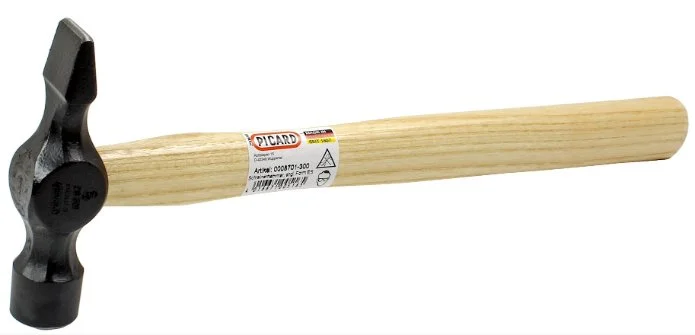
Let’s start with the cross-peen hammer. These come in various shapes and sizes and go by different names, including the Joiner’s Hammer or Warrington Hammer—named after the town in England where this style was developed in the 1860s.
No matter the name, the key features are a slightly conical striking face on one end and a wedge-shaped face on the other. This tool is ideal for driving the small nails commonly used in furniture and cabinet making.
The wedge end serves two functions:
It allows you to strike a small nail head while it’s pinched between your fingers.
It concentrates striking force at the center of mass, helping to drive the nail straight and avoid glancing blows.
It can be a little tricky to hit the nail squarely with that narrow point. But once you get it started with a couple of light taps, you can finish it off with more confident swings using the flat end.
Sure, most nails are driven with pneumatic tools these days. But every workshop should have a cross-peen hammer for those delicate jobs—like fastening the back of a picture frame or installing a small moulding.
Ball-Peen Hammer
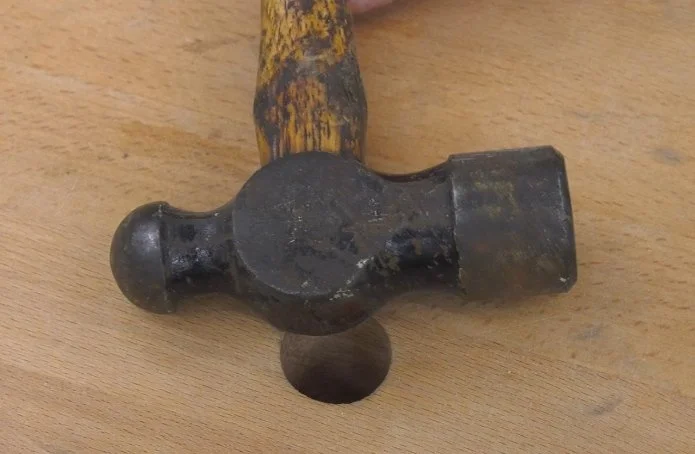
Though it’s traditionally a metalworking tool, every woodworking shop should also have a ball-peen hammer. It’s not primarily for driving nails, but for shaping and peening, especially the rounded end.
One common use is to peen the ends of brass pins to secure hardware or metal plates. Because the force is concentrated at a small point, this hammer allows for very precise work.
Ball-peen hammers come in many sizes, and I recommend picking up more than one. They're often easy to find at yard sales or flea markets, especially in rural areas. Just keep your eyes open.
Hardwood Mallets
Hardwood mallets are a workshop staple. They provide solid force without damaging chisel handles or other tools. These come in many shapes and sizes, and it’s worth having several.
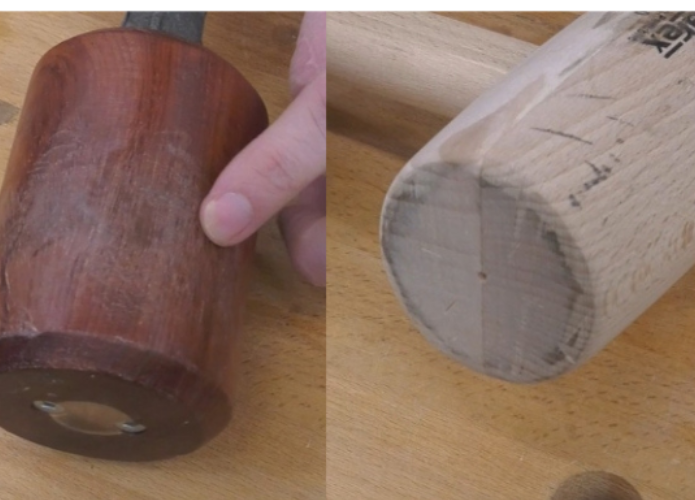
Left to right: A turned mallet and a barrel-style mallet.
A turned mallet is perhaps the easiest to make yourself if you own a lathe. One drawback: the long-grain striking surface wears faster than the end-grain face of a barrel-style mallet.
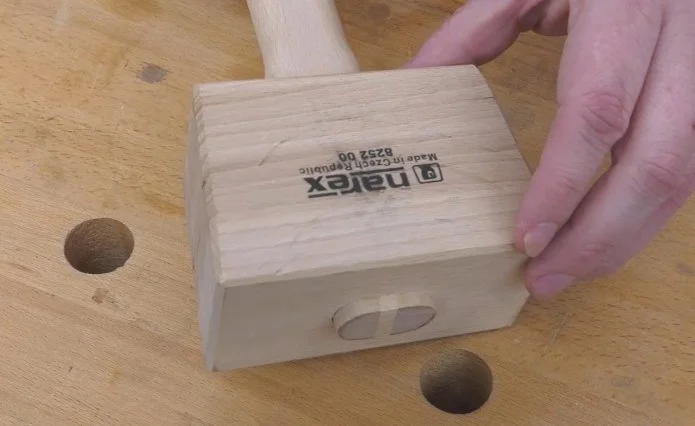
One of my favorites is a traditional joiner's mallet. It offers the balance of a turned mallet with the end-grain strength of a barrel-style. Plus, the angled faces (at about 5 degrees) ensure a solid, comfortable strike.
I get mine from a family-owned business called Taylor Tools. They’re a sponsor of my channel and a go-to source whenever I need to order tools online. If you use my link, it helps support the channel as well.
The Lump Hammer
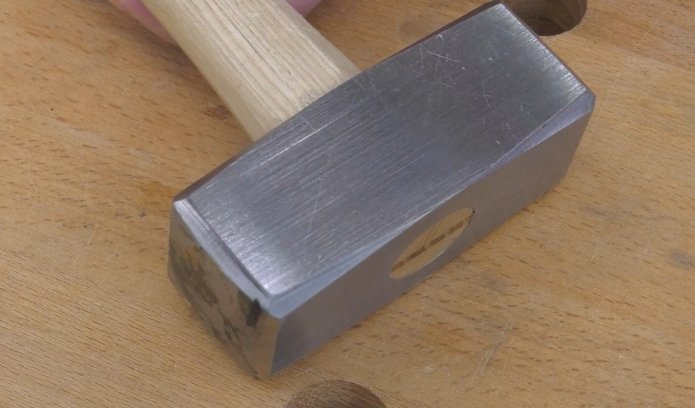
Not all striking needs to be gentle. Enter the lump hammer. While it looks like a smaller version of a sledgehammer, it’s really a tool for persuasion, not destruction.
With a 2½-pound head, a lump hammer can do the heavy lifting—like chopping mortises in hardwood—without requiring too much muscle. It’s a favorite for assembling joinery, such as dovetails or carcass joints, by simply adjusting your grip on the handle.
I got mine from Crucible Tools, but you can try a 2- or 3-pound mini-sledge to start. The handle might be longer and slightly awkward, but it’ll get the job done.
Dead-Blow Mallet
If you need precision without leaving marks, a dead-blow mallet is your friend. While even a wooden mallet can leave dents, a dead-blow mallet is unlikely to damage finished wood.
Unlike a hard rubber mallet, a dead-blow has a hollow head filled with steel or lead shot. This delivers more mass and minimizes rebound—hence the name. I like having a few different sizes around my shop.
Rubber Mallets
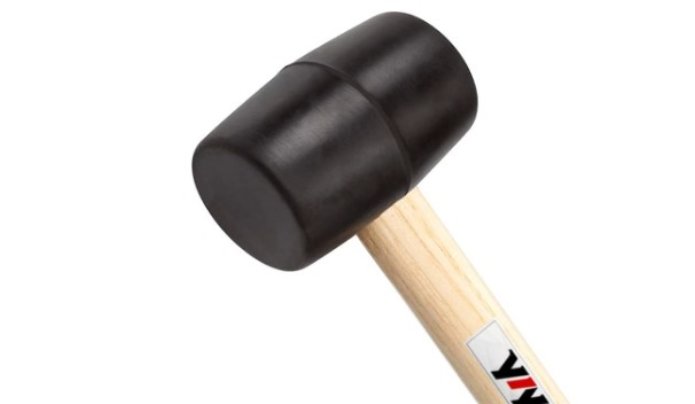
A solid rubber mallet still has its place, not so much with furniture, but when working on my machinery. It’s great for adjusting table saw wings, fence rails, or fitting pulleys. It delivers a heavy blow without denting metal.
Brass Carving Mallet
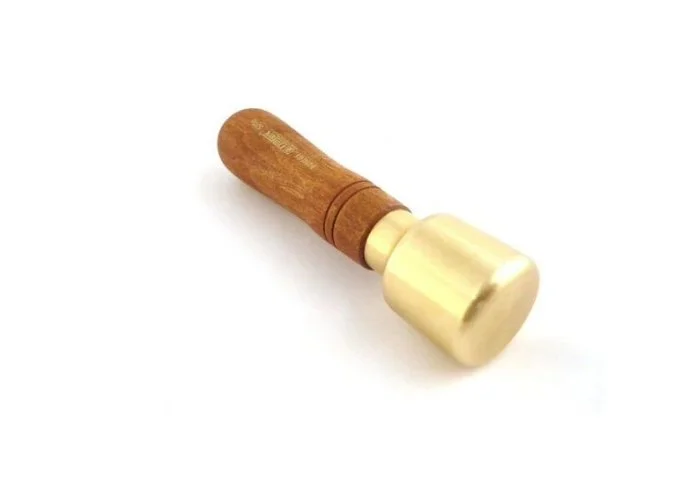
If you do any wood carving, consider a small brass mallet. The one in the above picture is about 500 grams, or just over a pound. It's used less for brute force and more for guiding carving gouges.
You can hold it by the handle or grip the head directly—it gives you much more control than carving by hand alone. Mine is a Narex, also from Taylor Tools.
The Claw Hammer
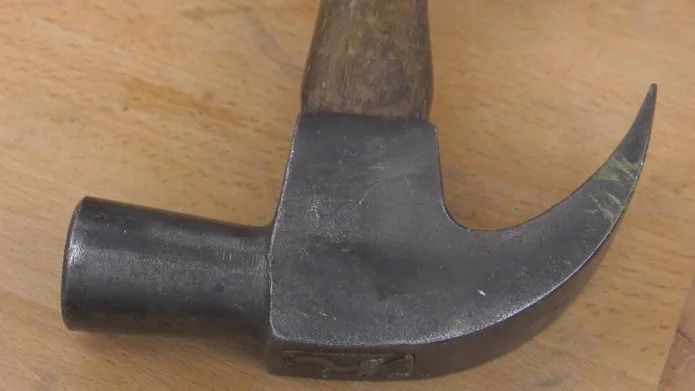
What workshop would be complete without at least one claw hammer? I use a larger 16-ounce one for general tasks, and a smaller version for delicate work.
Claw hammers aren’t all created equal. A good one is well-balanced, with a comfortable handle, a firmly fixed head, and a slightly domed striking face. The claw should be sharp enough to pull even the smallest nails.
Unfortunately, many modern hammers sold in hardware stores are better described as “hammer-shaped objects.” If you’re willing to hunt, vintage hammers—like mine—are often far superior. One of mine is probably close to 200 years old.
Final Thoughts
As I said, you may want to check out used sources for some of these tools. But if you’re looking to buy something new, visit the links through out this post.
I hope this article has shown you that there’s more to hammers than meets the eye—and maybe even convinced you to try something new in your own workshop. Thanks for reading, and happy woodworking!
This post contain affiliate links. If you make a purchase, we may receive a small commission.
Need some cool tools for your shop? Browse my Amazon Storefront for inspiration.