
THE FIRST AID KIT WOODWORKERS NEED
Learn how to prepare your woodworking shop for emergencies with a comprehensive first aid kit and practical safety plan. Tips for treating cuts, burns, and severe injuries help keep you and others safe while working with power tools.
It’s been almost six years since I had a serious woodworking injury. I learned a lot that day, but one of the most enduring lessons was how ill-prepared I was to provide the immediate first aid I needed.
My first aid kit wasn’t easily accessible. It contained a lot of junk I didn’t need—and not enough of what I did. I also didn’t have a plan in place that was sufficient for dealing with something very serious.
Since that time, I’ve spoken to a lot of woodworkers, and I’ve found that virtually none of them are prepared for a catastrophic shop injury either.
You may think you’re prepared. After all, it’s just common sense, right? Stop the bleeding, get help. But you must understand what happens to your mind when a serious injury occurs. You may think of yourself as a tough person with a clear head, but when you’re looking at shredded flesh, gaping holes, or a piece of you that has come off—you’re not tough anymore.
Some people get confused. Some people get physically ill. Some get dizzy or may even pass out. Even if you manage to keep a level head, you’re likely to suffer the effects of shock. Your hands will shake. You’ll forget things—like where the first aid kit is, or how to treat the injury you just sustained.
In my case, I couldn’t find my keys. I had difficulty swiping to unlock and dial my phone. My first aid kit wasn’t even in the shop at the time. I lived—but I also didn’t cut anything off. If the injury had been much worse, my lack of preparation might have cost me dearly.
Plan Ahead
You must plan ahead, train yourself for specific scenarios, and set things up so you can act with minimal thought or effort.
This starts with your first aid kit.
You should have a first aid kit in the shop itself—within steps of where an injury is likely to occur. You should know exactly where it is so you don’t have to hunt for it.
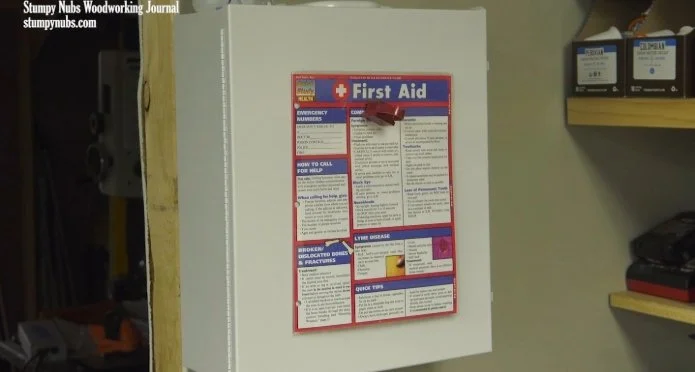
The wall-mounted first aid kit in my shop.
I like wall-mounted kits because they can’t get moved or buried under junk. They can’t be borrowed and forgotten. It’s immediately visible to me—or even to someone unfamiliar with the shop.
Another reason I prefer a wall-mounted cabinet is accessibility. If you’re alone and a hand injury occurs, you need easy one-handed access. I don’t like zippers. I don’t like containers I have to hold down with one hand and open with the other. If you can’t open it easily with one hand, it’s a bad choice.

I also like that I can see everything in a wall cabinet at a glance. No digging. No fumbling. When your brain isn’t running at full capacity, you may not even remember what you have. But if it’s laid out in an organized way, you can scan it quickly and know your options.
I bought my cabinet empty. Most pre-assembled kits are packed with filler. That’s fine—almost all of it is useful. But they rarely leave extra room for what you’ll really need during a catastrophic woodworking injury.
I didn’t want a separate trauma kit. I wanted everything in one place and ready to go. So I customized an empty cabinet to suit my needs.
Throughout this article I will share everything in my cabinet, along with links. But first, let’s go over a few real-world scenarios and how my kit addresses them.
Disclaimer: I am not medically trained or certified. You should get a reliable first aid guide, read it thoroughly, and review it at least once a year. Keep it in your kit. If anything I say contradicts professional advice or what’s in your guide—follow that advice, not mine.
Common Injuries in the Shop
Splinters and Small Cuts
Splinters can be hard to remove. I like sharp-pointed tweezers to dig beneath the skin. I also keep a pair of lighted reading glasses in my kit for better visibility—and to help anyone who struggles with reading fine print instructions on anything inside the kit.
Always wash small wounds with soap and water. That’s often enough to prevent infection, however, I also keep antibiotic ointment in case the wound is deep or tough to clean.
Cover the wound to stop the bleeding and help it stay shut. Keep a variety of bandages—especially for knuckles and fingertips.
I don’t like to leave a bandage on too long—they get dirty quickly. For long-term protection, I prefer liquid bandage. It stays flexible and lasts through handwashing.
If a cut or puncture is deeper than a quarter inch, get medical help. Some people keep super glue for closing small wounds, but I won’t recommend that. Just know that if you do keep it, use single-use tubes so they’re not dried out when you need them.
More Serious Injuries
Deep Cuts
If you suffer a serious cut, the first priority is to stop the bleeding.
Apply pressure. Use anything—your shirt, a clean rag. If you can, elevate the wound above your heart.
For heavier bleeding, I keep hemostatic gauze in the kit. These help blood clot faster. I also have wound seal powder for the same purpose.
If the bleeding is heavy—especially if it’s bright red and pulsing—you don’t have time for powders. You need serious pressure.
That’s when you should reach for an Israeli bandage. These were developed for the military and combine a dressing pad, an elastic wrap, and a pressure bar to control bleeding on limbs.
If it’s worse—say, a severed artery or an amputation—you’ll need a tourniquet. Don’t try to MacGyver one. Use a good one that won’t break on you.
Again, learn how and when to use these items properly. Watch reliable training videos. It could save your life.
Cleaning and Covering Wounds
Once bleeding is under control and if you can tolerate the pain, rinse the wound with water before heading to the ER. This can help prevent infection, especially if you’ll be waiting to be seen.
Cover the wound properly. Gauze is great—cheap, sterile, and effective. But gauze will stick to your wound and hurt when it’s removed. Use non-adhering pads when possible, and secure them with roll gauze or tape. Medical tape is easier to tear and less damaging to skin.
Self-adhesive bandage wrap is also a favorite. It sticks to itself, applies pressure, and is easy to use one-handed.
Amputations
If you cut something off—like a finger—most people forget to retrieve the severed part until it’s too late. You have to plan ahead.
I’ve made a couple of amputation kits. I wrapped gauze pads and placed them inside a gallon-size ziplock bag. The bag stays unsealed so it’s accessible one-handed. Drop the finger inside, fold the gauze like a taco, add cold packs on either side, and seal the bag.
Cold packs take the place of ice. Just squeeze them to activate. They stay cold for about 15 minutes—long enough to get to the hospital or at least reduce damage. Don’t place the severed part directly on the cold pack. That’s what the gauze is for.
Nobody wants to think about putting their fingers in a baggie, but if it comes to that, you’ll be glad you planned ahead.
Other Essentials in My Kit
Scissors: Medical ones are great for clothing and bandages.
Aspirin: For potential heart attacks. Uncoated, chewable. Don’t use if you’re bleeding.
Ibuprofen: My go-to for emergency pain relief. Helps with inflammation.
Alcohol wipes: For cleaning your hands, not wounds.
Hydrogen Peroxide: For rinsing minor wounds if soap and water aren’t available.
Gloves: Individually wrapped, in case you’re helping someone else—or vice versa.
Sling: To immobilize an injury or elevate it.
Eye pad bandages: Also for eye injuries.
Burn cream: Just in case.
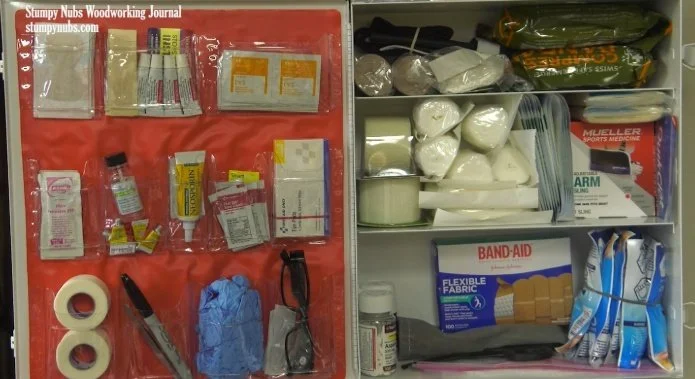
I keep everything neatly organized. I remove excess packaging on critical items. My tourniquet is held with a rubber band. My amputation kits are open and stored near the cold packs. I use the cabinet door pockets for small items.
I wish it hadn’t taken a serious injury to make me realize how important this was. But now that I have both a well-stocked kit and a solid plan, I feel a lot better—about my own safety and the safety of anyone else in my shop.
This post contains affiliate links. If you make a purchase, we may receive a small commission.
Need some cool tools for your shop? Browse my Amazon Storefront for inspiration.