
HOW A LITTLE WEDGE MAKES THE STRONGEST JOINT EVER!
The wedged mortise and tenon is one of the strongest mechanical joints in woodworking, combining resistance to shear and tensile forces with a visually striking design. This article walks through every step—from cutting the mortise and shaping the wedges to fitting and gluing the tenon—offering practical tips to avoid common mistakes and achieve a perfect joint.
Previously I have talked about the strength of glue joints and the efficacy of mechanical fasteners such as nails and pocket screws. All of these are perfectly acceptable forms of joinery—in the right places. But not all woodworking is about gluing or screwing parts together. Sometimes, you want to fit your parts with mechanical joinery for projects that demand the highest level of strength.
Perhaps the strongest joint in all of furniture making is the wedged mortise and tenon. You could make a case for the drawbored and pinned mortise and tenon—but we already addressed that.
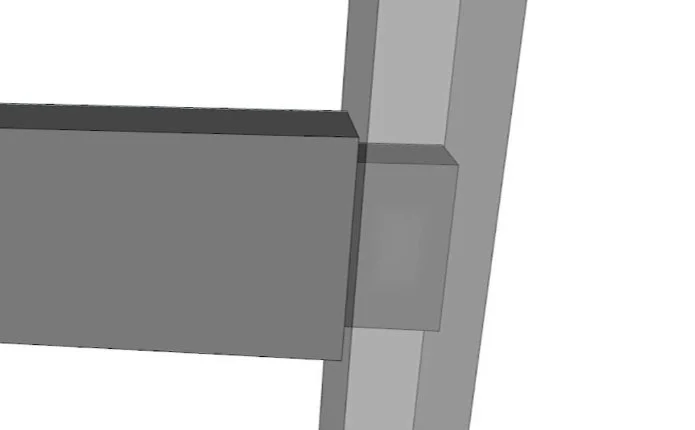
A standard mortise and tenon joint.
The wedged mortise and tenon differs from a standard mortise and tenon. A standard mortise has straight sides to accept a straight tenon. This joint offers excellent resistance to shearing forces and holds up well to linear forces caused by racking. Thanks to the mechanical nature of the joint, a significant amount of wood must fail before it gives way.

Its only real weakness—if you can call it that—is in tensile forces. A strong enough pull can draw the tenon straight out of the mortise because there’s no mechanical element to resist that force. In a standard joint, glue alone is responsible for keeping it together. And while glue is strong, nothing beats the mechanical strength of solid wood.
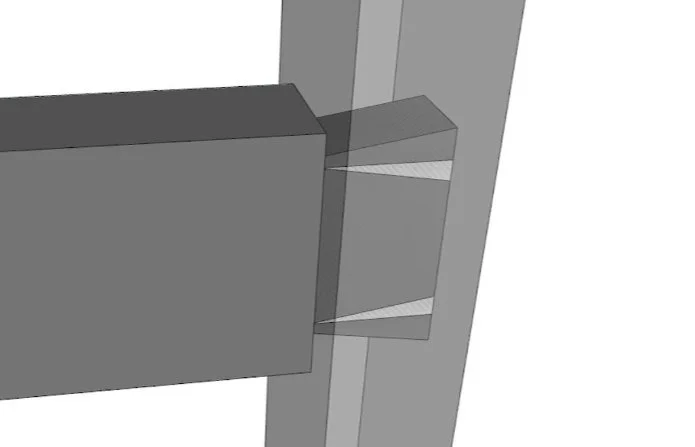
The wedged mortise and tenon solves this problem by adding mechanical resistance to tensile forces. The tenon is flared open on the exit side, and the mortise is shaped to match this flare using wedges that lock everything together.
If you're looking for a joint that will never come apart, this may be your best bet—especially if your project requires a relatively short tenon, like when working with 3/4-inch stock that doesn't allow for a deep mortise.

Plus, I think wedged mortise and tenon joints just look great, especially when you use woods of contrasting colors.
Cutting the Mortise
In this article, I’ll walk you through how to make this joint using a Forstner bit to cut the mortise and a table saw to cut the tenon. I’ll also point out a mistake I often see in other tutorials.
The thickness of your mortise is determined by the Forstner bit you use.
It’s best to cut the mortise first, but to do that, you need to estimate the size of the tenon. The thickness is easy—that’s determined by the size of the Forstner bit you’re using. It’s nice if your chisel is the same size, too.
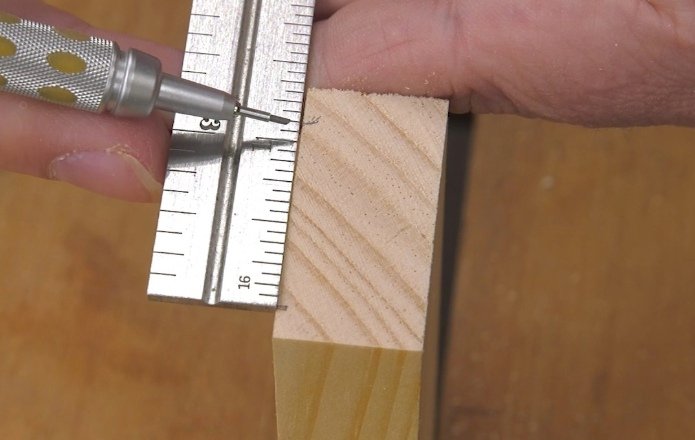
The length, or width of the tenon, is up to you. My stock used here is 1-1/2 inches wide, so I come in about 3/16 inch from each edge, giving me a tenon that’s roughly 1-1/8 inches wide. These are just rough numbers to help lay out the mortise—the actual tenon will be custom-fitted after the mortise is complete.
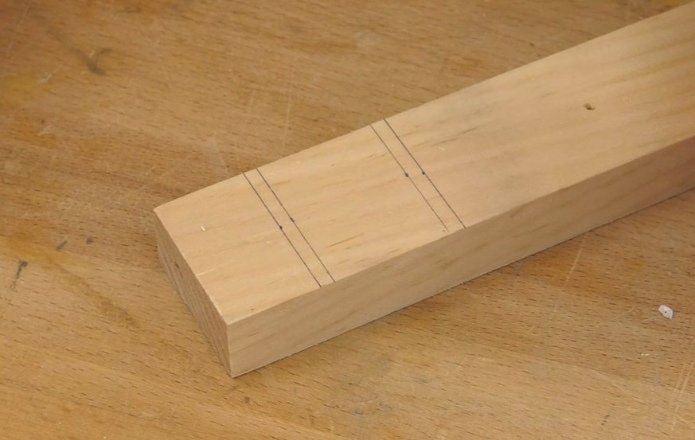
1/8 inch is added on each end only on the face side of the joint.
Suppose I want the mortise to start about 1 inch from the end of the workpiece. I add 1-1/8 inch for the tenon’s width and carry those lines across the face. That marks the actual width of the tenon. But since the front face will be flared for the wedges, I add 1/8 inch on each end only on the face side. The back side is marked with just the tenon width, without wedge allowance.
The tenon width markings continued to the back side.
To be clear:
Back side = tenon width.
Face side = tenon width + 1/8 inch on each end for wedges.
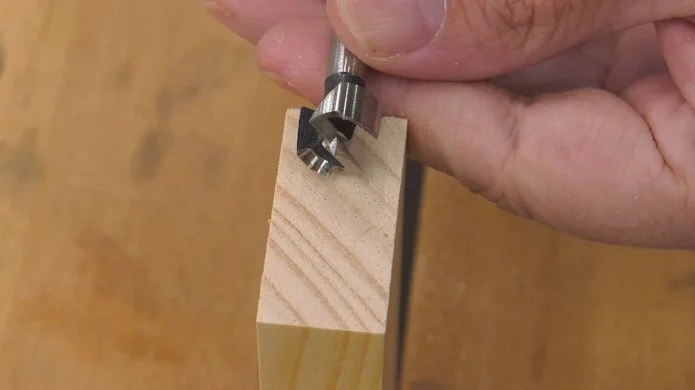
Now for the width of the mortise. Since I’m using a Forstner bit, I just need to mark the center of the mortise. I pick an edge, and with a marking gauge, scribe a centerline on both faces, referencing the same edge.
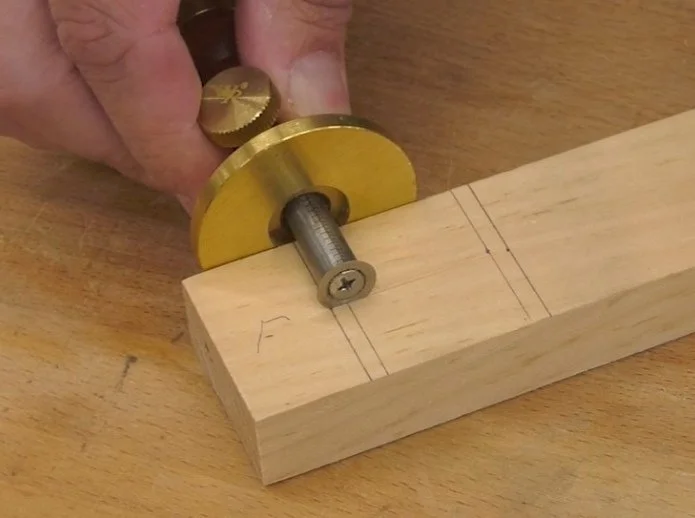
The beauty of using a marking gauge is that it gives the Forstner bit a clean place to start. You will also want a good Forstner bit.
Boring and Shaping the Mortise
A fence helps keep things aligned. Just remember to keep the same marked edge against the fence on both faces.
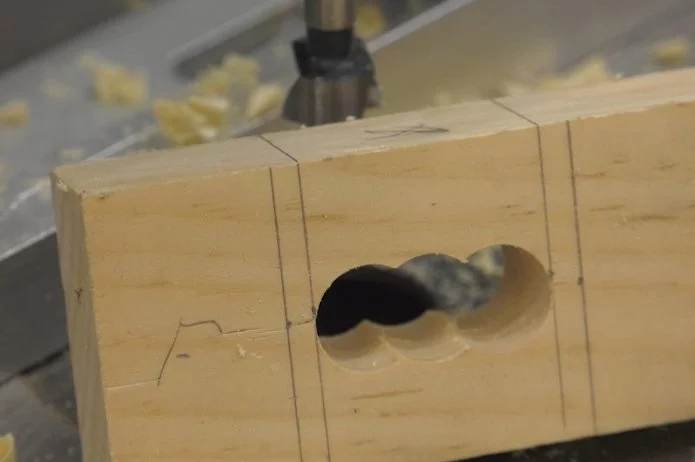
I start boring at one line, drilling just past halfway through the stock. Then I switch to the opposite line. This leaves a center guide point for boring the rest. On the back side, use the same tenon-width lines, not the flared ones from the front. The goal is a straight, through mortise.
Next, square it up with a chisel. I mark the inner boundaries with my gauge, flipping the workpiece and referencing the same edge. Then repeat on the opposite edge.
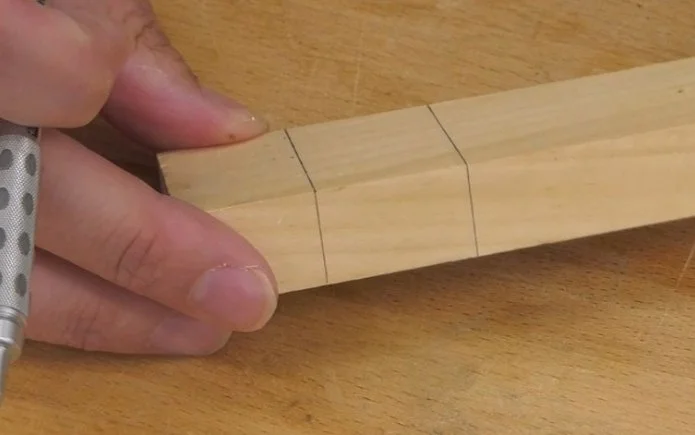
At this stage, you’ve made a standard through mortise. To convert it for wedges, we reshape the ends so they slope from the outer front lines to the inner back lines. A bevel gauge helps here.
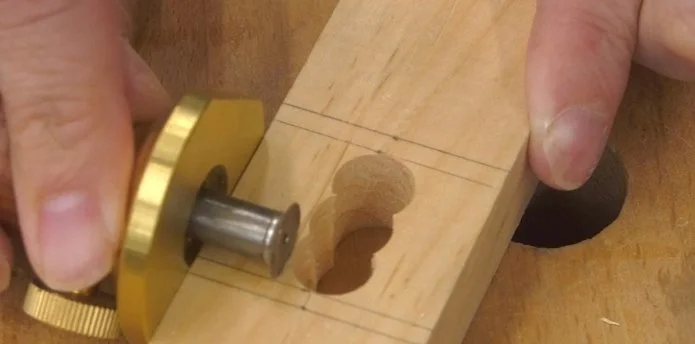
Shaping the Mortise for Wedges
I mark the angle on a piece of 2x2 construction lumber in both directions—this becomes my guide block. With the workpiece clamped and a scrap under it for support, I align the guide with the mortise edge and start paring away the end slope using a chisel.

Slowly pare away at the slope.
Work carefully, and use a sharp chisel. If it matches the mortise width, even better. Your eye might fool you about the slope, so use a ruler to verify—if it touches both faces at the same time, your slope is correct.
Cutting the Tenon and Wedges
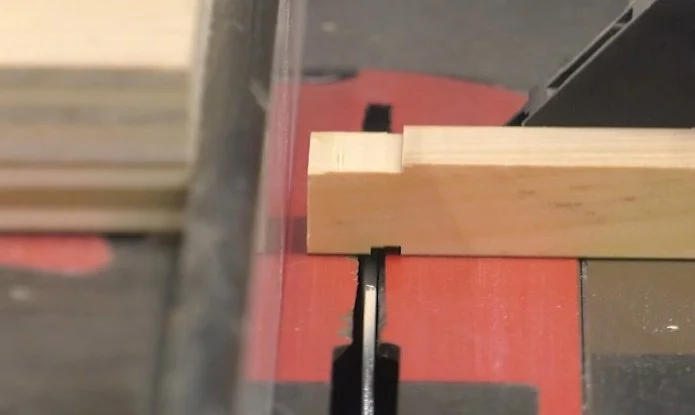
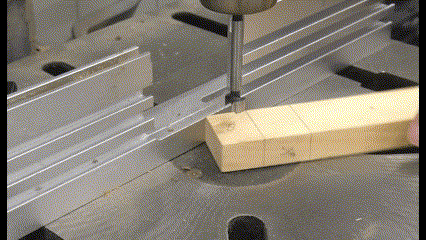
Cut the tenon to fit the smaller opening (the back side). I use a rip blade with flat-ground teeth on my table saw. I sneak up on the perfect fit by nibbling away the thickness gradually and checking the fit. Always use a miter gauge to keep things square—never cut freehand on the table saw.
Once thickness is dialed in, which means it fits firmly without having to be pounded in, do the same to cut the tenon to width.
The extra space on each end of the tenon is for the wedges. I cut mine a bit thicker than the 1/8 inch gap—just under 3/16 inch—to compress the fibers slightly and ensure a tight, gap-free fit.
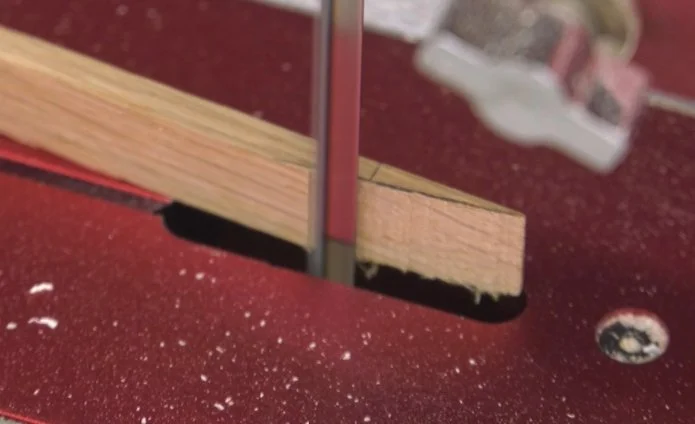
I cut them by hand on the bandsaw, but you could make a jig if cutting many. There are plenty of videos on that.
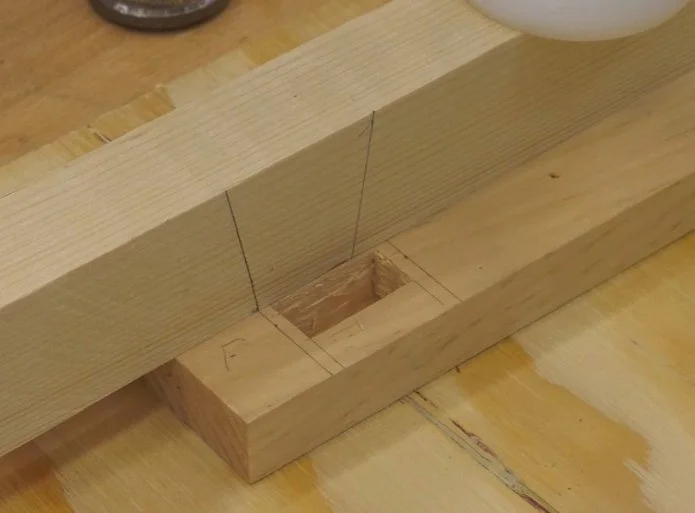
A Better Way to Cut the Wedge Slots
Here’s where I think many folks go wrong. People often drill holes at the base of the tenon, then cut straight down. The idea is to prevent splitting.
But here's the issue: if you cut straight down, the tenon has to bend a thick block of wood. That’s hard at the base, where fibers can tear. It might even cause the workpiece to split—ironically, what the drilled holes were meant to prevent.
Instead, I mark 1/16 inch up from the tenon base, then add that to the wedge thickness and mark in from the top. This gives me a slope that matches the wedge angle, allowing the tenon to flex like a hinge—far less likely to split.
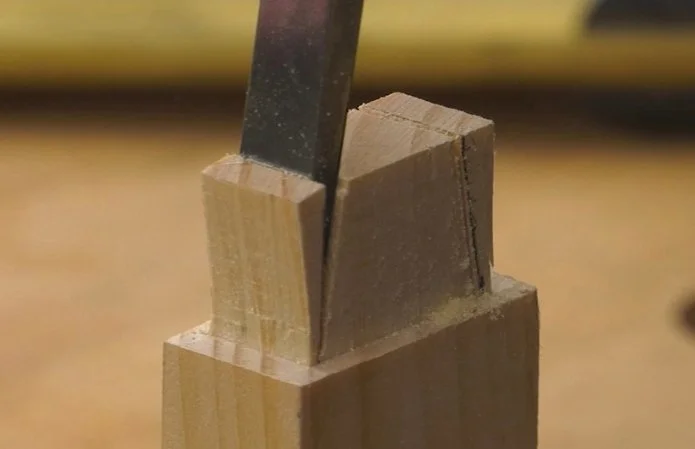
This doesn't weaken the joint. The glue will turn the tenon and wedges into one solid mass.
Assembly and Final Thoughts
Now to glue it up. I apply glue to all surfaces and drive in the wedges. Ideally, the sloped sides of the wedges should face inward to match the saw cuts—but it’s not a big deal if you mess that up slightly. Use a block to hammer them home so you don’t mar the ends.
Unlike a regular mortise and tenon, you don’t have to wait for the glue to dry before finishing. Plane or sand it flush and admire your work.
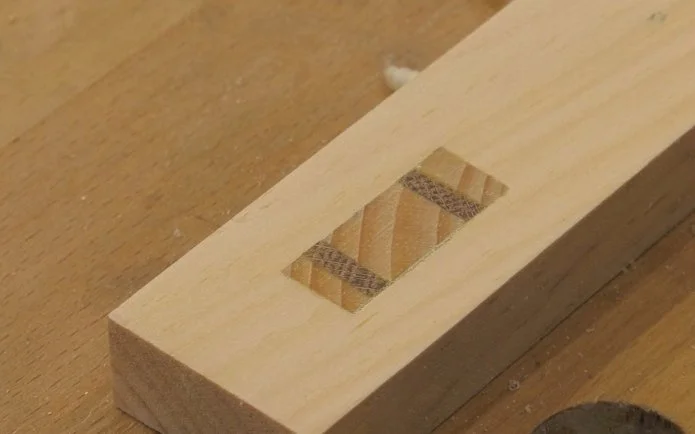
This is my favorite part—seeing the result. The end grain pine contrasts beautifully with the long grain, and the oak wedges add visual interest. Under finish, the colors will pop.
Imagine this as a table or chair leg—it’s not coming apart. I think you’ll agree: the wedged mortise and tenon is one of the strongest and best-looking joints you can make.
Happy woodworking!
(This post contains affiliate links. If you make a purchase, we may receive a small commission.)
Forstner bits: https://amzn.to/3HGnkBo
Marking Gauge: https://lddy.no/10muz
Need some cool tools for your shop? Browse my Amazon Shop for inspiration.