
BUTT JOINT VS MITER JOINT: WHICH SHOULD YOU USE?
Choosing between a miter or butt joint for large panels depends on aesthetics, edge profiling, and wood movement. Using alignment aids like loose tenons or biscuits and flexible fasteners ensures strong, long-lasting joints that can expand and contract without splitting.
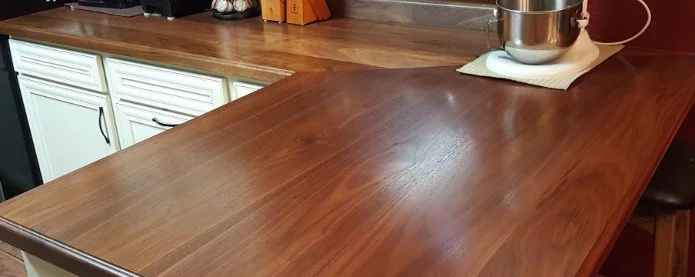
A few years ago, we built some walnut countertops, and like many counters, these required a corner joint. In that case, we opted for a large miter.
About a year later, we built a corner desk—and for that project, we chose a 90-degree butt joint instead.

Why did we choose one over the other? How did the potential for wood movement factor into those choices? And how did we create those joints so they would be strong and seamless, while still allowing for that potential wood movement?
In this article, I’ll answer all those questions so you can confidently choose and successfully execute whichever joint best suits your project.
Pros and Cons of Each Joint
Personal preference is, of course, a major factor. Both joints can look great, but you may simply prefer the aesthetic of one over the other.
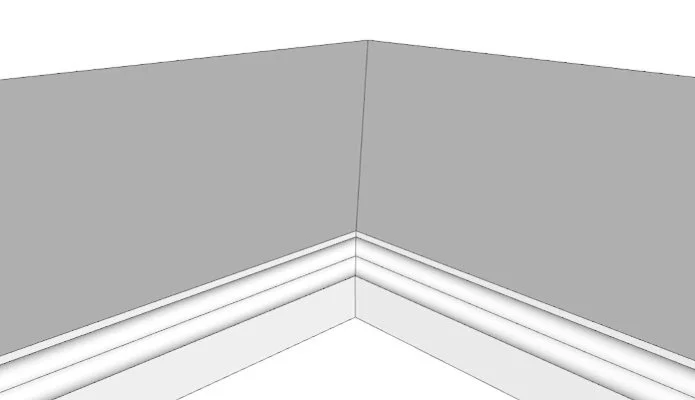
In our case, the desktop featured a square edge, while the countertop had a profiled edge—and that played a role in our decision. If you try to butt two profiled pieces together, you’ll end up with a gap at the inner corner.

If you try to butt two profiled pieces together, you’ll end up with a gap at the inner corner.
You can solve this by routing the profile after the slabs are joined—which is what we did. But keep in mind that a round router bit can’t reach fully into a square corner. That means you'll either have to settle for a radius in the edge profile or hand-carve the transition to a sharp point.
Another solution could be adding mouldings after joining the slabs, coping the inside corner like you would with baseboards or crown mouldings.
But if you connect two panels with a large miter, you can rout the profile first and get a crisp, clean corner—just like a giant picture frame.
This is one consideration when choosing between a miter or a butt joint for large desktops or countertops. Another critical factor is wood movement.
Understanding Wood Movement
Even after a finish is applied, wood still swells and contracts as the humidity changes. Boards don’t expand lengthwise (with the grain); they only expand across the grain. On humid days, the width of a large slab—like a countertop or desktop—can fluctuate by 1/8 inch or more.
And that movement affects miter joints differently than butt joints.
A butt joint has conflicting grain directions, with end grain butting against long grain. You can’t permanently glue these two slabs together, the end grain side will expand while the long grain side won’t. The seam must be able to move, or the end-grain side will eventually crack.
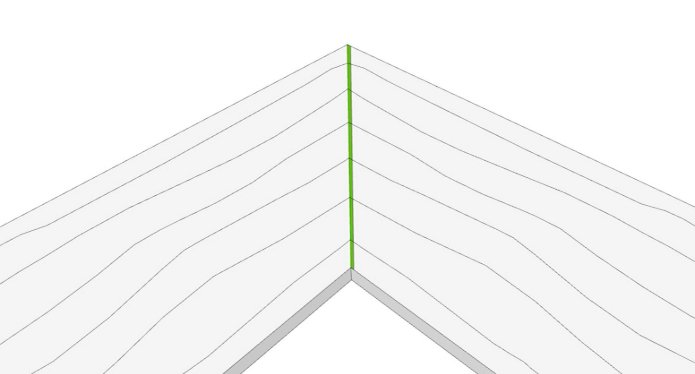
A miter joint is different. While the grain directions still differ, it’s an end-grain-to-end-grain connection. Theoretically, both halves should expand and contract together—but that’s not exactly what happens.
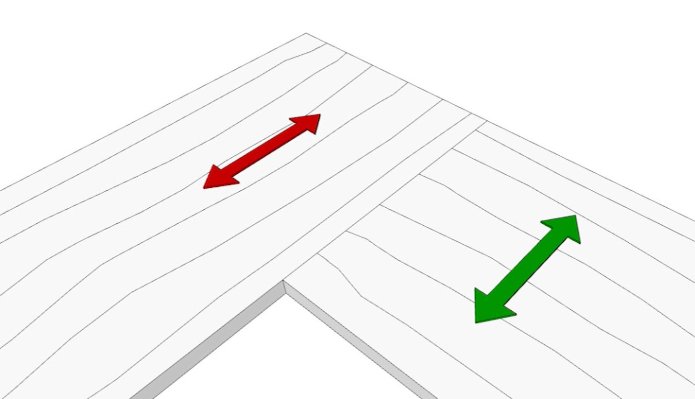
As both halves of a miter joint swell in width without growing longer, the outer corner tends to open up. When they shrink, the inner corner tries to open up instead.
This phenomenon is subtle—barely noticeable in a small picture frame, for example. But with wide slabs, the effect is magnified. Even in a climate-controlled home, fine gaps may appear over time. Eventually, any glue in the joint will fail. That’s why you need a better method to hold the joint together.
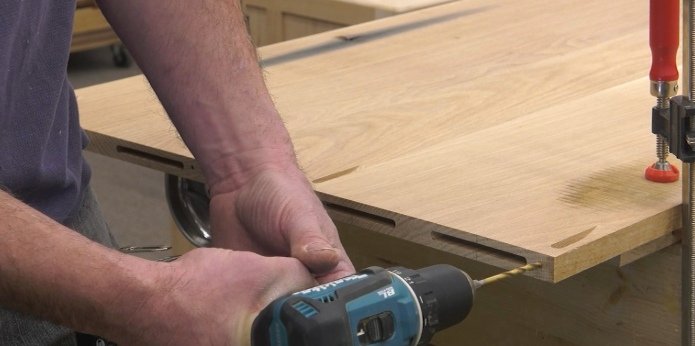
Cutting the Joints
Before we talk joinery, let’s address cutting. This can be intimidating with large, heavy slabs. And the last thing you want are gaps in the joint.
We cut one with a track saw and the other with a circular saw and edge guide. The track saw was a bit easier—especially for the angled cut—but both did the job well.
The key is to make the entire cut in a single, fluid motion. Don’t pause mid-cut, or you’ll leave blade marks that can appear as gaps in the finished seam.
If your circular saw cut isn’t perfect, consider using a router with a straight-edge to skim the end grain. A straight bit will clean up blade marks and ensure a tight-fitting seam.
Also, don’t assume you must cut a perfect 90-degree or 45-degree angle. For the countertop, we made a template based on the actual cabinets at the jobsite and marked the inner and outer corners of the joint to get the proper angle. For the desktop, we placed the two halves on the frame and scribed the end of one panel to match the edge of the other. This prevents mistakes from the frame or cabinet construction from compounding into the top.
Joinery That Allows for Movement
As we’ve established, glue has no place in these joints. What you need is something that will:
Pull the two halves together
Keep them aligned and on the same plane
Still allow the wood to move independently across the grain
This is where loose tenon joinery comes in.
Biscuits are a good option—as long as you use a high-quality biscuit joiner that cuts tight-fitting slots. If the biscuit wobbles inside the slot, it won’t help with alignment.
A loose tenon router jig also works well. (You can find an article here on loose tenon joinery.) This method is similar to what the Festool Domino creates.
Remember: these loose tenons or biscuits are for alignment only. They keep the seam flat but still allow for side-to-side movement. That’s why they’re preferable to dowels, which restrict movement in all directions.
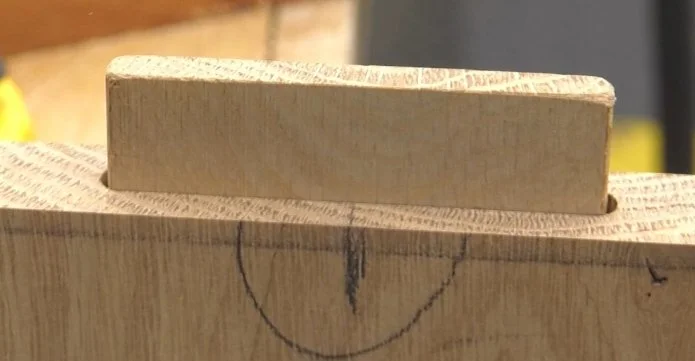
Cut the slots slightly wider than the tenons or biscuits, giving them room to move side-to-side—but not up and down. And most importantly: don’t use glue. These joints are dry-fit and then held together using metal fasteners.
Fastening the Joints
For the butt joint, we used pocket screws. The pockets go into the end grain side—not the long grain side. The exit holes are counter-bored larger than the screw’s threads, allowing the joint to shift as needed over time.
When you screw the joint together, the screw heads pull the seam tight. If the end-grain panel expands or contracts, the shaft of the screw allows movement thanks to the oversized hole.
The miter joint could also use pocket screws, but they won’t be quite as strong. That’s because the threads can’t grip end grain as securely as they can grip long grain. I’m not saying it won’t work—but it’s not ideal. And remember, miter joints are particularly prone to opening at the corners due to wood movement.
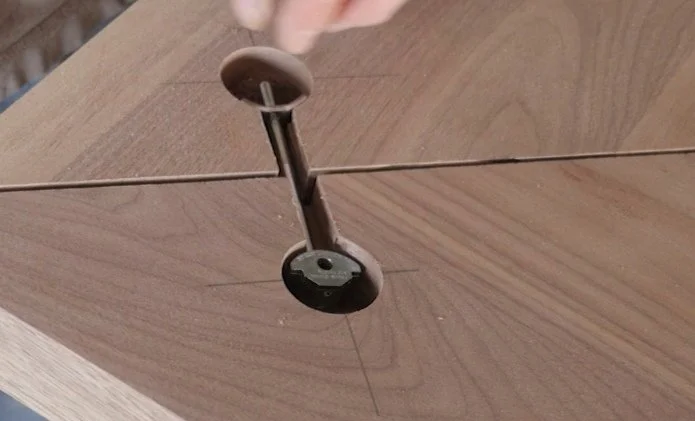
So instead, we used draw-bolt joint connectors—also known as dog-bone connectors. These require a special slot, which you can easily make with a Forstner bit and a simple router jig. You can watch a tutorial here.
These connectors are very strong. The thick slab countertop will never come apart.
Final Thoughts
Both joints are very strong—when executed properly. And now that you understand the unique considerations of each, you can confidently approach your next large panel corner joint.
Whether you choose a butt joint or a miter, knowing how to handle wood movement, alignment, and fastening will make all the difference in the strength and longevity of your project.
Happy woodworking!
This post may contain affiliate links. If you make a purchase, we may receive a small commission.
Need some cool tools for your shop? Browse my Amazon Storefront for inspiration.