
WOOD GRAVY: THE BEST WOOD FINISH EVER
Learn how to use “wood gravy” to fill open grain and create a glass-smooth finish on hardwoods. A simple wet-sanding technique that upgrades any woodworking project.
If you really want a furniture project to look and feel glassy smooth, you need to know how to make gravy—and more importantly, how to use it to give any wood surface a beautiful finish. In this article, I’ll share an old-school technique you can start using today that will absolutely transform your next project.
Why Some Hardwoods Don’t Feel Smooth
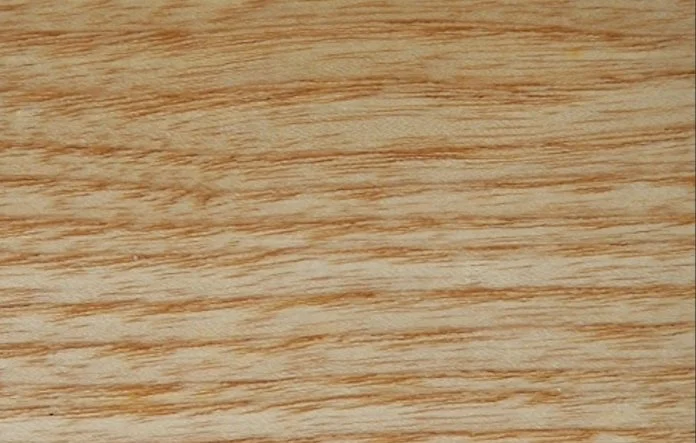
Some hardwoods have what’s called open grain—large pores that create a textured surface, even after sanding. Woods such as:
Oak
Ash
Walnut
Hickory
You can sand them to whatever grit you want, but those pores will still telegraph through your finish, especially when light hits the surface.
For some projects, that natural texture is perfectly fine. But for others—tabletops that catch reflections or small hand-held items like boxes—those pores make the surface look dull and feel rough, even when you’ve sanded forever.
Why Finishing Alone Doesn’t Fix the Problem
A lot of people try to solve this by piling on heavy coats of polyurethane or lacquer, hoping to fill the pores. But too many coats can make your project look plasticky, not silky.
A better solution? Fill the pores first, then apply your finish.
Manufacturers do make commercial grain fillers, but for generations woodworkers have relied on something much simpler, cheaper, and—in many cases—better:
Gravy made from the wood itself.
The Old-School Trick
I learned this years ago from the late Charles Neil, and it’s beautifully simple.
What You Need
An oil-based finish of any kind
Polyurethane, varnish, tung oil, boiled linseed oil—anything that hardens
It does not need to be your final finish
Cloth-backed, wet-use sandpaper (400–600 grit)
A random orbit sander (optional but faster)
Rags for wiping
A spatula spreading
If you have a half-empty can of glossy poly you’ve been meaning to use up, this is the perfect opportunity.
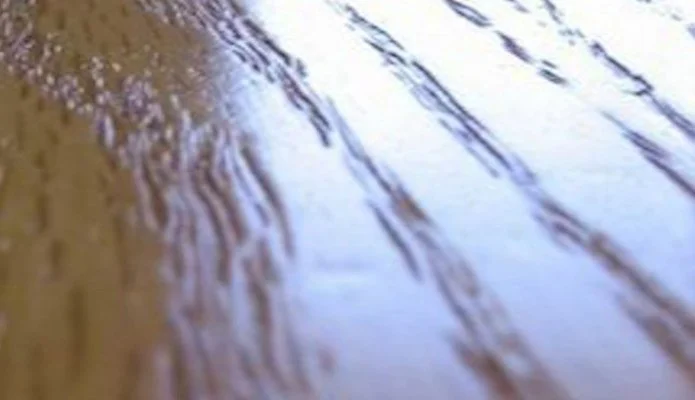
Step 1: Pour and Wet Sand
Pour a small puddle of your oil finish onto the wood. Now wet sand directly into the oil.
A few tips:
Use cloth-backed fine grit sandpaper or discs that can withstand oil.
Avoid sanding discs with holes if your sander has dust collection—you don’t want oil and slurry inside the machine.
Work the surface slowly and evenly to create a fine slurry.
You’ll see it immediately: A creamy mixture of oil and ultra-fine sawdust. That’s your gravy.
This slurry packs into the pores beautifully, filling in grain and even minor imperfections.
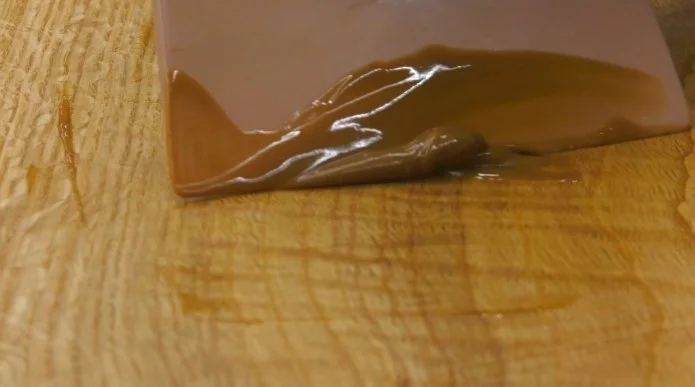
Step 2: Work in the Gravy
Use a spatula to spread the gravy across the surface.
It will:
Fill pores
Minimize texture
Reduce the number of finish coats you need
Improve the final feel dramatically
It won’t fill knots or large gaps—it’s still too thin for that—but it’s perfect for smoothing open grain.
Step 3: Wipe and Dry
Wipe off the excess, then let the surface dry fully.
Because this uses an oil binder, it’s best to apply oil-based topcoats over it. There are situations where you can switch to water-based finishes afterward, but unless you really know what you’re doing, stick with oil-based for safety and compatibility.
Step 4: Apply Your Final Finish
Here, I applied two coats of wipe-on poly in a satin sheen.
The result?
Glassy smooth surface
No open-grain texture
A natural, not plasticky look
Beautiful clarity, even under raking light
This sample is white oak with curly figure—and the gravy technique absolutely transformed it.
Why You Should Try Gravy on Your Next Project
If you're working with any open-grained hardwood, gravy is a game changer. Use it at least on the surfaces that will be touched, handled, or seen the most.
You'll get:
Silky smooth feel
Professional-level clarity
Fewer topcoat layers
A finish that looks and feels higher-end
Try it once, and you’ll never skip it again.
This post may contain affiliate links. If you make a purchase, we may receive a small commission.
Need some cool tools for your shop? Browse my Amazon Storefront for inspiration.