
WILL A CHEAP 2X6 PINE WORKBENCH LAST?
Eight years later, a recycled-construction-lumber workbench is still rock solid thanks to clever layered joinery and bone-dry salvaged wood. While a few vise placements and design choices could be improved, the bench has proven that you don’t need expensive hardwoods to build a durable, high-quality workbench.
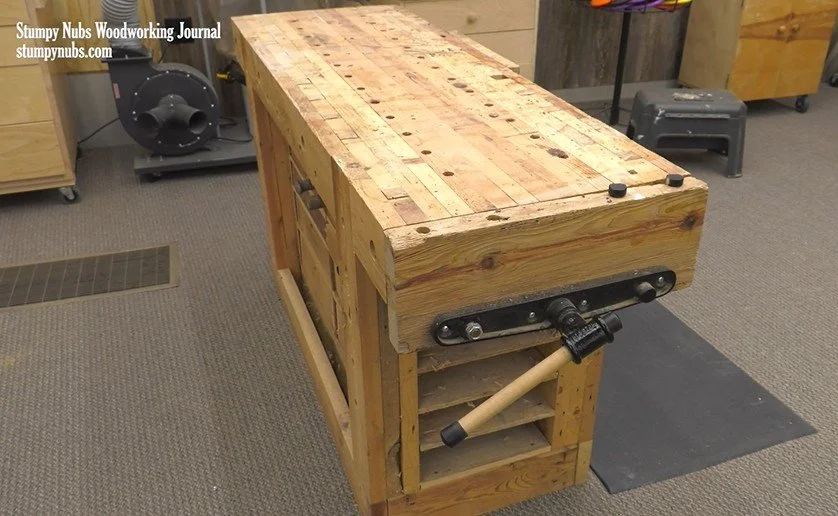
Roubo bench made 8 years ago
Time flies, doesn’t it? It’s been 8 years since I made this workbench in a two-part series on YouTube. In that time, this bench has seen a lot of use across three different workshops.
Since it's made entirely from old construction lumber—with hardly a scrap of hardwood—I thought some of you might be interested to see how it’s held up and if there’s anything I would change in its design. Or perhaps, what I think you should do differently if you want to make your own high-quality woodworking bench from inexpensive materials.
The Bench’s Condition After 8 Years
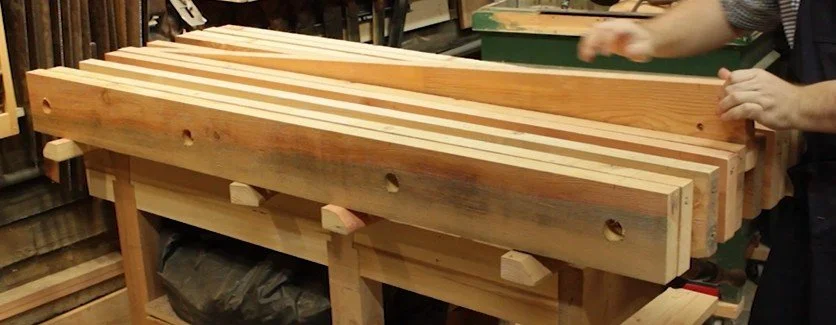
After 8 years, the bench is still rock solid. That’s because it was built using large mortise and tenon joinery throughout, including double-tenons where the legs connect to the top, as seen below. These joints may look complicated, but they weren’t difficult to make. The bench is built in layers, so there’s no need to cut tenons or chop mortises in the traditional way. It was actually very easy, and these joints will never loosen—no matter if it’s been 8 years or 80 years.

A double-tenon joint where the leg connects to the top of the bench.
Durability of the Pine Boards
The pine boards, all 2x6 construction lumber, have held up really well, too. Some of this is Douglas Fir, which isn’t as hard, but most of the bench is made from Southern Yellow Pine, which is nearly as hard as oak. The vise chops on the end could use replacing, but they were a little spalted to begin with, so it’s expected.
You could beat the crap out of the top if you wanted to—especially along the edges—but I could do the same to my beech workbench if I wanted to. This one cost me nearly nothing because I used salvaged boards.
The Advantage of Using Dry, Recycled Lumber
Using old lumber also meant the wood was dry. If I had bought brand-new 2x6 lumber from the home center, I might have some twist in the frame by now as it dried and moved. If you only have access to new lumber, I recommend letting it sit in your shop for a few months to acclimate. In fact, I would suggest buying 2x10s or 2x12s and ripping them down to 2x6s. Wider 2x material is often drier because it’s been sitting around longer than 2x6s, which are produced in vast quantities.
However, using dry wood doesn’t guarantee the top will always be perfectly flat. This bench has been re-flattened a couple of times and probably could use it again. That’s just the nature of solid wood tops. But with dry wood and solid joinery, the maintenance should be minimal.
The Cabinet Beneath the Bench
In the original videos, I said I was going to build a cabinet beneath the bench. I did end up slapping something together from more old, recycled boards. I made it so the drawers could open from either direction, allowing access from both sides of the bench. I really like that feature.

Cabinets created for underneath the workbench
I never created detailed project plans for the cabinet, and I’m not sure if I ever will. However, we do have project plans for the bench itself here. You don’t need them to build the bench, but they sure make it easier since all the calculations for the layered joinery are done for you.
Minor Changes I'd Make
If I were to build this bench again, there are a few minor changes I’d make, particularly regarding the length and the position of the vises. Keep in mind, I built this bench for the space I had at the time, which wasn’t very large. So, it’s only 5 feet long. This makes the bench a little cramped, and an extra foot of length would have been nice.
That extra foot would’ve given me more work area next to the face vise. It’s a little awkward to reach over the vise when you just want to work on top of the bench. Plus, the face vise is sort of misplaced in the middle of the bench.
The reason it’s where it is is because the end vise is on the left end of the bench top. If you’re right-handed like me, the end vise should be on the right end of the bench, with the face vise nearer the left, not in the middle. But when I built the bench, the right end was meant to go against a wall, so I had no choice but to put the end vise on the left. The vise body beneath the bench crowded the face vise over to the middle.
It’s worked this way for years, but I prefer the more traditional vise positions on my other workbench. I could move the vises to their proper places, but that would require flipping the whole thing over to better access the mounts—and this bench weighs a ton. So, I haven’t done it yet.
Square Bench Dogs vs. Round Bench Dogs
One feature I go back and forth on is the square bench dogs. All the mortises for the dogs were made during the layering process, so I didn’t have to chop them individually. It wasn’t a big deal. But some people who use my project plans ask why I have two rows of square dogs and two rows of round hold-fast holes, when I could just use round dogs and share the holdfast holes, eliminating the square holes altogether.
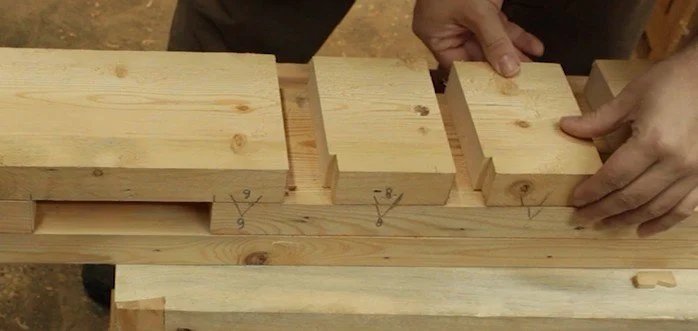
Mortises for the square bench dogs were added during assembly.
The answer is, I like square dogs because they have a more traditional feel. They all have little lips near the top that catch on notches in the holes, keeping them from falling through. One of the dogs has a split part now, but it’s easy to repair.
Functionally, round dogs work just fine. So, there’s no reason you couldn’t eliminate the square holes if you prefer round dogs.
Threaded Rods and Glue
Another thing you could eliminate if you wish are the threaded rods running through the bench top. These were used to hold the layers together during construction and to prevent a failed glue joint from causing the top to split over time. I guess I wasn’t confident in my year-old wood glue and the cold shop conditions when I built the bench. But if you use fresh glue and build the bench on a warm day, you should get strong glue joints and you might not need the threaded rods inside the bench.
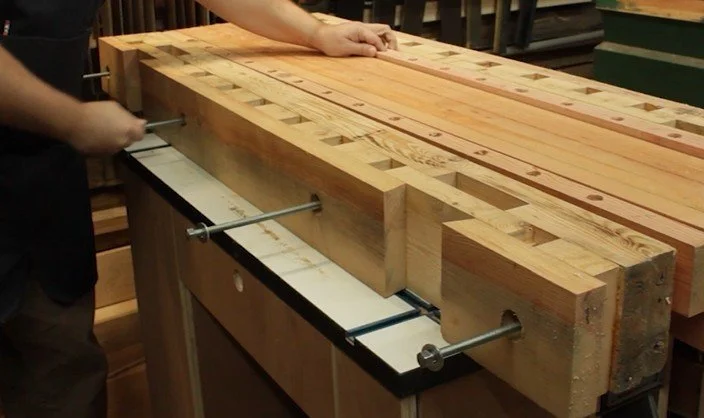
I used threaded rods through the bench top in the orignal construction.
Bench Height
The height of my bench has worked well. I tend to prefer it around wrist height. Others prefer a slightly lower height, maybe around their center knuckles when their arm hangs at their side. It really depends on what you use the bench for.
If you do a lot of hand planing, knuckle-height is comfortable. If you work mostly with power tools, wrist height—or even a little higher—will bring the work up closer to your eyes, and you’ll find yourself bending over less.
We have a video about choosing the right bench height, which you can find here or below this article.
Adding Weight to the Bench
The yellow pine in this bench has tight growth rings and is quite heavy. The tool cabinet beneath the bench really added some extra heft, keeping it stable while I work. If you don’t want to build a tool cabinet, I’d recommend adding a platform at the base with a few cement blocks for added weight. After all, many species of construction lumber aren’t very heavy, so it could make a difference in the stability of your bench.
No Finish, No Problem
Finally, I never put a finish on the benchtop—not even linseed oil. I never saw the need. It’s a work surface, not a dinner table. There are actually good reasons not to put a finish on a workbench top. We have a video about that too.
Conclusion
In conclusion, this recycled pine workbench has held up incredibly well over the years, and while there are things I might change if I built it again, it’s still an essential part of my shop. Whether you’re building a bench from scratch or using recycled lumber, there’s a lot to learn from real-world experience.
You can find links to the resources I mentioned, including the project plans for the bench, below. Let’s check back in another seven or eight years to see how it holds up!
Happy building!
OTHER RESOURCES RELATED TO THIS VIDEO
-Plans for this bench.
-Video about bench height.
-Video about bench finish.
-Video about bench maintenance.
-Video about good bench features.
Need some cool tools for your shop? Browse my Amazon Shop for inspiration.
(This link is an affiliate link. If you make a purchase, I may receive a small commission.)