
A CLEVER WAY TO MAKE BOXES, CABINETS, AND DRAWERS
The locking rabbet joint with a hidden groove creates drawers and boxes that are self-aligning, strong, and almost as durable as dovetails—without complicated setups. Using just a router and a few clever fence adjustments, you can make professional-quality cabinetry quickly and easily.
Let me show you a secret I learned many years ago that solves a big problem. Have a look at this:
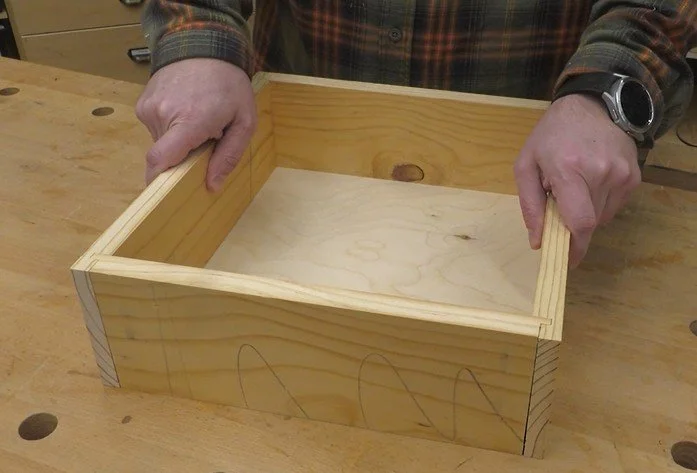
Do you see it? Not yet? This could be a box or a drawer. If it were bigger, it could be a cabinet. It's made up of four sides and a bottom panel. Notice how they all lock together. Now do you see it? Not yet? OK, let me give you a little more information.
The way the corners go together is called a locking rabbet joint. Some folks may call it a tongue and dado joint or even a drawer joint. Whatever you call it, this joint is designed to self-align.
So imagine you're assembling a big cabinet, and you're trying to get the clamps in place without everything sliding out of alignment at the corners because the glue is slippery. The locking nature of these corners eliminates that problem and makes project assembly a breeze.
In the case of a drawer, this type of locking joint also adds a mechanical component that prevents the front from pulling off over time as people yank it open. Almost as strong as dovetails, but way easier to make.

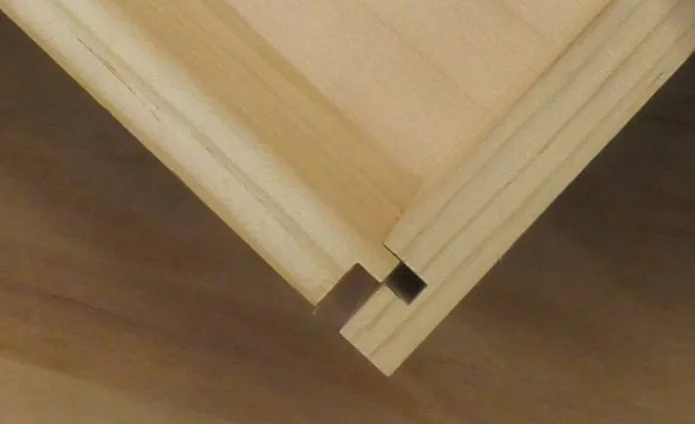
But that’s not the secret I’m getting at. Have you figured it out yet? No? In the next picture, look at the bottom.

It slips into a neat little groove. Now, creating that groove is trickier than it looks because normally, when you rout a groove like this, the ends will be visible on the outside of the box. This means you'll have to try and plug or hide those openings.

Normally when you rout a groove like this, the ends will be visible on the outside of the box.
But what if you could make them disappear—or better yet, never exist at all? What if you could make cabinets, boxes, or drawers with fixed panels, but without difficult stopped cuts or complicated setups? Just quick and easy? That’s the secret I’ll share with you in you in this post. I call it the mysterious hidden groove joint. Once you see how easy this is, you may never make a drawer, box, or cabinet the same way again.
The Instructions
Usually, I’d do this on my table saw with a dado set. But because many of our viewers don’t have access to dado sets, today I’ll walk you through how to do this at the router table with just a 1/4-inch straight bit.
I start by attaching a scrap of wood to my router fence to create an auxiliary face. You’ll see why shortly. Notice I placed it about 1/8" above the top of the table. This just gives the sawdust somewhere to go so it won’t build up.
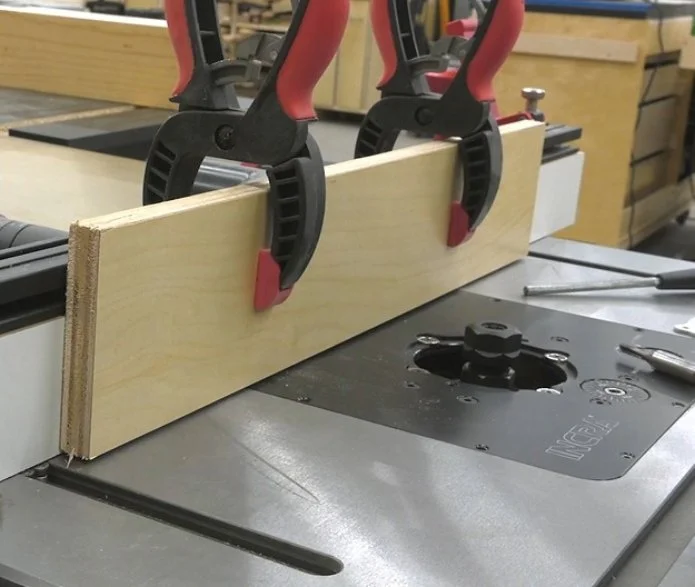
The auxillary face I attached to my router table, with 1/8” gap above the top of the table.
Adjusting the Router Bit
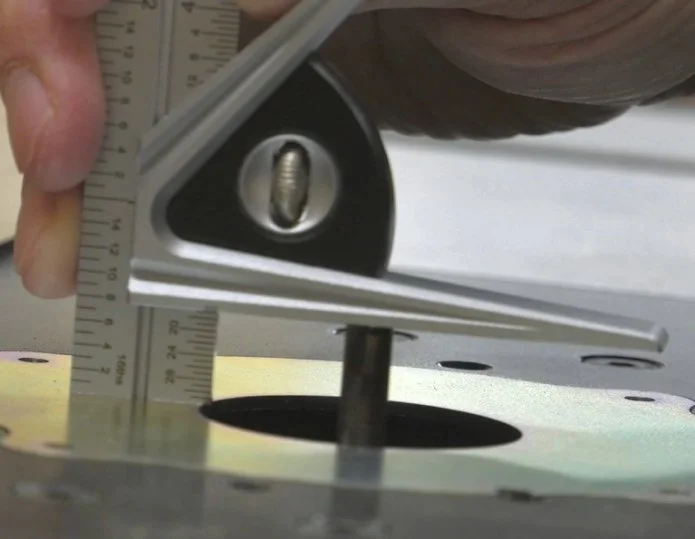
Next, I raise my bit 1/2-inch above the table. This assumes your material is about 3/4-inch thick. If you're using 1/2-inch stock, you'll raise the bit 3/8-inch instead.
Setting Up for the Drawer Sides: For this tutorial, let's say we’re making a drawer. I set my fence so that the cutter is flush with the outer face of one of the front or back pieces.

Then, I use these settings to cut dados across both ends of each side piece.
Using a Push Block for Stability: Because these sides are narrow, I use a scrap of wood and a push block to keep my workpieces perpendicular to the fence as I work.
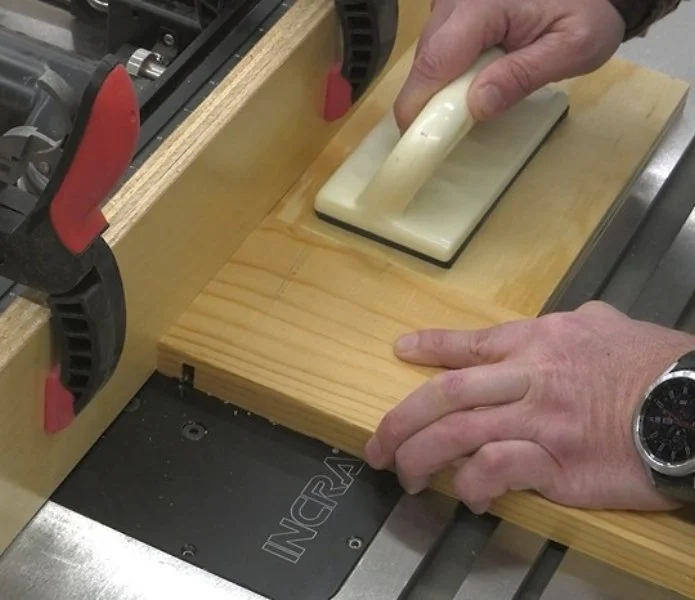
Using a scrap of wood and a push block allows me to keep workpieces perpendicular to the fence
Reducing Bit Height: Next, I reduce the bit’s height to 1/4-inch above the table. Again, this is for material that’s around 3/4-inch thick. If this were 1/2-inch material, I’d change the bit height to just 1/8-inch above the table.

At this setting, it may take a couple of passes to nibble away the material between the dado and the ends of the side pieces. I use my pusher to guide the piece as the end is moved away from the fence to clear away any remaining waste. That completes half of the locking rabbet joint.
Creating the Other Half of the Joint: To create the other half, I move the fence forward until the back of the router bit barely skims its surface. This is why I clamped on that auxiliary fence face: to ensure my good fence isn’t damaged by the bit.
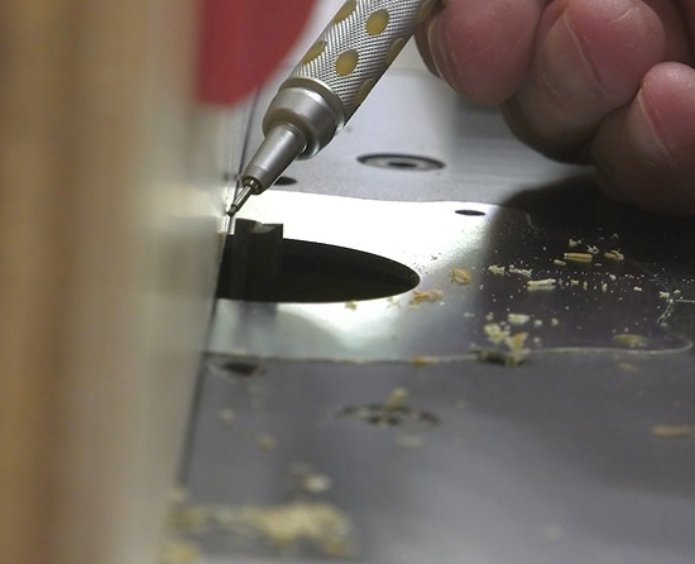
To create the other half of the rabbet, I move the fence forward until the back of the router bit barely skims its surface.
Cutting the Rabbet: Now, I’m working with the front and back panels of my drawer assembly. I suppose if this were a cabinet, these would be the top and bottom panels.
I cut a rabbet on both ends of each workpiece. The first one will take more than a single pass. I’ll raise the bit a little at a time, removing more material until the tongue that remains is just thick enough to slip into the dado on the end of the mating workpiece. Once that height is dialed in, I can cut tongues on each end of all my pieces.

That’s the locking rabbet joint I was talking about—easy-peasy, right?
Cutting the Hidden Grooves: Now, let's cut the hidden grooves for our panels to slip into.

Raise the bit no higher than the thickness of the tongue you just created. That should be about 1/4 inch for 3/4 stock, or about 1/8 inch for 1/2-inch thick stock. Then, I move the fence back about 1/4-inch from the bit. With these settings, I can cut grooves along the edges of all the workpieces.
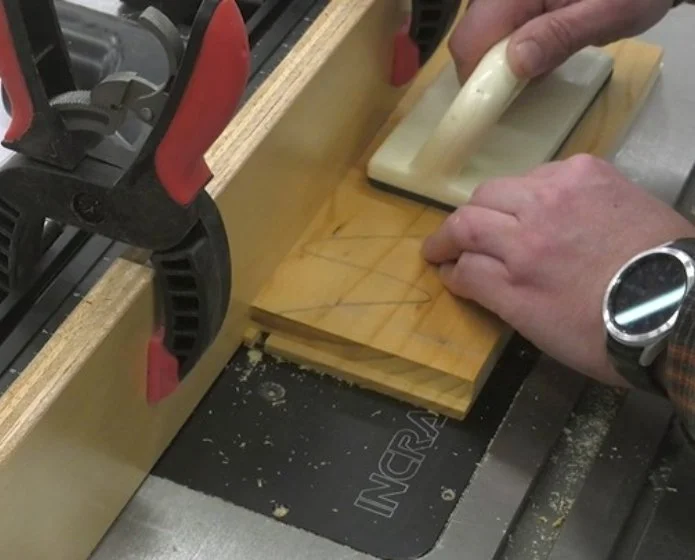
The orientation of your pieces is important.
Notice the orientation of the pieces I’m showing you here. It’s important to cut your grooves on the right faces.
Final Assembly: Congratulations! You’ve just made a drawer. As you will see, the ends of the groove are not visible from the outside. Not bad for a single router bit and just a couple of fence settings. And don’t forget, this same process can make not only sturdy drawers but also full-size cabinets and other boxes that are easy to assemble and super strong.
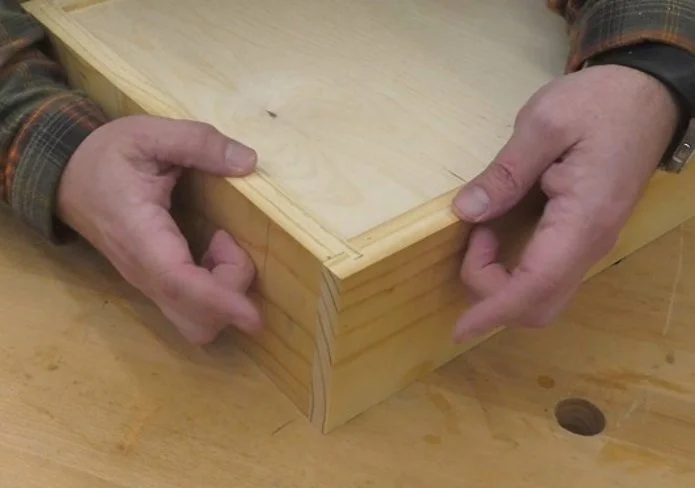
A completed locking rabbet joint with hidden groove.
Final Thoughts:
This simple, yet effective, method for creating strong, self-aligning joints and hidden grooves is a game-changer. Whether you’re building drawers, cabinets, or other box-type furniture, this technique will save you time and effort while delivering professional-quality results. Once you try it, you’ll wonder how you ever made cabinets and drawers any other way.
Give it a go, and let me know how it works for you!
Need some cool tools for your shop? Browse my Amazon Store for inspiration.
(This link is an affiliate link. If you make a purchase, I may receive a small commission.)