
FAST AND EASY DRAWERS: THE HALF-HALF-HALF METHOD
Build strong, precise drawers fast with the half-half-half method. One table saw setup cuts all joints—no dovetails or complex setups needed.
If you want a drawer to last, it’s a good idea to use a mechanical joint — something that physically locks the sides together so the wood itself must break before the joint fails. Relying only on glue, as you would with a simple butt joint, won’t hold up over time.
Traditionally, dovetail joints have been the gold standard for drawers because of their mechanical strength and time-tested durability. But not everyone wants to take the time to set up a dovetail jig — or even owns one. That’s where a simpler option comes in.
I call it the locking rabbet joint, and it’s nearly as strong as a dovetail — yet much easier to make. In fact, you can build the entire drawer — including the rabbets, dados for the corner joints, and grooves for the bottom panel — with a single table saw setup.
Why “Half-Half-Half”?
This joint is sometimes called a quarter-quarter-quarter drawer, but I prefer to call it a half-half-half drawer — and I’ll explain why shortly.
First, let’s look at the basic principle and how you can use it to batch out drawers quickly and efficiently.
A drawer is essentially a four-sided box with a bottom panel. The drawer front is often a separate piece that overlays the box later, so we’ll focus on building the box itself.
The Classic Quarter-Quarter-Quarter Setup
Many small or medium-sized drawers — like those in kitchen cabinets — are made from ½-inch plywood.
The “quarter-quarter-quarter” name comes from using a ¼-inch dado stack, raised ¼ inch above the saw table, and set ¼ inch from the fence.
With this single setup, you can cut:
The rabbets on the ends of the front and back pieces,
The dados on the ends of the sides, and
The grooves for the bottom panel.
You don’t need to adjust the blade or the fence between cuts. Just run all the parts through — sides, fronts, and backs — and you’re done.
It couldn’t be simpler… unless you’re working with stock that isn’t ½ inch thick.
Adjusting for Other Thicknesses: Half-Half-Half
Let’s say you want to use ¾-inch plywood instead, as I have used on many projects. A ¼-inch setup won’t work for that. Or maybe you’re using hardwood you milled yourself to ⅝ inch or 9⁄16 inch.
No problem — the same concept applies. You just adjust the setup based on half the thickness of your material.
For example:
½" stock → ¼" setup
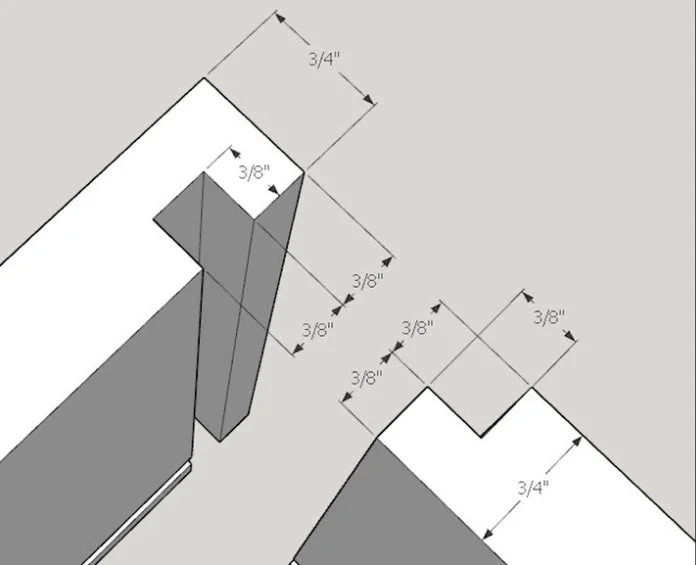
¾" stock → ⅜" setup
⅝" stock → 5⁄16" setup
So the thickness of your dado set, the height of the blade, and the distance from the fence are all equal to half the thickness of your material.
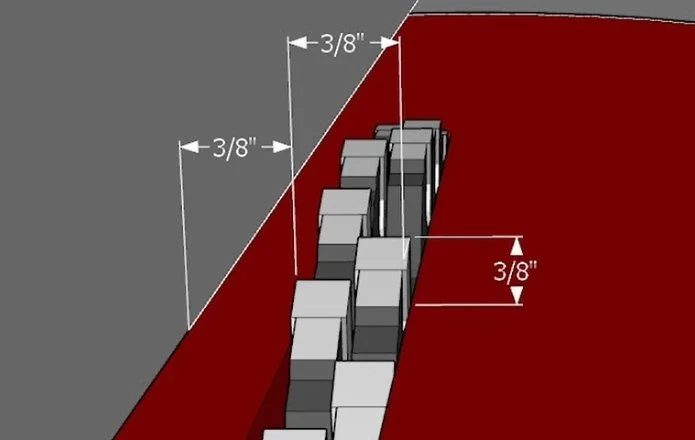
One setup. All the cuts. Every part. That’s the beauty of the half-half-half method.
Making the Cuts
Here’s how I used this method with ¾-inch plywood:
Cut the sides first.
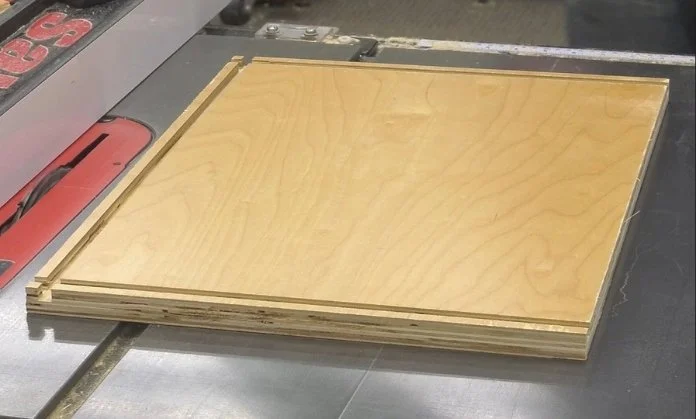
Run the panels flat on the table saw to cut a dado on each end and a groove along the bottom edge.
That’s three passes per side: one on each end and one along the bottom.
Cut the fronts and backs.
Run a groove along the bottom edge (flat on the saw, just like before).
Then, instead of dados on the ends, cut rabbets by standing the piece on edge as you feed it through the blade.
Make this cut on the opposite face from the groove.
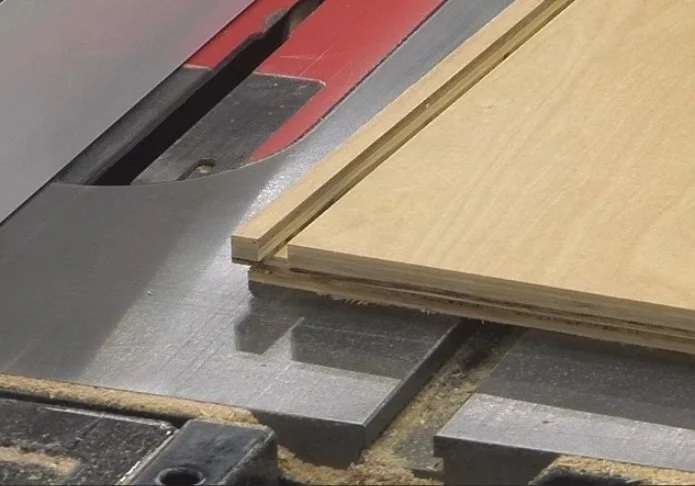
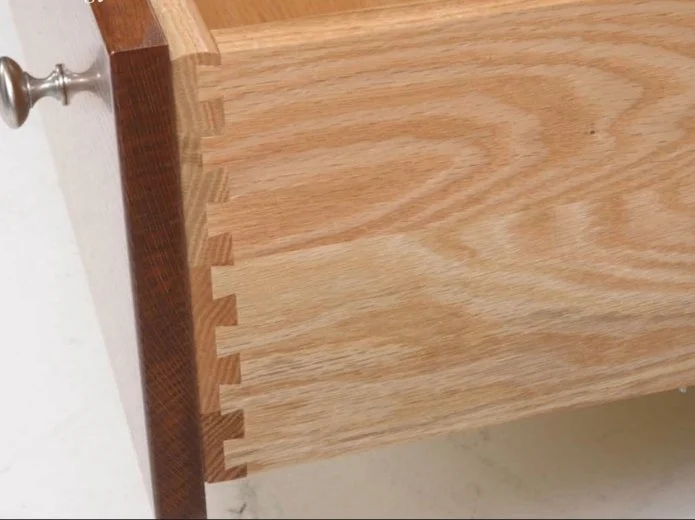
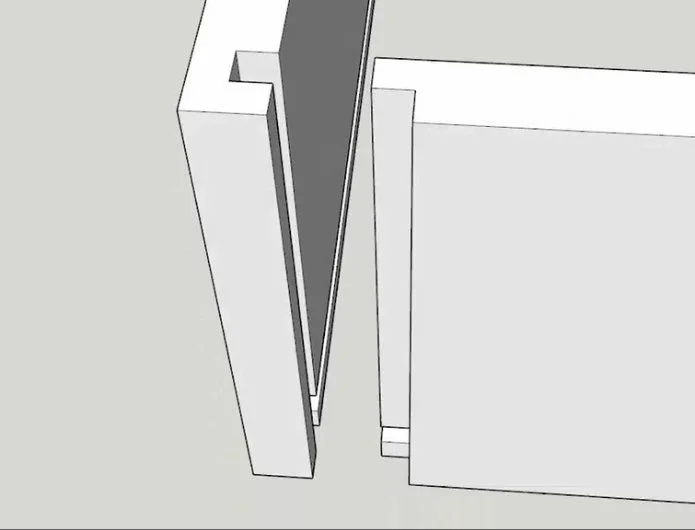
When you’re done, you’ll have what’s known as locking rabbet joints. The drawer sides and ends interlock perfectly, and the groove provides a home for the bottom panel.
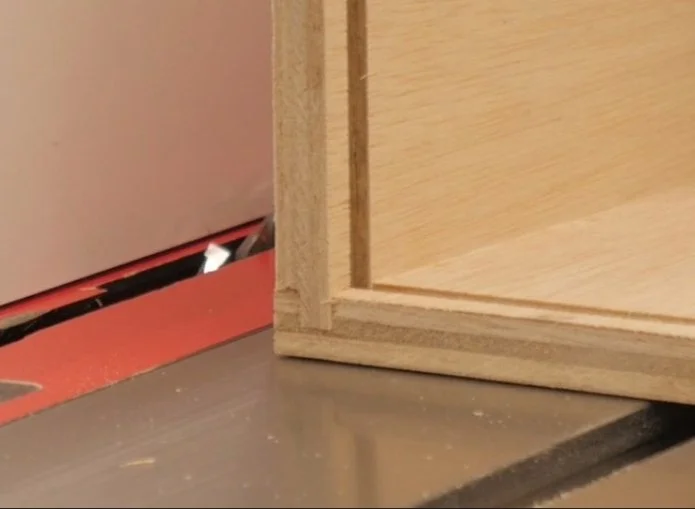
Fitting the Bottom Panel
If you’re using ½-inch plywood and a ¼-inch setup, your groove will perfectly fit a ¼-inch bottom panel — easy.
But if you’re using ¾-inch plywood (which requires a ⅜-inch setup), you likely don’t have ⅜-inch plywood for the bottom. That’s fine.
Just rabbet the edges of a thicker panel (½" or ¾") all the way around so the edges fit neatly into the ⅜-inch groove. Simple and effective.
Safety Tips
This process requires removing the blade guard, so be careful.
Drawer parts are often long and narrow, which can make it tricky to keep them standing upright when cutting rabbets on their ends. Always ensure the piece is stable and supported.
A few safety aids:
Use a larger scrap of wood as a push block behind the workpiece and a paddle to keep them both against the fence.
Consider a taller sacrificial fence or featherboards for extra stability.
Before turning on the saw, practice the motion a few times with the blade off to ensure everything moves smoothly and safely.
Final Thoughts
That’s all there is to it! With the half-half-half method, you can make a lot of drawers — quickly, accurately, and with surprising strength.
Just remember:
The thickness of the dado stack,
The height of the blade, and
The distance from the fence
…should each be half the thickness of your drawer material.
Half-half-half. It really is that simple.
This post may contain affiliate links. If you make a purchase, we may receive a small commission.
Need some cool tools for your shop? Browse my Amazon Storefront for inspiration.