
WHY SHARP ISN’T ALWAYS BEST - DULL CHISELS
While sharp chisels are essential for most woodworking tasks, a deliberately blunt chisel can be a surprisingly useful tool for controlled paring and shaping, especially across the grain or on end grain. This article explains how to create a crisp blunt edge, when to use it, and the advantages it offers over ultra-sharp tools in specific scenarios.
Updated 2/17/2026
The most difficult cutting and paring jobs usually require the sharpest chisels. In fact, keeping your tools sharp is one of the fundamentals that's constantly hammered into the consciousness of woodworkers.
But believe it or not, there are times when a blunt chisel may actually be the better choice. This is an old, largely forgotten trick that not many of today’s woodworkers seem to know about—until today.
Really, the idea long predates any of us. Blunt chisels have been used by plane makers, patternmakers, and joiners for centuries. As I said, it’s somewhat of a lost technique in this modern world, where so much emphasis is placed on achieving edges that you can shave with.
THE PROBLEM WITH ULTRA-SHARP EDGES
There are a couple of problems that can come from that level of sharpness. For one thing, the microscopically thin steel at the cutting edge can wear away fairly quickly. It takes almost constant stropping to maintain such an ultra-keen edge. Not a big deal if you have a power stropping wheel like I do, but it may get old fast if you have to hand-strop every few minutes.
The second problem is the tendency for the wedge shape of a standard 25- or 30-degree bevel to dive beneath the wood grain—particularly when working against or across the direction that the wood fibers lie.
A blunt edge can solve both of these problems. Let me show you how...
CREATING A BLUNT EDGE
I don’t blunt my good chisels because I don’t always need a blunt edge. Instead, I keep a few old chisels and gouges around for this purpose. The sharpening process could not be easier: I simply set a tool rest perpendicular to the grinding wheel.
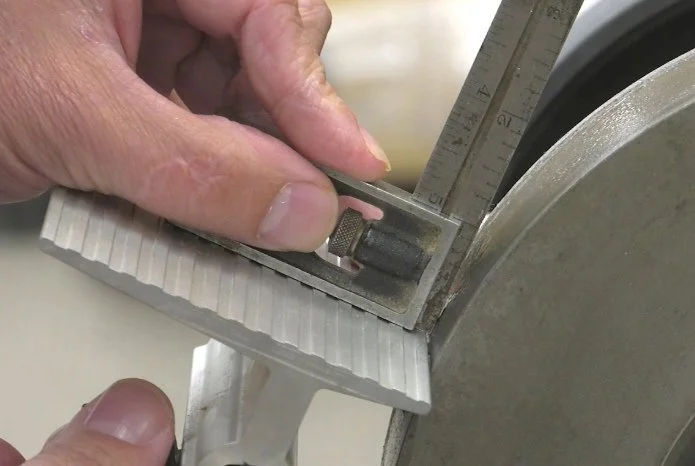
Setting a tool rest perpendicular to the grinding stone.
It doesn’t take much effort to create a flat facet on the end of the tool. That facet doesn’t have to be very wide—about 1/16 inch will do it.
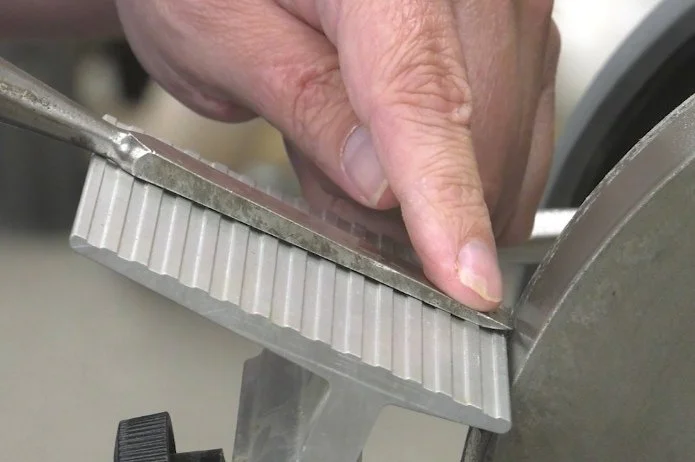
I've essentially created a scraper. All the cutting will be done along the square edge where the new front facet meets the back of the tool.
Note that I said it’s a square edge. What I mean by that is you don’t want that front facet angled forward. It won’t cut if it’s like that. A slightly backward angle is fine, but try to get it as square to the back of the tool as you can.
Depending on the direction the wheel spins, the grindstone may leave a ragged burr on the underside of the tool. My Tormek doesn’t, because the wheel is spinning upward. But a regular bench grinder might—and if that’s the case, you should remove the burr. I use the side of my Tormek’s wheel; this isn’t possible on a regular grindstone, so use some fine sandpaper.
Another way to deal with the burr is to place the tool upside-down on the tool rest when you grind. That way, assuming your grindstone is rotating downward, any burr left behind will be on the top of the tool where it won’t matter, instead of the bottom where the cutting occurs.
If you use that method, though, be sure to account for any wedge shape of your chisel by tilting the rest a tiny bit more. Otherwise, you may end up with a bevel that’s slanted forward, as I described earlier.
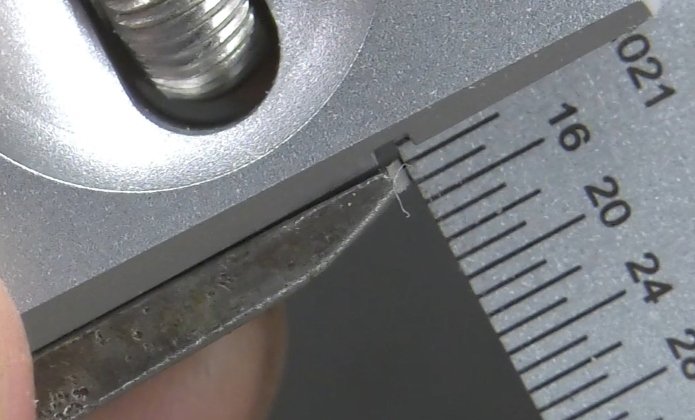
A blunt edge is sharp and crisp.
A clean, blunt edge is not the same as a dull edge. A dull edge is rounded over. But where the front facet meets the back of this tool is sharp and crisp. That makes a world of difference in many situations.
GOING AGAINST THE GRAIN
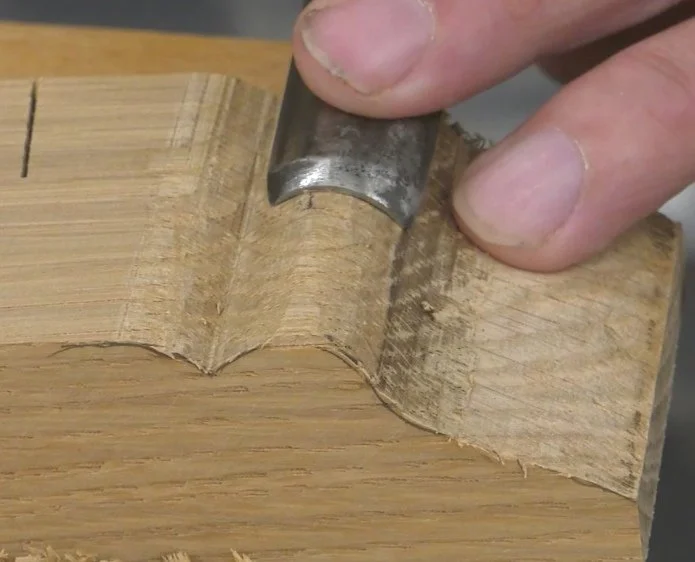
Imagine you’ve rough-cut a curve on the bandsaw and it needs more refining. You could use sandpaper, but that can be a little slow and it may be difficult to see what you’re doing. A chisel is more precise. If you’re working with the grain, you may be able to do it with a regularly sharpened chisel. But working across the grain can be problematic, as the bevel tries to dive deeper into the fibers than you may want it to go. Working against the grain with a regular chisel is nearly impossible.
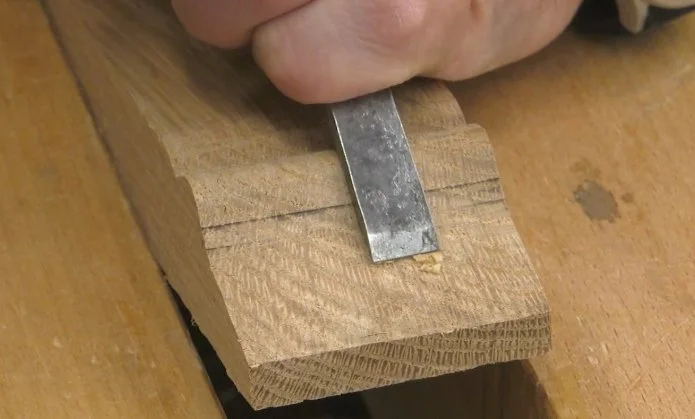
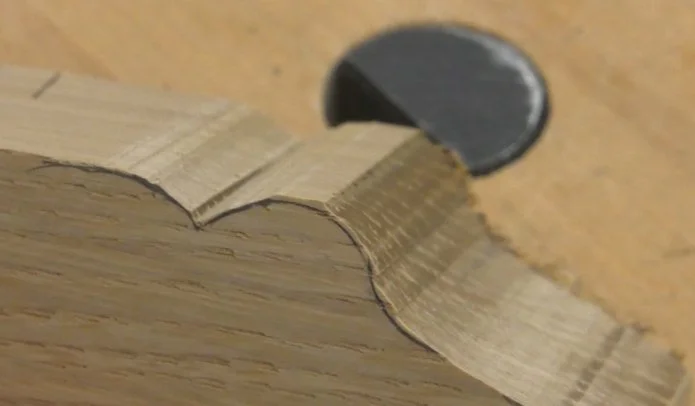
But a blunt chisel is not so much affected by grain direction. You can shave in a very controlled way, both across the grain and directly against the grain. This works particularly well with hardwood, though not as well in softwood, as the fibers may tear more. In the above image I worked with some hard hickory and I was able to refine my shape fairly easily, working from multiple directions. Once the shape is established, the surface may be smoothed with finer grits of sandpaper.
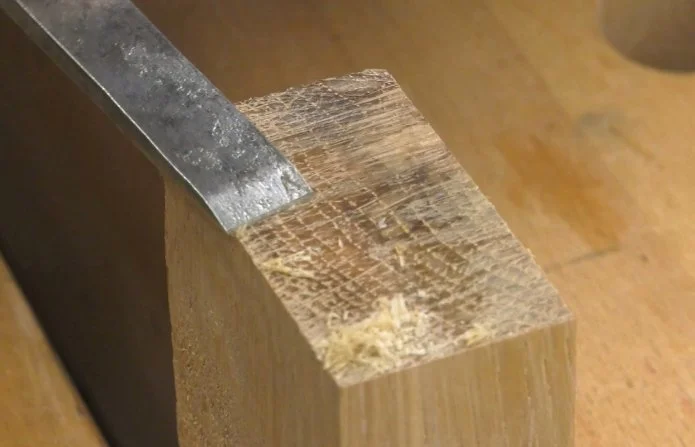
A blunt chisel is also useful for cleaning up hardwood end grain. In this case, despite the extreme toughness of the hickory, the surface left behind is remarkable. And because the edge of a blunt chisel is not ultra-thin like a regularly sharpened chisel, it will stand up to this abuse much longer.
It won’t stay sharp forever, though. Eventually, that 90-degree edge will round over and you’ll notice the tool begin to skate across the wood more than it cuts the fibers. That’s when you just lightly touch it to your grindstone again. Not too much—especially if you are using a more aggressive bench grinding wheel. As the front facet grows wider with successive sharpenings, the performance won’t be affected, but there’s no reason to grind away more of the tool than is required to crisp up that 90-degree edge again.
A blunt chisel is not for every project, but there are some situations where one will come in very handy. In fact, you may also find it useful to keep a couple of blunt gouges around for various shaping tasks.
It’s an old-timey tool trick that will serve the modern workshop well. Happy woodworking!
(These are affiliate links. If you make a purchase, I may receive a small commission.)
Tormek Sharpening System: https://amzn.to/4dCNeSp
Need some cool tools for your shop? Browse my Amazon Shop for inspiration.