
HOW LOCK MITERS CAN MAKE PROJECTS CHEAPER AND BETTER
Learn how to build thick, solid-looking furniture legs from thinner stock using lock-miter joints. This guide covers grain control, safer cutting techniques, and precise assembly for professional-quality results.
Awhile ago, we built two pieces of bathroom furniture out of beautiful hickory I had been saving for just the right project.

A mahogany bathroom vanity.
It took a long time to find that project because a lot of furniture requires at least some thick stock to make legs and other components—and all my boards were just ¾-inch thick once they were milled flat and straight.
This is a problem a lot of folks have. How do you find two- or three-inch thick stock (preferably from the same tree so it matches the grain and color of the rest of your boards) when not everyone has access to a well-stocked mill or hardwood dealer?
The Solution: Build It Yourself
The answer is to make it yourself. That’s what we did with the hickory bathroom vanity. We assembled each leg from four beveled strips of ¾-inch material, making them look like solid wood.

The benefits of this process go beyond just using thinner, less expensive stock to create the beefy legs you need. They can also look a lot better than solid wood legs.
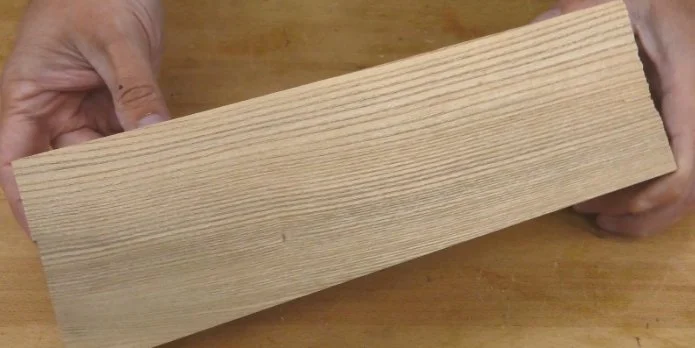
Take a look at a chunk of solid oak. Notice how nice and straight the grain is on this face. That quarter-sawn or rift-sawn appearance is what a lot of folks pay top dollar for. But everything changes as you turn it just 90 degrees. Now we have a much less pleasing flat-sawn grain pattern.

That’s the nature of large, solid wood components. They can look great from one angle, but completely different from another.
This smaller, assembled example, on the other hand, appears to be quarter-sawn all the way around—something that is impossible in nature, but entirely possible in the workshop. When you assemble a leg or a post from four separate pieces, you control the grain on all four sides.
Of course, quarter-sawn oak is just one example. No matter the wood you use, it pays to control the grain pattern by wrapping it around the post rather than just taking what nature gives you.
Safer, Smarter Assembly Techniques
In the past, I used to do this by simply cutting double-beveled strips at the table saw and gluing them together. But that can be really tricky.
For one thing, it can be difficult to cut perfectly consistent 45-degree bevels at the table saw, especially when doing both edges of a narrow strip. Frankly, it’s a good way to get a nasty kickback.
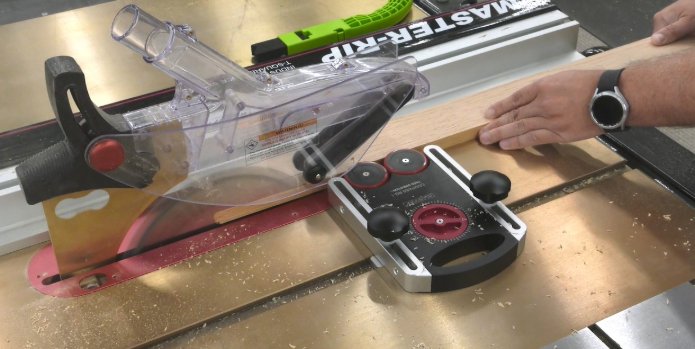
So I started prepping my stock on the table saw by carefully ripping everything to its final width. These straight, 90-degree cuts are perfectly safe when done with the proper safety equipment. A featherboard or a roller-guide system can also help ensure each strip is precisely straight and equal in width.
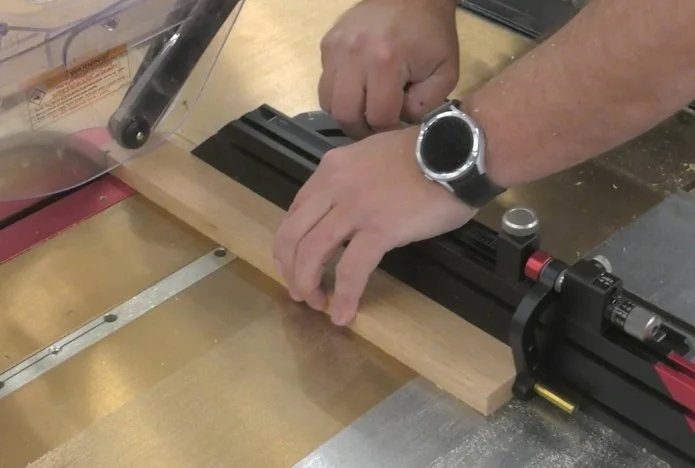
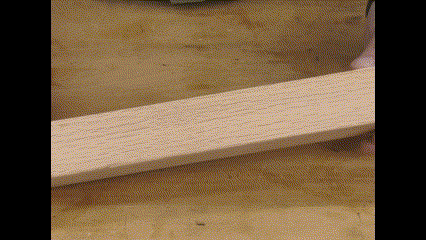
Then I use a well-tuned miter gauge to cut all my parts to length. I like to leave about a half inch extra on each piece so I can trim the whole leg once it’s assembled.
Routing with a Lock-Miter Bit
With that finished, I move to the router table. This is a safer and, I think, more accurate method for beveling the edges—especially if I use a lock-miter bit.
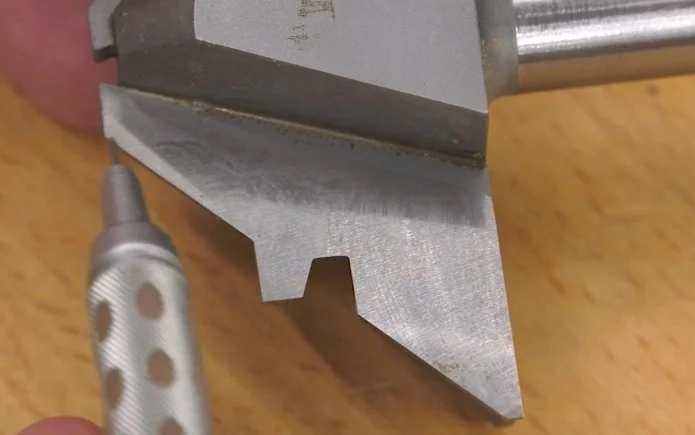
I like this bit for two reasons: First, it is precisely 45 degrees. There’s no way I can mess that angle up. Second, it creates a mechanical joint that is far easier to glue up and assemble—I won’t even need any clamps.

This type of mechanical joint is easier to glue up and assemble.
These bits are fantastic—and don’t listen to folks who say they are too hard to set up. We made a whole video about how to set one up quickly and easily. I’ll link to that in the description below this article, along with a link to the lock-miter bits I recommend.
In this article, I’m going to share with you an even faster way to set one up using a digital caliper and a digital height gauge.
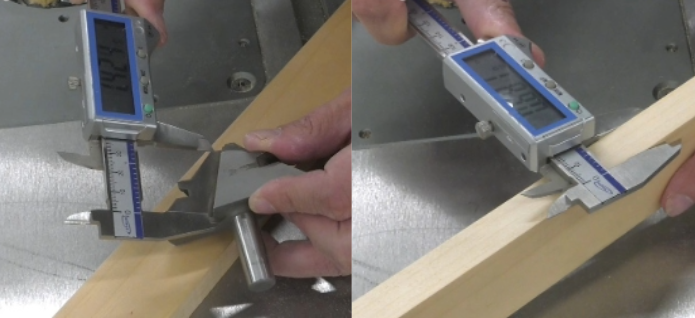
First, I measure the full height of the bit’s cutters. Then I measure the thickness of my material. I divide both those numbers in half and add them together. That’s the height that I set my bit above the table.
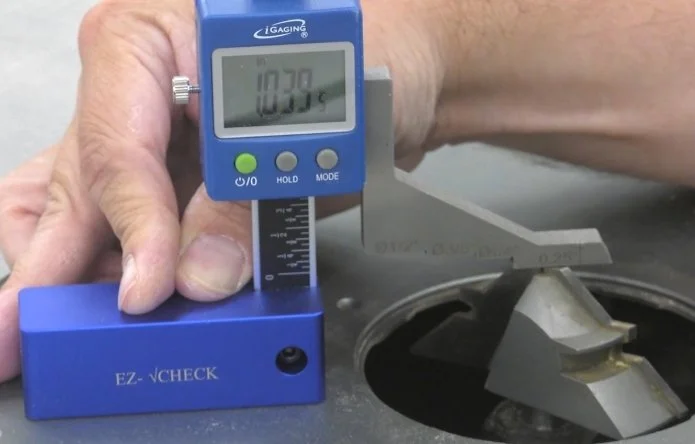
While this should work perfectly, I still do a test cut—cutting a couple inches into the end of a scrap and then flipping it to do the other side. Then I cut that end off, separate the two pieces, and put them together. If the surfaces are flush, my bit height is dialed in.

Setting the Fence
Setting the fence is super simple too. Place a workpiece against the fence and lay a ruler on the table against it. Set the fence so the edge of the cutter just barely scrapes the ruler. You want to hardly feel it at all. Then lay the piece flat on the table and put the ruler on top. The cutter should just barely scrape in this position as well. If it doesn’t, your bit height is off and you need to check your measurements.
Making the Cuts
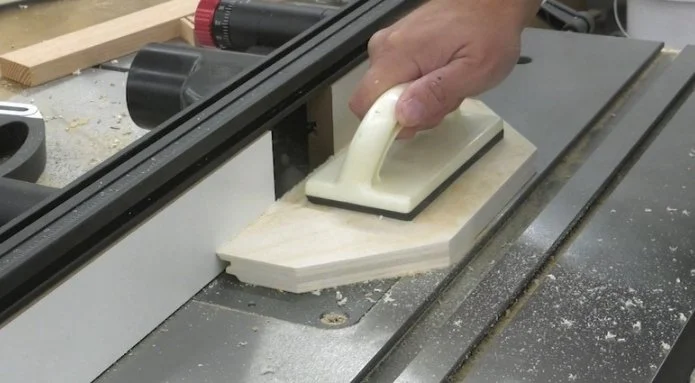
Cutting the first edge couldn’t be simpler. I use a pair of push blocks to apply nice, even pressure both down on the table and against the fence. Do not do this with your fingers alone. If you are machining a really long workpiece, you might set up some featherboards, but in most cases, for this first edge cut, the push blocks are enough.
I run all the workpieces through, then make a change before cutting the opposite edges.
This one is a little trickier because the workpiece has to be run flat against the fence. As we cut, we’ll be removing a lot of the bottom edge, leaving only a narrow strip against the fence for support.

As we cut, we’ll be removing a lot of the bottom edge, leaving only a narrow strip against the fence for support.
To keep everything stable and consistent, I stack two featherboards—or in this case, I’m using a high roller guide with two wheels, so it applies pressure higher on the workpiece, near the center strip that will remain, rather than just at the bottom edge.

Again, if you don’t have an adjustable roller guide like this one, you can stack two featherboards instead. Ideally, you’d want one of these setups on each side of the bit, providing support as you feed the workpiece in and as it comes out. But since these are short workpieces, I used a paddle to keep pressure on the fence as the workpiece clears the bit.
The roller guide and the paddle only keep pressure against the fence. The downward pressure and the forward motion come from a custom pusher I made from a scrap of plywood, which I profiled by running it flat on the table at the same lock-miter bit setting. Then I attached a strip of wood at the heel. The profile easily slips over the top edge of my workpiece, while the heel-strip hooks on the end to move it through the cut. This custom pusher is much easier to use than paddles alone when you have a featherboard stack or a roller guide in the way.
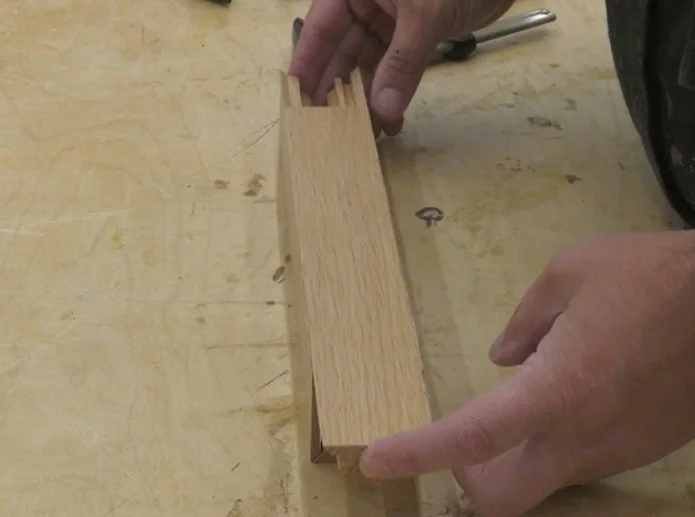
Assembly and Final Touches
Now you get to see the real benefit of using a lock-miter router bit to bevel these edges. The parts slide together so nicely, and it is almost self-squaring. The mechanical lock along each seam prevents glue-slip, so you can use clamps if you like—but you could also just skip the clamps and use rubber bands or, my personal favorite, blue tape.
If, after assembly and glue-up, you find some openings in your seams, don’t worry about it. Just burnish the edges with a screwdriver, compressing the fibers together and sealing up any cracks.
Once you have the ability to build your own thick legs and posts, a whole new set of furniture projects will open up to you. Don’t forget to check out the links below, and we’ll see you next time.
Why not just set up your lock-miter router bit this way? https://www.youtube.com/watch?v=L_rJhz9C3wk
(These are affiliate links. If you make a purchase, I may receive a small commission.)
-Whiteside lock-miter bits: https://amzn.to/3b620VZ
-Digital Caliper: https://amzn.to/3S284iY
-Digital height gauge: https://amzn.to/3JacNuN
Need some cool tools for your shop? Browse my Amazon Shop for inspiration.