
THIS SHOULD END THE SAW BLADE HEIGHT DEBATE
There is no single “correct” table saw blade height—only tradeoffs between safety, cut quality, heat, tear-out, and kickback. Once you understand how blade height actually affects the cut, you can stop following myths and start setting your saw for the material and task at hand.
Did you know that the proper height for a table saw blade is one of the most hotly debated topics since “tastes great vs. less filling”? You have to be a few years old to get that reference. If you’re under 30, you might be more familiar with a comparison like which is more satisfying—avocado toast or being offended.
People will confidently tell you there is only one correct blade height. It’s 1/8 inch above the workpiece. Or is it the middle of the tooth? Or maybe the bottom of the gullet?
It’s amazing how much disagreement exists among people who are absolutely certain there’s only one correct answer.
That’s because blade height is far more complex than most people think—maybe even you. So through the rest of this article, I ask you to keep an open mind as I explain how you might have been wrong your entire life.
The Simple (and Honest) Truth
Put simply, the proper table saw blade height depends on:
What you’re cutting
How you’re cutting it
How many of your fingers you’re willing to sacrifice in the process
Let’s break that down.
The “Low Blade Is Safer” Argument
Some people argue that the distance between the top of the board and the top of the teeth should be equal to how deeply you’re willing to be cut. The reasoning is that if the teeth barely break the surface of the wood, your hand is less likely to come into contact with them if a workpiece kicks back and pulls your hand toward the blade.
This is a valid argument.
We’ve all seen videos where a blade set just a little higher would have meant the difference between a scare and losing a finger.
The “High Blade Prevents Kickback” Argument
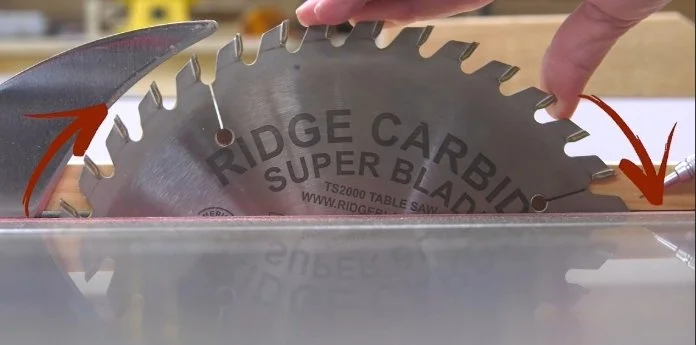
Others point out that the lower a blade is set, the more the teeth tend to push the wood back toward the operator. A fully raised blade, on the other hand, pushes almost straight upward and downward. Because of this, they argue that a higher blade is less likely to cause kickback.
In theory, that makes sense.
In practice, however, the most common and dangerous type of kickback happens when the back teeth of the blade lift the workpiece upward and pull it—possibly along with your hand—onto the blade. The back teeth of a fully raised blade can still do this, and when they do, there’s a lot more blade exposed above the table to do damage.
The Blade Guard Changes Everything
All of this assumes you aren’t using your blade guard.
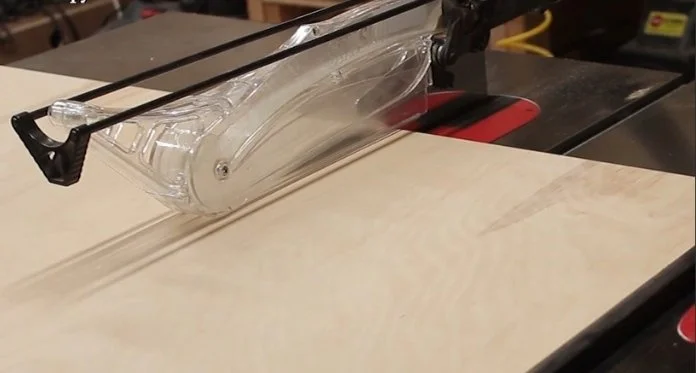
If you are using a blade guard—as you should be—your fingers are protected from the blade regardless of its height. The built-in splitter or riving knife also greatly reduces the risk of kickback.
With proper guarding in place, you’re free to focus on blade height based on cut quality, not just fear.
How Blade Height Affects Cut Quality
So how does blade height actually change the cut?
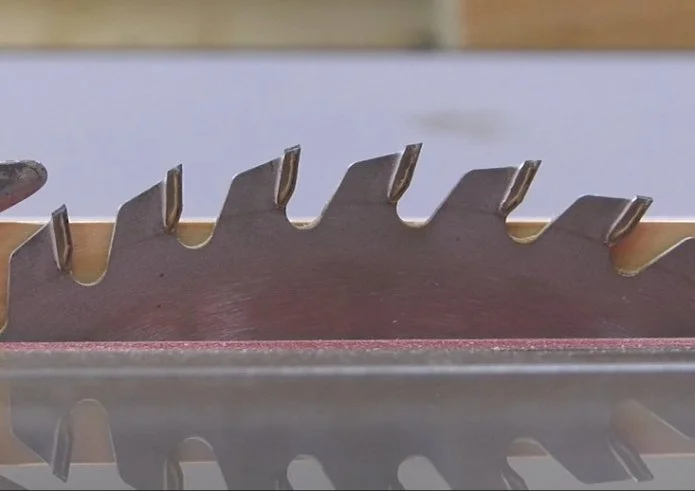
Lower Blade Height
More teeth are engaged in the kerf at one time
Teeth contact the wood at a shallower angle
The cut is less aggressive
Requires a slower feed rate in some materials
More friction and heat
Greater chance of burning or scorching
Higher Blade Height
Fewer teeth are in the kerf at once
Teeth strike the wood at a more aggressive angle
Can cut faster and run cooler
Reduces scorching in some materials
However, there are trade-offs:
A more aggressive cut can leave deeper blade marks
Teeth exit the wood almost straight downward
Increased risk of tear-out on the underside of the workpiece
Especially noticeable without a zero-clearance insert
So What’s the “Best” Blade Height?
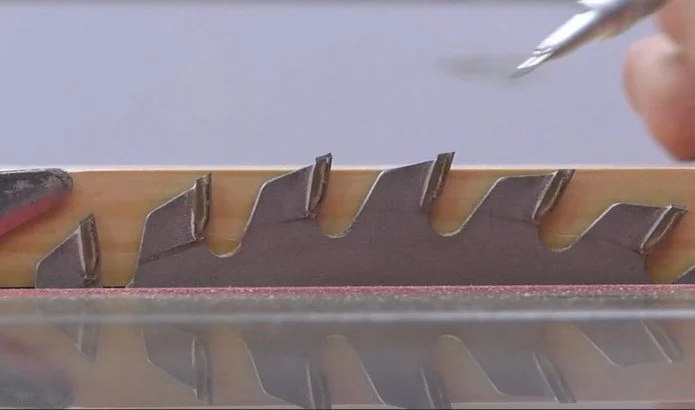
When you weigh everything—the risk of kickback, heat buildup, tooth engagement, cutting angle, and tear-out—you’ll find that the optimal blade height in most situations is when:
The teeth fully clear the top of the board and the bottom of the gullet is just exposed.
Interestingly, this is also the height many blade manufacturers expect you to use. That matters because blades are designed with specific tooth geometries and rake angles (positive or negative). Raising or lowering the blade significantly from that intended height changes how the teeth interact with the wood—and the blade may no longer perform as designed.
Rules Are Useful—Until They Aren’t
None of this means you should never adjust blade height.
Rather than following rigid rules, you should be willing to fine-tune blade height based on how your saw is actually performing with the material you’re cutting.
A Few Practical Examples:
Burn marks? Raise the blade slightly to reduce heat.
Chip-out on the underside? Lower the blade a bit.
Thin materials (laminate, hardboard)? A higher blade can help hold the workpiece down.
Acrylic? A slightly lower blade may reduce chipping—just don’t go so low that heat builds up.
Want faster ripping? Try raising the blade fully—assuming you’re using a blade guard.
The Bottom Line
There is no single “correct” table saw blade height.
But if you understand how blade height affects:
Safety
Kickback potential
Heat buildup
Tear-out
Cutting efficiency
—you’ll be able to make informed adjustments for your blade, your material, and your situation.
And that knowledge is far more valuable than any one-size-fits-all rule.
This post may contain affiliate links. If you make a purchase, we may receive a small commission.
Need some cool tools for your shop? Browse my Amazon Storefront for inspiration.