
LEARN TO MAKE BREADBOARD ENDS
This project takes a table design that should self-destruct and reveals the ingenious, centuries-old joinery that quietly saves it: true breadboard ends. With deep mortises, multiple tenons, and pegged elongated holes, the table stays flat, moves naturally with the seasons, and turns cheap construction lumber into heirloom furniture.

This table should not exist.
Its very design goes against everything we know about woodworking. It breaks so many fundamental rules about wood movement and grain direction that—by all logic—it should tear itself apart in under a year.
Unless… there’s more to it than meets the eye.
Maybe there’s a hidden secret the average person would never guess. Something so clever that, instead of collapsing almost immediately, this table will still be solid when your grandkids eventually haul it to the curb to make room for some mass-produced particle-board piece of junk they saw on Pinterest.
Welcome to Part 2 of this series, where I’ve been helping my friend build an heirloom-quality table from inexpensive Home Depot construction lumber. Yes, garbage wood. But with the right tricks, you can turn that garbage into something remarkable.
If you missed Part 1 you can check it out here.
Today, I’m tackling the next big challenge: How do you attach boards across the ends of a tabletop—without the whole thing self-destructing?
Why Wood Moves (and Why You Can’t Stop It)
Here’s the thing about wood: even when the tree is dead, the board is alive.
Humidity goes up? Wood swells wider and thicker.
Humidity drops? Wood shrinks narrower and thinner.
It never stops.
But here’s the kicker: wood doesn’t change in length.
So what happens when you attach a long board across the ends of other boards?
In theory, you’ve built a disaster. The end board prevents the others from expanding and contracting. So eventually they split, crack, or tear themselves apart.
That’s why we’re always told:
Never cross wood grain. Ever.
And yet… breadboard ends have existed for centuries. And they work.
The Secret Inside a Breadboard End
A proper breadboard end uses a brilliant hidden system of:
a long tongue
a matching groove
multiple tenons
deep mortises
and pegs in elongated holes
This combo keeps the tabletop flat, but still lets it expand and contract freely.
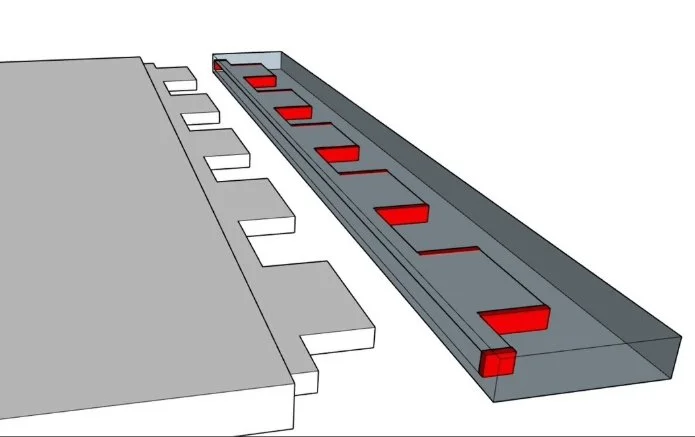
Here’s what’s going on inside:
A full-length tongue runs across the end of the table.
The breadboard has a matching groove and deep mortises.
A series of five individual tenons fit into those mortises.
The mortises are cut slightly wider than the tenons.
The groove has extra space at each end.
Pegs lock the parts together using elongated holes, allowing side-to-side movement but preventing separation.
This is why the joint works despite “breaking the rules.”
It’s not a rigid connection — it’s a controlled one.
Why Not Just a Simple Tongue and Groove?
Strength.
Someone will eventually grab the end of your table and lift it. And if all you’ve got is a tiny tongue sitting in a shallow groove… something’s going to snap.
Deep mortises and long tenons give the joint serious mechanical strength. And using several shorter tenons instead of one giant tongue preserves more material in the breadboard, making it stronger.
The old-timers who invented this weren’t messing around.
Cutting the Groove and Mortises
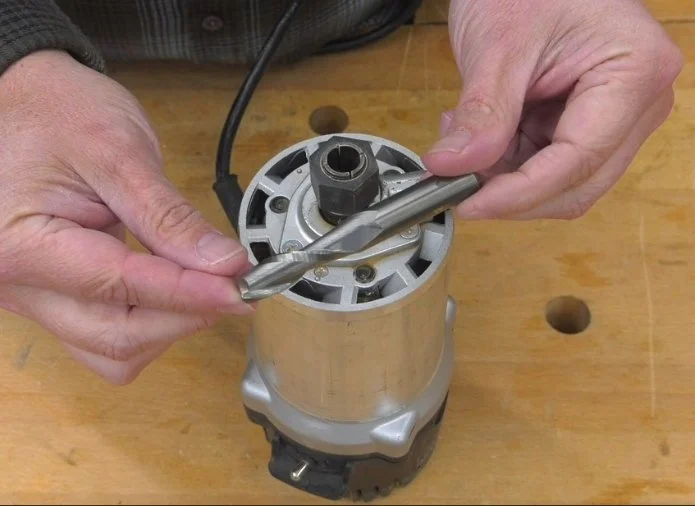
For this project, my setup was:
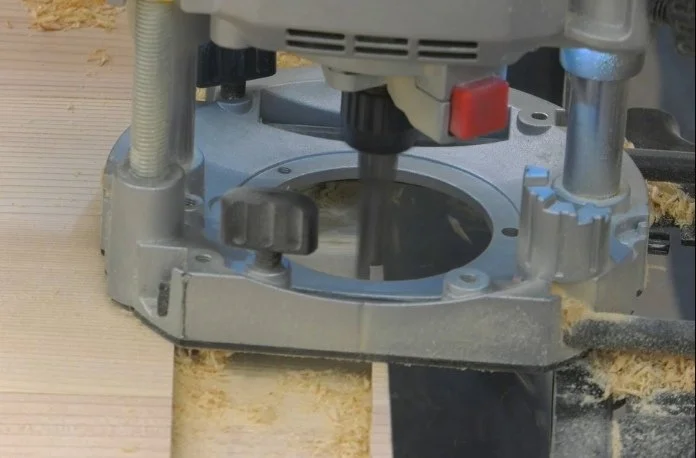
I started with the center groove, making multiple shallow passes to protect the bit and avoid vibration. When I got to the end, I reversed the router and cut in the opposite direction to ensure perfect centering. After a few passes, the groove was about an inch deep.
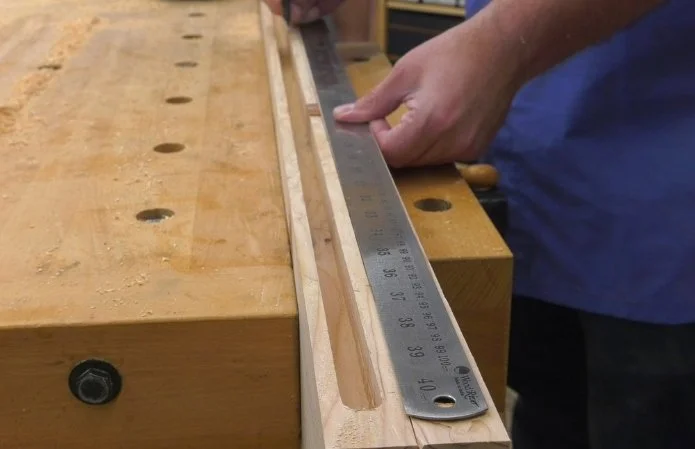
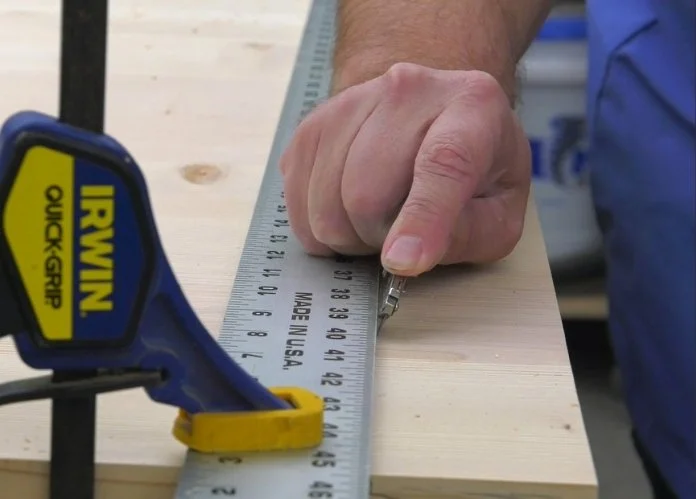
Then I marked out five mortises across both breadboards.
To remove waste quickly, I plunge at full depth several times to create overlapping holes, then clean up with a pass that moves from one end to the other—and a reverse pass to ensure perfect centering.
Transferring Layouts and Cutting the Tenons
After measuring the mortise depth, I transfer those marks to the end of the table—setting them slightly short so the tenons never bottom out.
I knife the shoulder lines for clean, crisp edges.
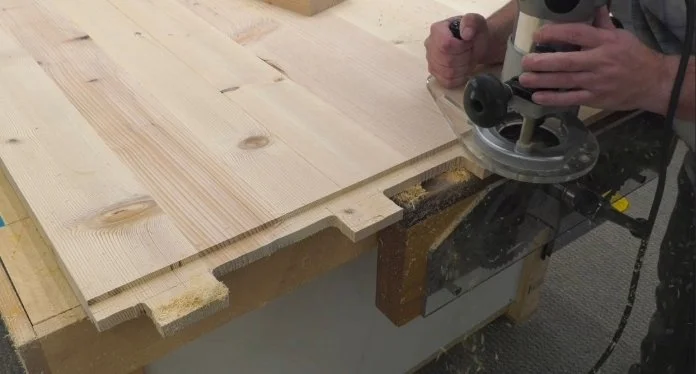
Then, using the router and edge guide, I remove material to create the long tongue.
Next, I lay out the tenons using the breadboard itself as a guide, mark the waste, and hog it out with a router fitted with an offset base. Perfection isn’t required here—tenon thickness matters far more than their exact width.
A chisel is used to:
square the corners
match the tenon edges to the router-bit radius
The breadboard should slide on with light tapping only. No hammers of doom. If it resists, adjust with a sanding block.
Drilling and Pegging the Joint
With the breadboard fitted, I layed out a series of peg holes—one for each mortise/tenon.
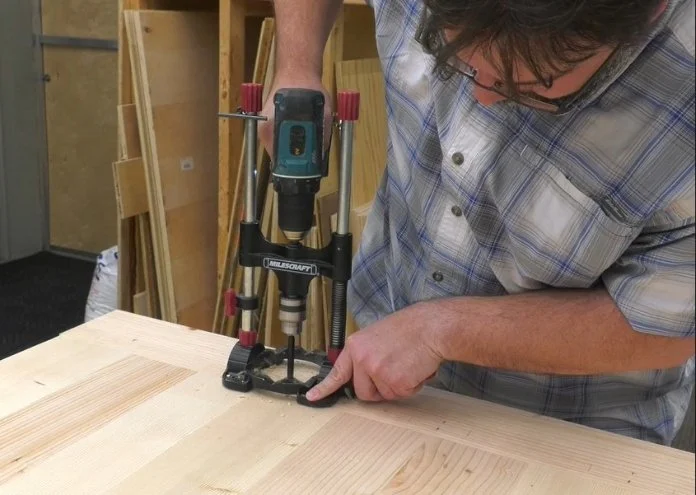
Using a Milescraft portable drill guide and a sharp Forstner bit, I drill from the top for the cleanest entry surface.
Then the breadboard comes off again so I can elongate all but the center hole using a file or rasp. These elongated holes allow the tabletop to expand and contract while the center peg keeps everything aligned.
Time to reassemble:
Clamp the tabletop flat
Slide the breadboard on
Drive the dry dowels halfway
Add a touch of glue at the rim only, except for the center peg which should be fully glued
Drive the pegs home
The glue keeps the pegs from falling out—but doesn’t interfere with wood movement.
Once dry, I cut them flush.
Why Leave the Ends a Little Long?
Because the table’s width will change with the seasons—while the breadboard will not.
By leaving the breadboard ends slightly long, the inevitable shift looks intentional, like a design choice instead of a mistake. And since you aren’t looking at the underside, perfection isn’t required.
Final Thoughts
That’s how you make proper breadboard ends:
They look fantastic
They keep your tabletop flat
They allow natural movement
And they turn humble construction lumber into real furniture
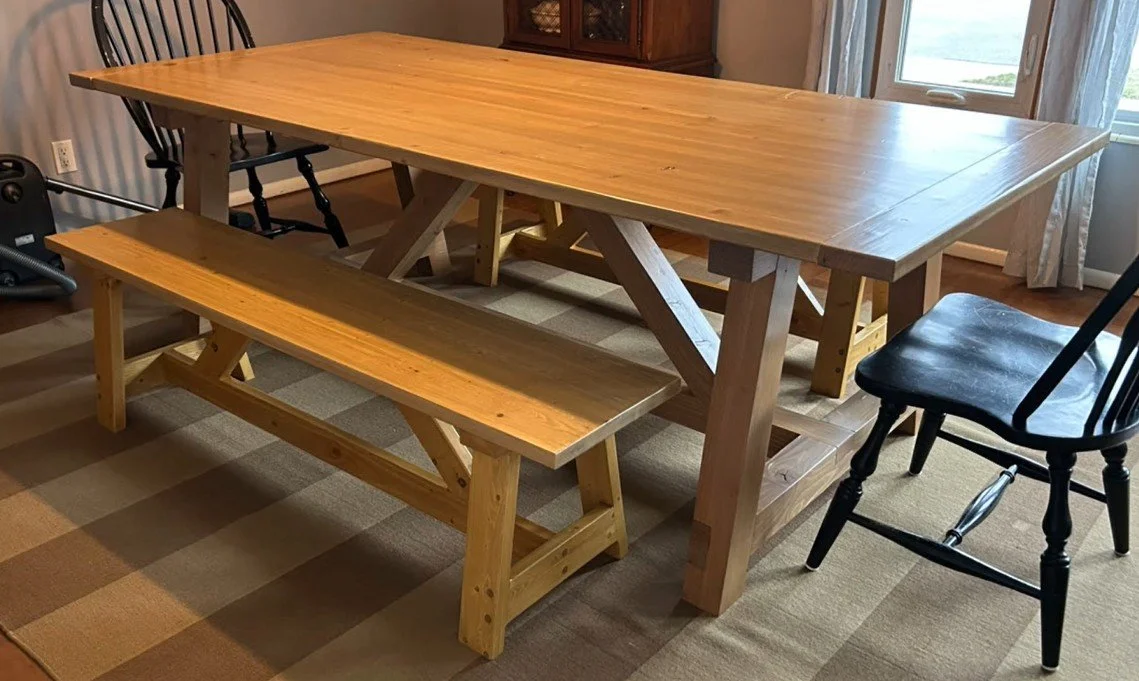
This table “should” fail—but thanks to a centuries-old joint, it’s going to outlast all of us.
This post may contain affiliate links. If you make a purchase, we may receive a small commission.
Need some cool tools for your shop? Browse my Amazon Storefront for inspiration.