
A STRONGER WAY TO JOIN WOOD: SLIDING DOVETAILS
Ready to level up your joinery? A tapered sliding dovetail delivers rock-solid strength, clamp-free assembly, and serious wow factor—and it’s far easier to make than most tutorials would have you believe.
Just about every woodworker makes cabinets and shelves from time to time. When we’re starting out, we usually rely on simple butt joints because they’re easy. Eventually, we graduate to dados because they’re stronger and look more professional.
But if you really want to up your game, a sliding dovetail will do it. Not only does it make you look like a master woodworker, it also offers some real advantages over other joinery methods.
Why Use a Sliding Dovetail?
For one thing, it’s about as strong as a joint can get. You can’t pull it apart. It also allows you to assemble a project quickly and easily—often with no clamps at all. Technically, you don’t even need glue. The joint holds itself together.
The key to making this joint work smoothly is a slight taper. That taper allows the parts to slide together easily without jamming halfway through assembly. Without it, the joint would be so tight you’d have to hammer the life out of it just to get it together.
Trust me—it’s worth taking a few minutes to learn how to make a tapered sliding dovetail. The time will come when you’ll be very glad you know how to do this. And that’s really all it takes: just a few minutes.
I stress that because most of the videos I’ve seen on this topic are ridiculously overcomplicated. No wonder people are afraid to try.
The Tools You’ll Need
My method is simple enough that anyone can do it. You’ll need:
A router
A straight router bit
A dovetail router bit
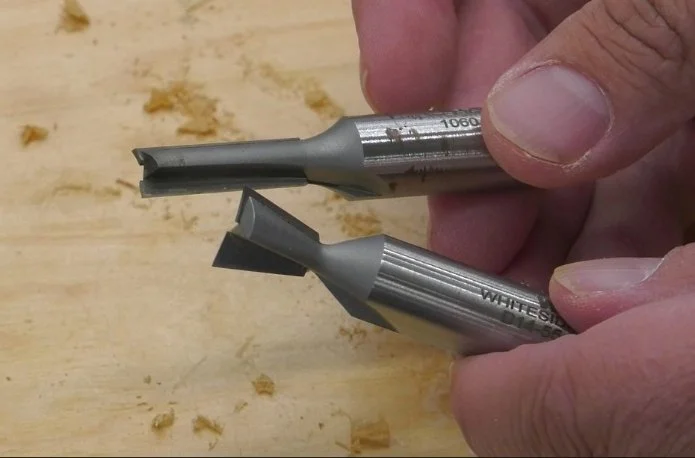
For 3/4-inch thick material, I use a 1/2-inch dovetail bit and a 1/4-inch straight bit. If you’re shopping for router bits, I highly recommend Whiteside. You can find the bits for this project here:
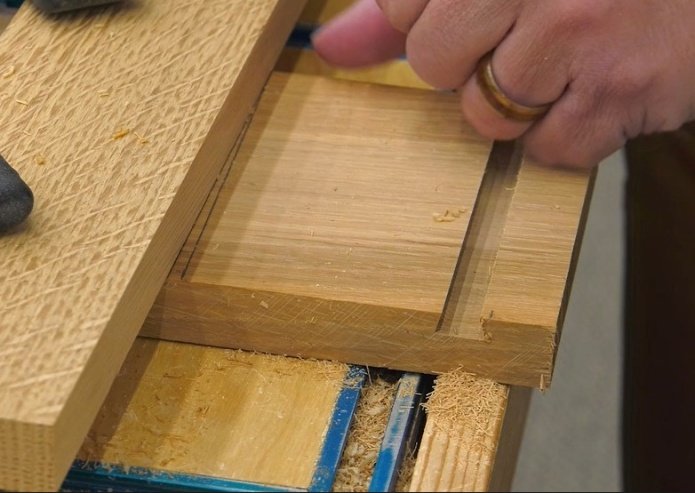
Routing the Tapered Dovetail Slot
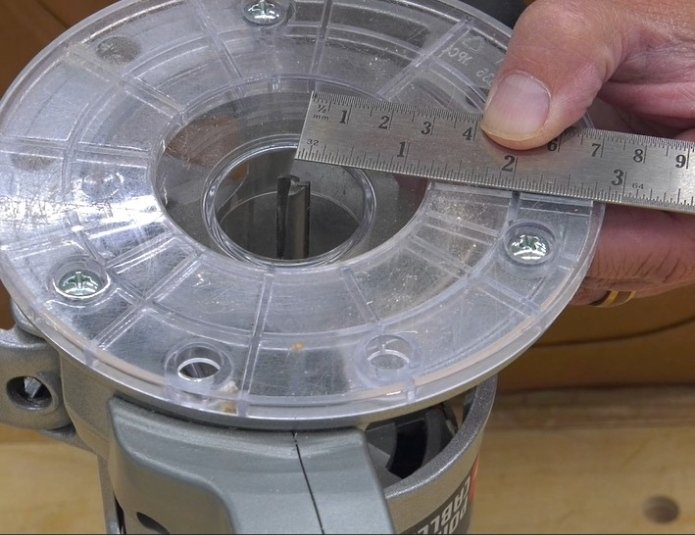
Start by measuring the distance from the center of your router bit to the edge of your router plate. Since plates aren’t always perfectly centered, put a piece of tape on the side you measured from to remind you to always keep that side against the fence.

Mark the centerline of where your shelf will sit, then add the router measurement you just took. Clamp a straight scrap of wood at that position to use as your fence.
Install your straight bit so it protrudes exactly 1/4 inch above the router plate. I like to set this using a combination square and lock it in—you’ll need this same height two more times.
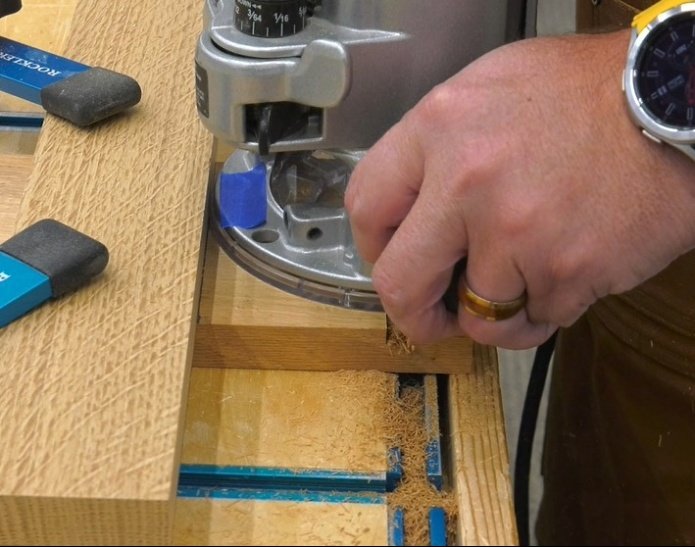
Now rout a simple dado, moving the router from left to right along the fence. Going the opposite direction can cause the bit to push the router away from the fence, resulting in a crooked cut.
Once the dado is complete, swap in the dovetail bit and reset it to that same 1/4-inch height. Make another pass to add the dovetail profile.
Adding the Taper
Next, grab a thin scrap to use as a shim—about 1 millimeter thick is perfect. Use it to move just one end of the fence back by that amount, introducing a slight angle. Leave the other end of the fence where it is.
Click to enlarge.
Make a second pass with the router. This creates the taper, with one end of the dovetail slot slightly wider than the other.
When working with narrow pieces, I prefer the wider end of the slot to be at the back of the project, since the narrow end always looks cleaner. Keep that in mind when deciding which end of the fence to move.
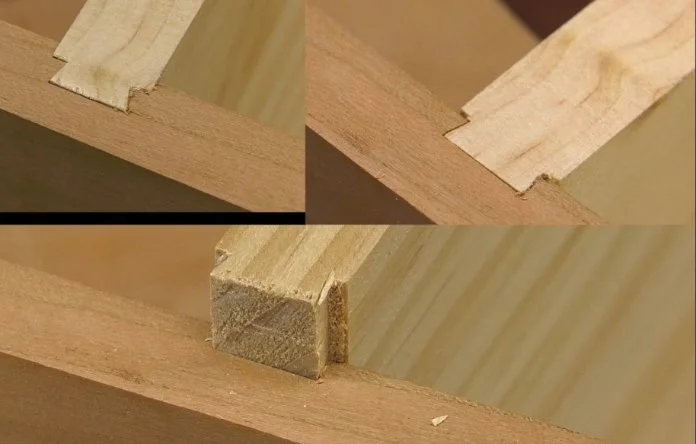
That completes the first half of the joint.
Cutting the Matching Dovetail Tongue
The mating piece is best cut on a router table.
Install the dovetail bit and set it—again—to exactly 1/4 inch above the table. This is why saving that combination square setting matters. All three bit heights must match to avoid gaps.
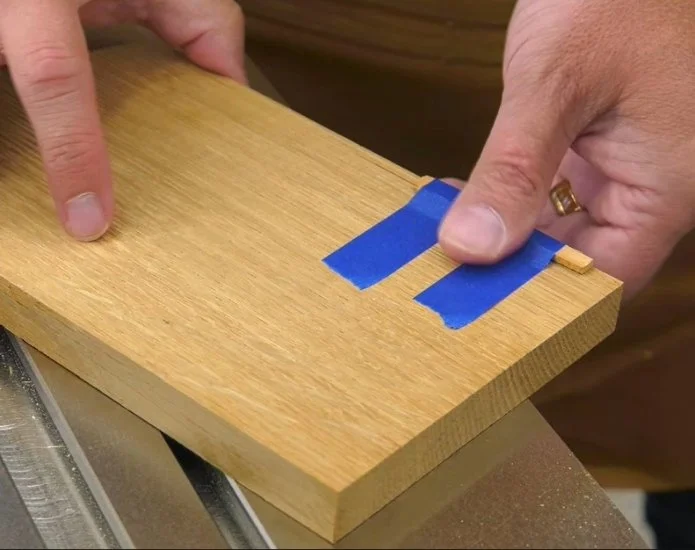
Now take that same shim and trim it down to about 1/4 inch wide. Tape it to the edge of your shelf board, positioning it slightly back from the end so the bit won’t hit it. The shim should go on the edge that will face the back of the project.
To prevent the shim from dropping into the fence gap around the bit, add a sacrificial fence face to create a zero-clearance opening.
Set the fence so just the corner of the dovetail bit is exposed. Start with a light cut. Make the first pass with the shim riding against the fence, then rotate the board and make a pass on the non-shim side.
Dialing in the Fit
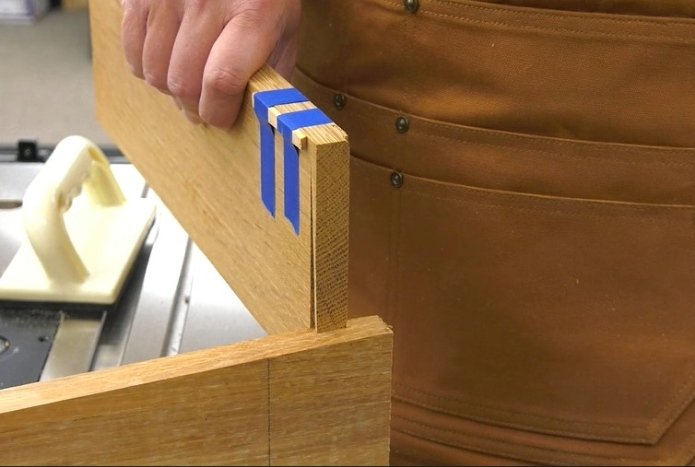
At this point, the joint probably won’t fit yet—and that’s fine. Gradually move the fence back, exposing a little more of the bit, and take light passes on both sides. Check the fit often.
The joint should slide in easily at first and tighten as it goes deeper. When it slides almost all the way in and seats fully with a few mallet taps, you’ve nailed it.
I often cut a test joint first. Once everything is dialed in, you can cut all the joints in a project quickly and consistently.
Final Thoughts
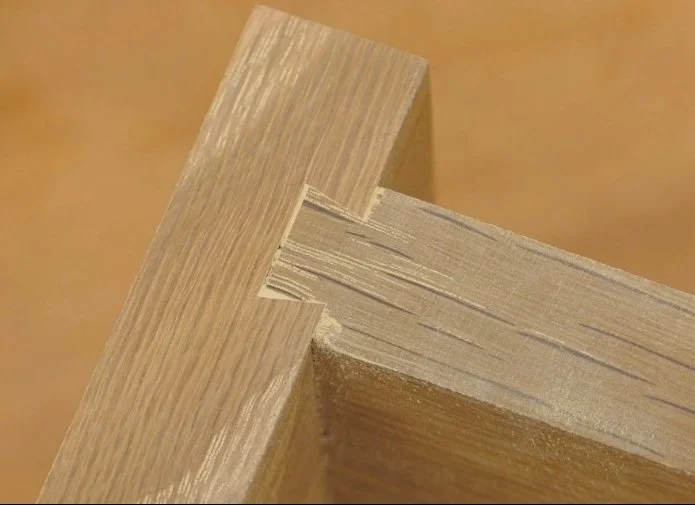
This one wasn’t perfect, but after a little light sanding, it looks pretty good to me. And compared to a standard dado, it’s in a whole different league.
Give it a try—you might just find yourself looking for excuses to use sliding dovetails in your next project.
This post may contain affiliate links. If you make a purchase, we may receive a small commission.
Need some cool tools for your shop? Browse my Amazon Storefront for inspiration.