
ANCIENT WOOD FINISH IS MAKING A COMEBACK
Shellac is a fast-drying, forgiving, and incredibly versatile wood finish that’s just as relevant today as it was centuries ago. Easy to apply, easy to repair, and beautiful on nearly any project, it proves that “old-school” doesn’t mean outdated.
For hundreds of years, shellac was widely considered the best wood finish in the world. It’s fast and easy to apply, all natural, and environmentally safe. Despite what the makers of polyurethane and expensive high-tech resins might tell you, shellac is not old-fashioned.
In fact, it may still be the best wood finish available—for several very good reasons. By the end of this article, I can almost guarantee you’ll want to head out to the shop and put shellac on something.
Shellac: Pros and Cons
Why You Should Consider Shellac
There are several compelling reasons to use shellac on your next project.
It’s incredibly easy to apply.
I’ll cover application in detail later, but shellac is very forgiving and beginner-friendly.
It’s hard to mess up.
Shellac dissolves itself, meaning runs and imperfections can be fixed simply by applying the next coat. This also makes shellac easy to repair—even years later—which isn’t true of many modern film finishes.
It dries extremely fast.
Shellac dries so quickly that you can often apply the next coat almost immediately. This means a finishing job that might take days with other finishes can be completed in hours—or even minutes.
It’s highly compatible with other finishes.
You can apply shellac over oil-based stains, water-based dyes, tung oil, or boiled linseed oil. You can also apply almost any finish over dewaxed shellac, making it an excellent universal sealer that helps stains absorb more evenly.
It offers beautiful color options.
Shellac flakes come in a range of colors, from clear to yellow to deep brown. You can also add aniline dyes to shellac to create custom wood stains.
It’s safer to use indoors.
Shellac is alcohol-based, not petroleum-based. With basic ventilation and non-spray application, you generally don’t need a mask. Unlike polyurethane, shellac doesn’t stink up the house for weeks and has a mild odor that dissipates quickly.
It’s environmentally friendly and food-safe.
Shellac is used in food products like candy coatings and pill finishes. That makes it safe for toys and nursery items.
The Downsides of Shellac
Shellac isn’t perfect, and it’s important to know where it falls short.
Poor water resistance
Sensitive to heat and alcohol
Because of this, shellac is not a good choice for tabletops, countertops, bathroom vanities, cutting boards, or bowls that will be washed.
While reasonably durable, shellac isn’t a heavy-duty finish like polyurethane or lacquer. It’s ideal for furniture, cabinets, boxes, frames, and musical instruments—but not for outdoor projects or high-abuse surfaces.
Shellac also changes the color of wood. Super-blonde shellac starts nearly clear but yellows slightly over time. Blonde, amber, and garnet shellac add warmth immediately. This can be a benefit or a drawback depending on your goals.
Finally, some people object to how shellac is produced. It’s derived from the secretions of the lac beetle, and collecting it inevitably kills insects. While these insects reproduce in enormous numbers and aren’t endangered, this can be a concern for some users.
Shellac also tends to dry with a high gloss. If you prefer a satin or matte finish, you’ll need to rub it out with steel wool or apply paste wax.
Shellac From a Can
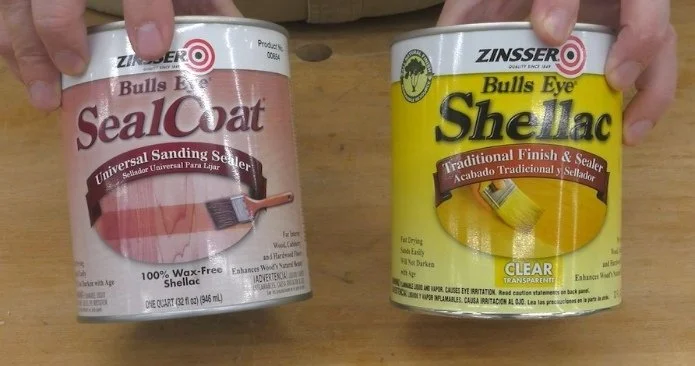
Shellac is available in liquid form or as flakes. The easiest way to start is with pre-mixed shellac. Most stores carry two versions:
SealCoat
SealCoat is extra-thinned shellac—known as a 2-pound cut. It soaks deeply into wood fibers and works well as a sanding sealer or as a complete finish (with more coats). It’s also dewaxed.
Regular Canned Shellac
This version is more concentrated and usually diluted 30–50% with alcohol before use. While it requires thinning, it can be more economical long-term.
For beginners, SealCoat is ready to use right out of the can. If good alcohol is hard to find where you live, it may also be the better choice.
Shellac From Flakes
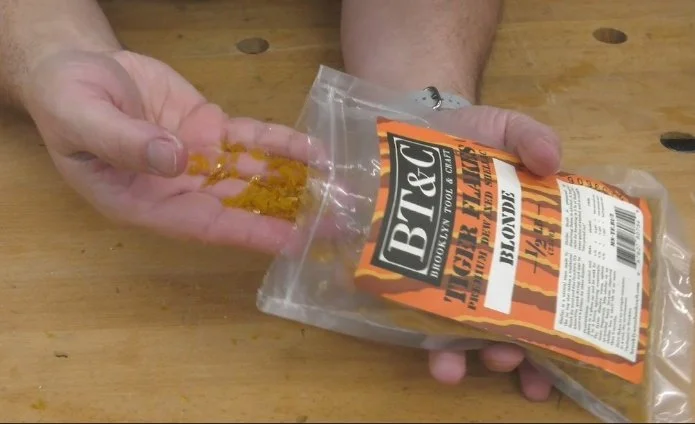
Buying shellac flakes gives you more flexibility and less waste.
Why Use Flakes?
More color options
Longer shelf life before mixing
Ability to mix only what you need
Understanding Pound Cuts
1-lb cut: 1 oz flakes + 8 oz alcohol
2-lb cut: 2 oz flakes + 8 oz alcohol
You can scale these ratios up as needed.
Shellac contains a lot of alcohol, which evaporates quickly, so you’ll use more finish than you might expect. Start small until you get a feel for how much you need.
Mixing Tips
Pulverizing flakes speeds up dissolving (a dedicated coffee grinder works well).
Use the purest alcohol you can find:
Denatured alcohol (low water content)
90–99% isopropyl alcohol
190-proof grain alcohol (excellent if available)
Shake or stir frequently at first, then let it sit overnight in a warm environment. Shellac dissolves best above 60°F (15°C).
For faster results, a magnetic mixer works wonderfully and keeps the finish crystal clear.
Important Shellac Considerations
Shelf Life
Canned shellac: ~3 years (often already old when purchased)
Mixed shellac: ~6–12 months
Flakes (unmixed): many years
Always label containers with the date. If shellac stays sticky or gums up sandpaper, it’s time to toss it.
Wax Content
Natural shellac contains wax, which adds depth but prevents other finishes from adhering. Use dewaxed shellac if it will be a base coat for another finish.
SealCoat is dewaxed. Regular canned shellac usually is not. Flakes may or may not be—check the label.
Easy Shellac Application
Applying shellac couldn’t be simpler.
You can use:
A pad applicator (cotton wrapped in cloth)
A quality natural-bristle brush (recommended for beginners)
Apply thin coats. Shellac dries fast—the alcohol flashes off in seconds, and the finish hardens in minutes.
The first coat may raise the grain slightly. Lightly sand with 600-grit paper if needed. Subsequent coats usually require no sanding.
Because alcohol re-dissolves shellac, each new coat melts into the previous one, creating a single, unified film. This makes shellac incredibly clear and easy to repair.
Avoid over-brushing. Light, one-direction strokes work best.
How Many Coats?
Light-use items: 5–6 coats
High-use items: 10–12 coats
More coats mean higher gloss. To reduce sheen, rub out the final coat with steel wool or very fine sandpaper, or apply paste wax and buff.
Cleanup is easy. Seal leftovers tightly, label the date, and reuse applicators—alcohol will re-soften hardened shellac.
Final Thoughts
Shellac is fast, beautiful, forgiving, and incredibly versatile. It’s not outdated—it’s timeless.
Now that you know how it works, how to mix it, and how to apply it, there’s no reason not to give shellac a try. Save this guide for future reference—you’ll come back to it.
This post may contain affiliate links. If you make a purchase, we may receive a small commission.
Need some cool tools for your shop? Browse my Amazon Storefront for inspiration.