
HOW TO SAFELY CUT SLOTS WITH A ROUTER TABLE
Cutting slots on a router table seems simple—but without the right technique, it can turn dangerous fast. Learn how to hit your start and stop marks accurately, avoid climb cuts, and maintain full control for safe, clean results every time.
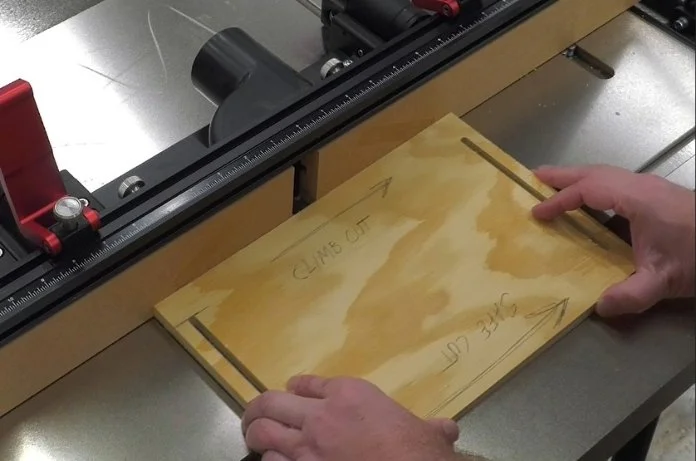
Have you ever cut one of these? I bet you have. And if you haven’t, you will eventually—because slots are used for all sorts of things in woodworking, especially when making jigs.
The first time I cut a slot with a router, I almost lost a finger. No joke—I had a really close call because I didn’t know what I didn’t know, and I ended up doing something really stupid. Since then, I’ve spoken to a lot of woodworkers who also didn’t realize how quickly slot cutting can go from perfectly safe to really dangerous if you don’t know what you’re doing.
So in this article, I’m going to walk you through how to cut a proper slot safely and accurately with a router table. File this lesson away, because you’re going to need it someday.
The Challenge of Starting and Stopping
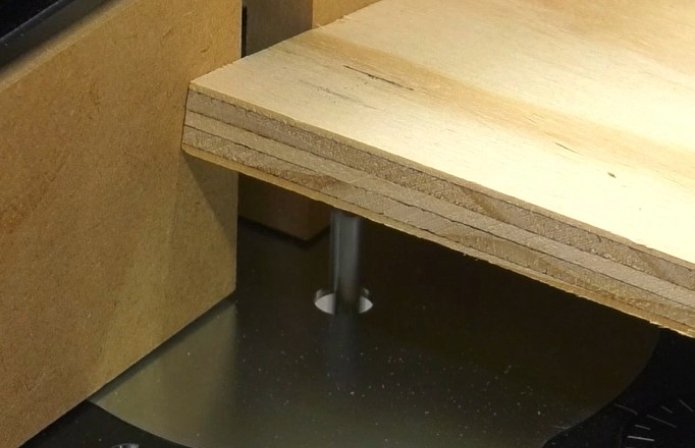
The trickiest part about cutting a slot is knowing where to start and where to stop, because you can’t always see what you’re doing as you tip the workpiece onto the spinning bit.

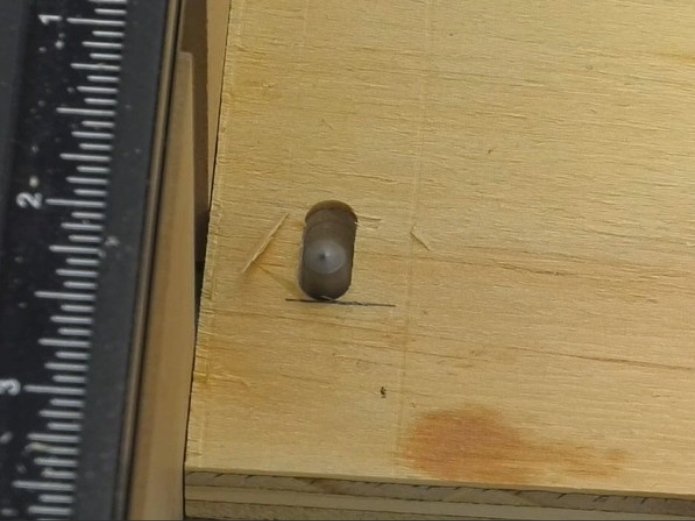
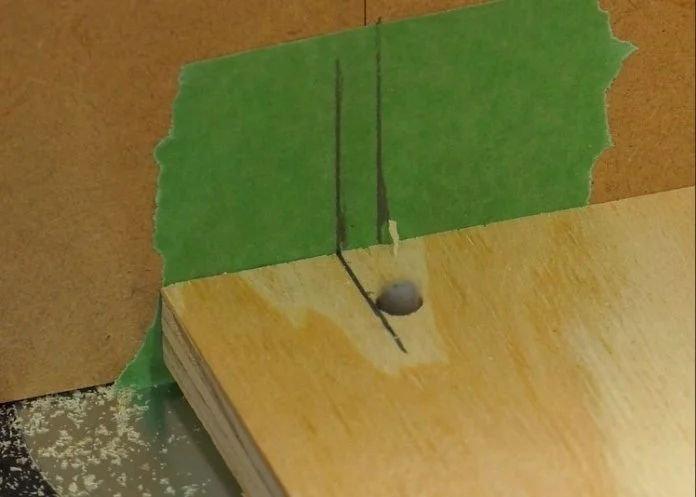
One obvious solution is to use a drill press to bore a hole exactly where you want the slot to begin. Then you slip that hole over the router bit and make your cut from there. This absolutely works—if you’re careful.
The issue is that if the hole is exactly the same size as the router bit, the bit can catch and spoil the end of your slot. You can avoid that by boring a slightly larger hole, but that may not look right in every situation.
Another drawback is that most people don’t want to use two tools to complete one task. So instead, they turn to what I call the blind tipping method.
The Blind Tipping Method
It’s called “blind” because you can’t really see where the bit will emerge through the workpiece as you lower it onto the spinning cutter.
Some woodworkers start slightly to the right of their intended starting point, then carefully move the workpiece backward (left-to-right) to reach the mark before continuing the cut in the proper right-to-left direction. This can work—but it requires care.
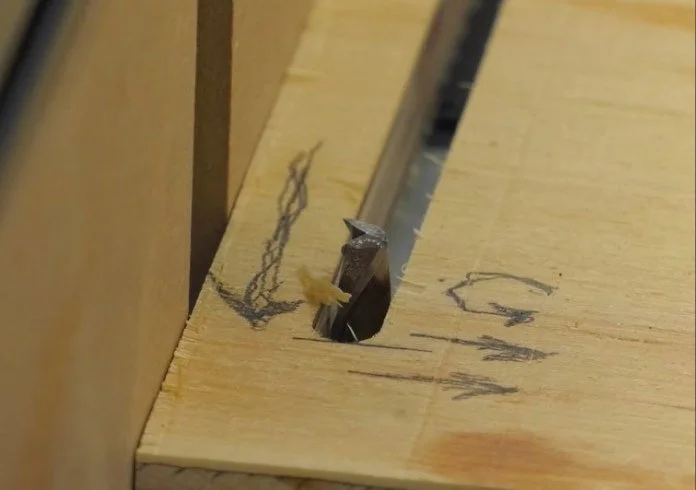
Keep in mind that feeding left-to-right on a router table goes against the normal feed direction. The spinning bit will try to pull the workpiece away from the fence, which can lead to a crooked or ragged cut.
A Better Way to Hit Your Marks
Here’s a more reliable approach:
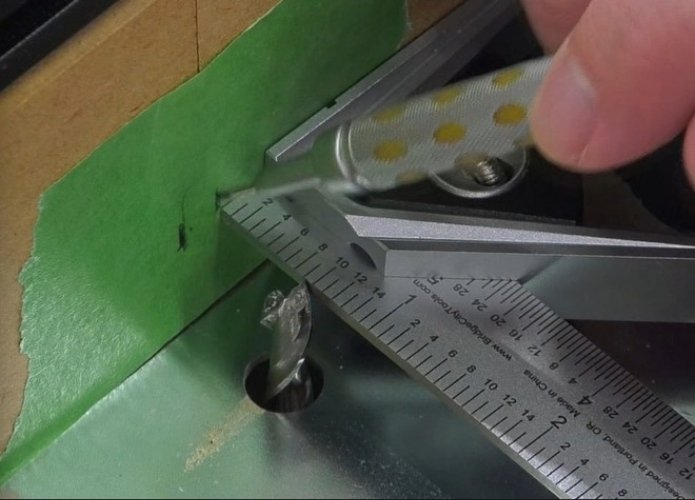
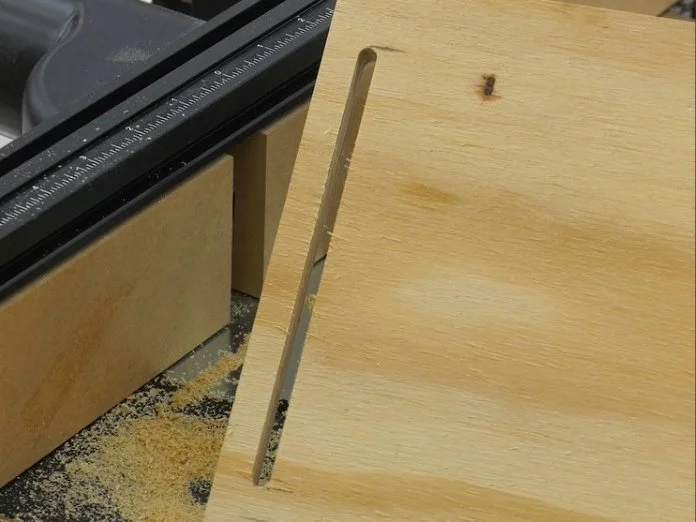
Use a square and a piece of tape to mark the exact position of both sides of your router bit on the fence.
These marks act as visual guides when lowering the workpiece onto the spinning bit.
This method also shows you exactly where to stop the cut, which is especially helpful if you’re making the slot in multiple passes—something I highly recommend, particularly in hardwood. Multiple passes reduce strain on the bit and produce a cleaner result.
If you’re not comfortable tipping the workpiece onto the bit, you can clamp a stop block to the fence, unless your fence has flip stops like mine. This helps you hold the workpiece in position as you lower it. A second stop block can mark the end of the cut, making repeatability quick and accurate.
The Most Dangerous Mistake to Avoid
None of these methods are especially risky on their own. But there’s one common mistake that can absolutely get you hurt—and it has to do with feed direction.
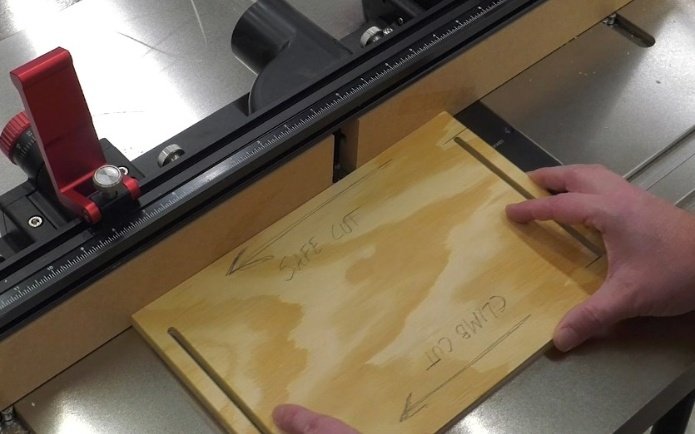
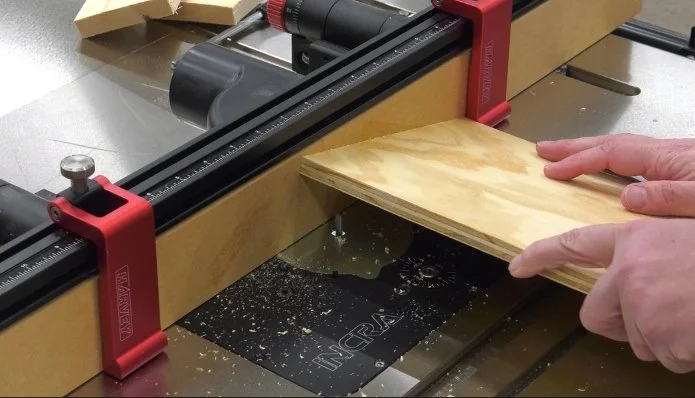
The correct way to feed stock on a router table is from right to left. This works against the rotation of the bit, giving you control.
If you feed from left to right, you’re making a climb cut, where the bit’s cutters try to pull the workpiece—and possibly your hands—into the danger zone.
Avoiding climb cuts is a fundamental rule. But when cutting slots, it’s surprisingly easy to make one accidentally.
How Accidental Climb Cuts Happen
Imagine you want to cut a slot wider than your router bit.
Let’s say your bit is 1/4 inch, but you need a 5/16-inch slot. You make your first pass, then move the fence toward the bit by 1/16 inch to widen the slot.
That’s where the problem starts.
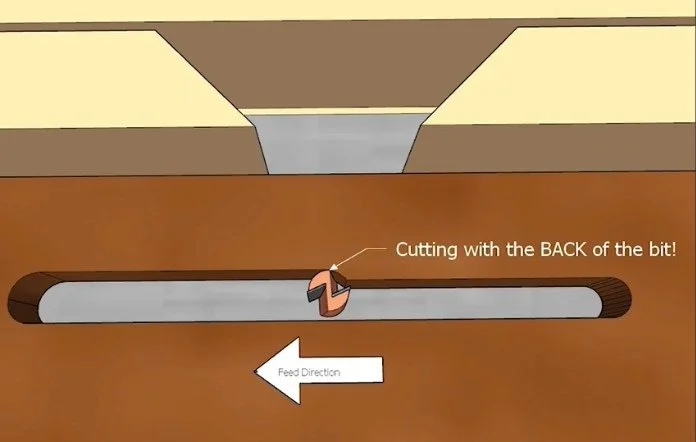
By moving the fence closer, you’re now cutting with the back side of the bit, which pulls in the opposite direction. That’s a climb cut—and it can yank the workpiece out of your hands.
The Correct Approach
If you need to widen a slot (or a dado or groove), always move the fence away from the bit, not toward it.
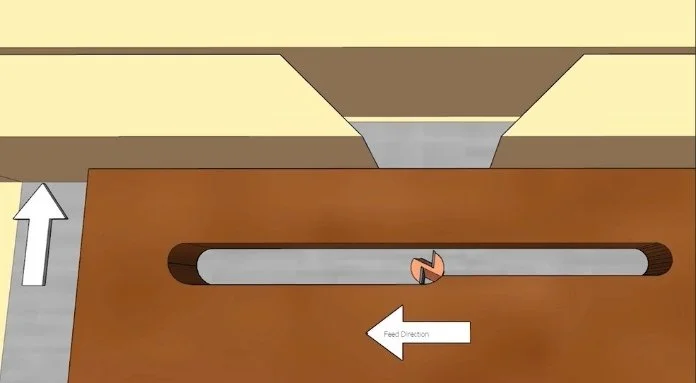
This ensures you’re always cutting with the front of the bit, maintaining resistance and control.
Why Not Just Reverse Feed Direction?
You might wonder: why not cut with the back of the bit, but reverse the feed direction (left-to-right) to compensate?
There are two problems with that:
First, switching feed directions mid-process is a great way to get confused—and mistakes here can be dangerous.
Second, cutting with only the back of the bit traps part of the workpiece between the bit and the fence. If something goes wrong, the wood can splinter or get launched across the shop.
A Note on Bit Engagement
You might be thinking: aren’t we always trapping wood between the bit and the fence when cutting a slot?
Yes—but there’s an important difference.
When both sides of the bit are engaged, their opposing forces cancel each other out. That’s why, earlier, I showed a small amount of left-to-right movement during setup—it’s not a dangerous climb cut in that specific situation, though it can still be harder to control.
Final Thoughts
Slot cutting is one of those operations that seems simple—but it comes with real risks if you don’t understand what’s happening at the cutter.
Stick to proper feed direction, take light passes, and use visual guides or stop blocks to improve accuracy and safety.
If you’re still unsure about climb cuts and feed direction—especially since they reverse when using a handheld router—I’ve put together a full tutorial that breaks it all down in simple terms.
Learn it once, and you’ll avoid mistakes that could cost you far more than just a ruined workpiece.
Happy woodworking!
This post may contain affiliate links. If you make a purchase, we may receive a small commission.
Need some cool tools for your shop? Browse my Amazon Storefront for inspiration.