
THE BEST JIG IDEA EVER
An incremental positioner turns a simple setup into a powerful system for ultra-precise, repeatable cuts. Build it into a table saw jig, and you can cut perfect tenons, joints, and micro-adjustments with speed and accuracy.
In this article, I’m going to show you a really useful table saw jig. At the same time, I’ll explain how the clever idea at the heart of this jig can be applied to all sorts of other jigs you can make for your workshop.
It’s such a simple, inexpensive idea—but it can accurately and repeatedly position workpieces so you can make precise cuts for tenons, lap joints, bridle joints, finger joints, and much more. Really, the only limitation is your imagination.
What Is an Incremental Positioner?
It’s called an incremental positioner, and here’s how it works:
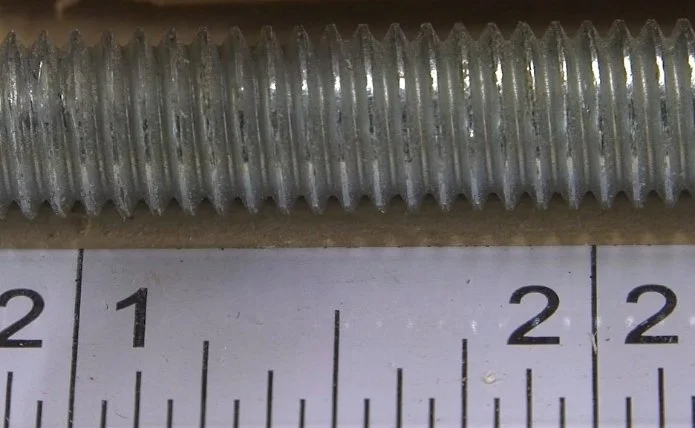
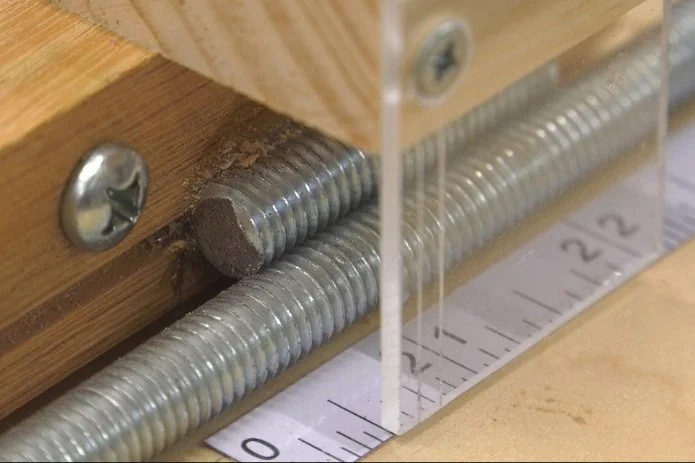
Some thread patterns correspond directly to the marks on our rulers. For example, a 3/8"-16 thread has 16 threads per inch, and an imperial ruler divides inches into 16ths. (Don’t worry—this concept works with millimeters, too.)
If you align a ruler’s scale with a set of fixed threads, and attach another section of the same thread pattern to a movable object, you can index movements using the marks on your ruler. It’s like having positive stops at every line on the ruler—every 1/16 inch, 1/32 inch, or even every millimeter. You just need to match the thread pitch to your measuring scale.
Now imagine the possibilities for woodworking jigs.
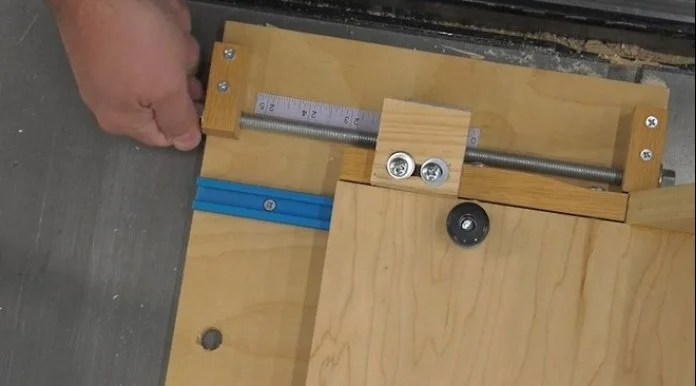
Applying the Idea: A Table Saw Tenon Jig
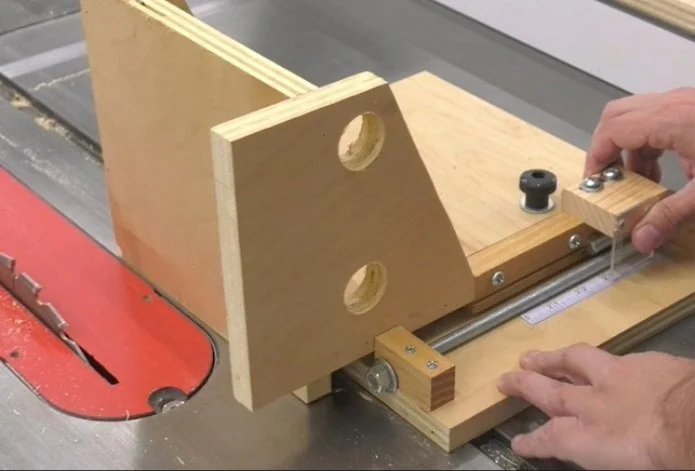
About ten years ago, I designed a table saw tenon jig using this homemade incremental positioner concept. It’s simple to build, and I even created a set of plans that walk you through the process.
I highly recommend building this jig—not only because it’s useful for many projects, but also because it provides a great introduction to designing other jigs around the same idea.
How the Jig Works
To illustrate how effective this system is, let’s take a closer look at how the jig operates.

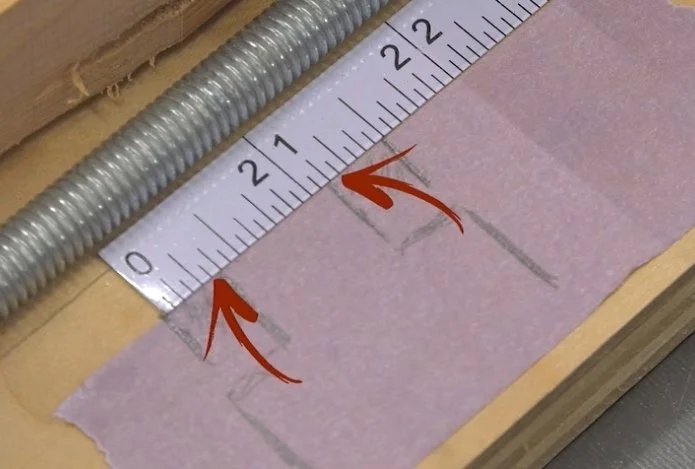
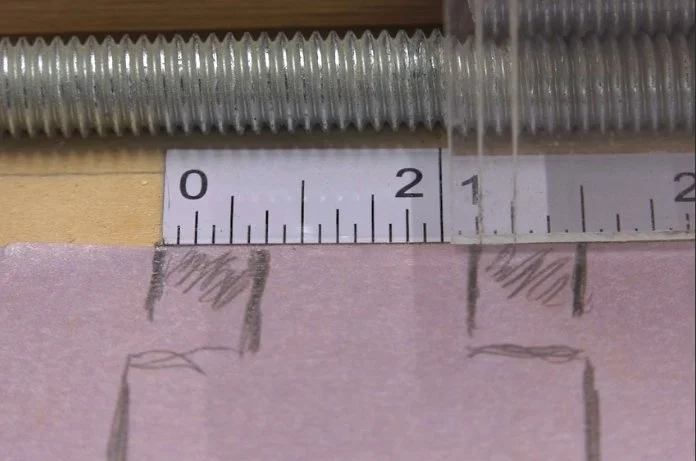
I’ve scratched two lines on my cursor exactly 1/8 inch apart—that’s the thickness of my saw blade. Incidentally, you could do the same thing with a router bit if you’re building a positioner for a router table jig. Just mark two lines that match the width of your bit, blade, or cutter.
This dual-cursor setup allows me to visualize exactly where the blade will cut in relation to the ruler, so I don’t forget to account for the width of the kerf.
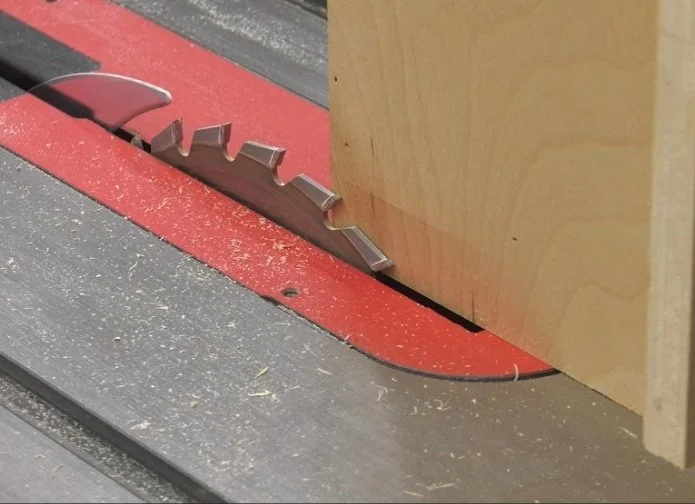
When the jig’s carriage is positioned right against the blade, making a cut would remove exactly the thickness of the blade from the edge of the workpiece. The two cursor lines next to the zero mark on the ruler would clearly indicate that 1/8 inch of material will be removed.
Cutting a Tenon with Precision
Let’s say I want to cut a tenon.
My workpiece is 1-1/2 inches thick, and I want to remove 3/8 inch from each cheek so that a 3/4-inch tenon remains.
Where do the cuts go? On either side of the tenon.
So that’s exactly what I do. I move the saw kerf—represented by the dual cursors—to one side of the tenon and make a cut. Then I move it to the other side and make the second cut.
That’s all there is to it.
Both cuts are made without stopping to rotate the workpiece, which is typically required with other tenon jigs. And because of the incremental positioner, I can repeat these cuts over and over with precise, consistent results.
If my eyesight isn’t perfect and I try to set the cursor slightly off a ruler line, the interlocking threads automatically nudge it back into position. It’s like having a positive stop at every 1/16 inch.
Beyond Single Tenons
This system works just as well for more complex joinery.
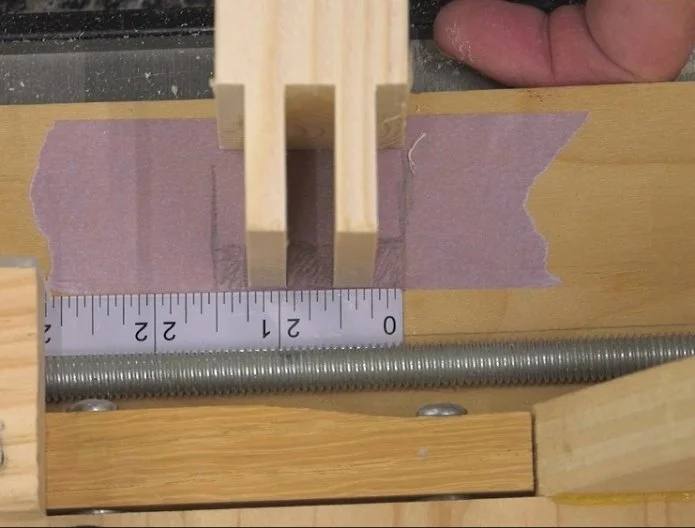
For example, here’s a double tenon: I simply make each cut with the dual cursor positioned in the waste areas, and the resulting tenons will match the layout on the ruler exactly.
Fine-Tuning with Micro-Adjustments
But what if you don’t want a tenon that matches a standard fraction like 1/2 inch or another measurement divisible by 1/16?
Sometimes you need to shave just a tiny amount off a tenon cheek for a perfect fit.
That’s where the incremental positioner really shines—it’s also micro-adjustable.
By rotating the fixed threaded rod, you can shift the carriage by extremely small amounts. This moves the cursor slightly off the ruler marks, allowing you to fine-tune the thickness of your tenon with incredible precision.
More Than Just Tenons
Of course, this jig isn’t limited to tenons. It works just as well for other types of joinery, including:
Rabbets
Bridle joints
Finger joints
Even more complex slip joints
Once you understand the concept, you can adapt it to all kinds of jigs in your shop.
Final Thoughts
I recommend building this jig—not just because it’s practical, but because it introduces you to the power of incremental positioning.
This simple idea can dramatically improve the accuracy, repeatability, and versatility of your shop-made jigs. Once you start applying it, you’ll find it opens the door to a whole new level of precision in your woodworking.
This post may contain affiliate links. If you make a purchase, we may receive a small commission.
Need some cool tools for your shop? Browse my Amazon Storefront for inspiration.