
THE 10-SECOND SHARPENING TRICK THAT REALLY WORKS
If freehand sharpening isn’t sticking, a fast, consistent jig setup can keep your tools razor sharp without the frustration. With a simple honing board, repeatable angles, and micro-bevels, you’ll sharpen faster, remove less material, and get back to work sooner.
This post contains affiliate links. If you click or make a purchase, we may receive a small commission.
Some time back, I made a video about sharpening tools where I said it’s worth learning to do it freehand because it’s faster and easier. I also have a video that will teach you how to do it. But if you don’t sharpen regularly, it can be hard to maintain the muscle memory needed to sharpen freehand.
The solution is a jig or guide. But it has to be fast and easy enough that you’ll actually want to use it instead of putting sharpening off and working with dull tools.
So in this article, I’m going to show you my setup. It will work with whatever you use to sharpen—diamond stones, water stones, even sandpaper. And it’s not just about holding the stones; it’s also about setting up your jig quickly and consistently, because consistency is key—in fact, it’s the whole point of a jig. If you can achieve and maintain the exact same bevel angle every time, you’ll only have to remove a tiny amount of steel from your tool to restore your edge.
Choosing a Honing Jig
First, let’s talk about the jigs themselves. I’ve used a lot of them over the years. They all work to different degrees, but some are better than others.
Eclipse-Style Jigs
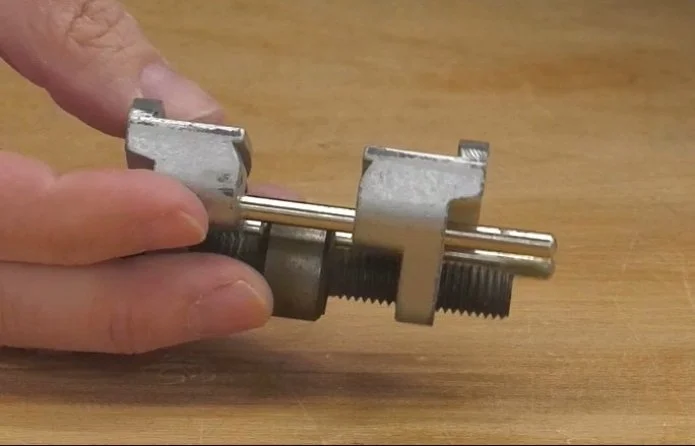
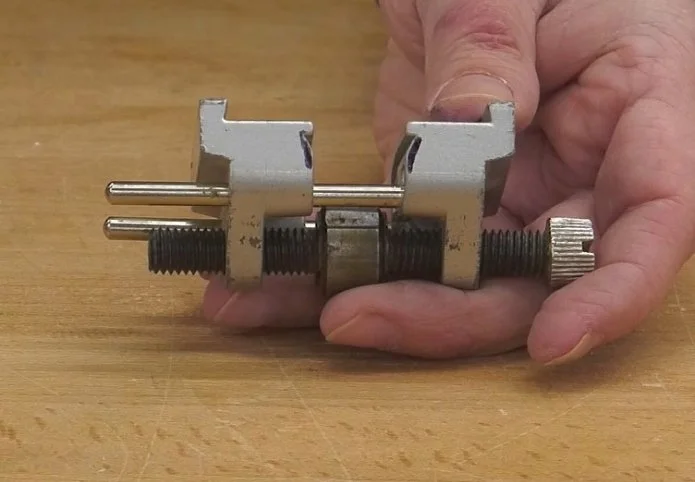
This Eclipse-style jig is very common and inexpensive. I think it’s a good choice if you’re on a budget. But you may need to make some modifications if you want it to really work right, because they can suffer from the effects of poor machining.
When you tighten the jig on a plane iron, the pressure can cause the jaws to tilt outward, creating a hump in the center that allows your iron to tip slightly to one side or the other. You may not notice it, but even a slight shift will lead to an inconsistent setup and more time at the stone.
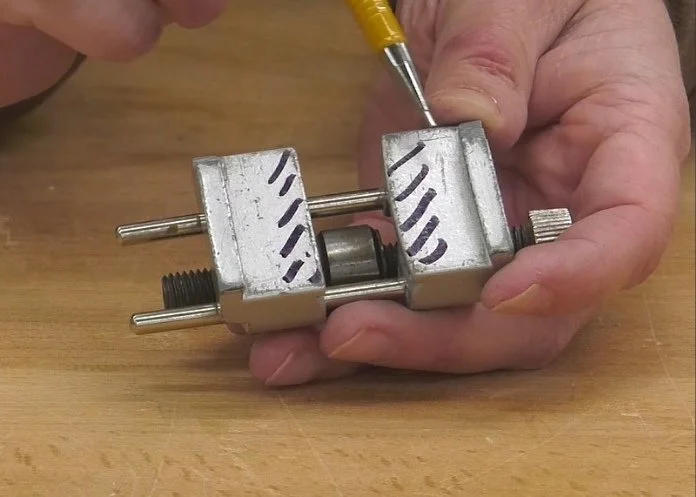
The black lines drawn on the jaws of this eclipse sharpening jig indicate where to file the jaws.
The solution is to file the jaws so they slope inward, allowing only the outer edges to hold the plane iron.
You may also wish to file the notches on the inside of the jaws. These are meant to hold chisels, but they often aren’t large enough to consistently grip thicker blades. A little work with a file can go a long way here.
Premium Honing Guides
Another option is to invest in a premium jig that works flawlessly. There are several on the market. For example, Lie-Nielsen makes a very good one, and many woodworkers like the Veritas jig.
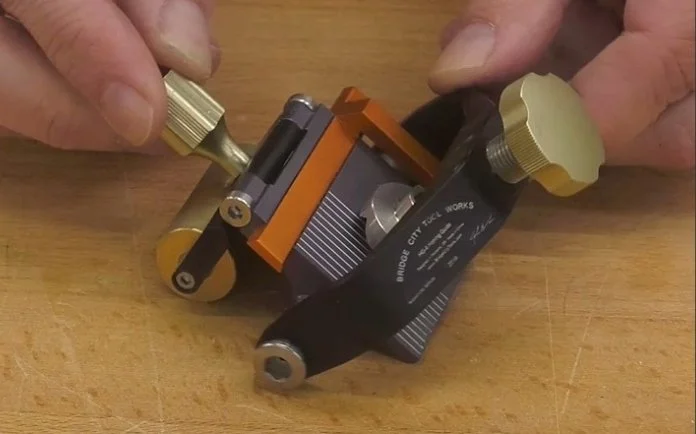
I mostly use the Bridge City Tools honing guide. For one thing, it doesn’t pinch on the sides of the tool, which automatically eliminates some of the issues other jigs suffer from. It also allows you to clamp specialty tools like mortising chisels.
There’s a movable fence to help square the tool to the jig, and I especially like the built-in micro-adjuster, which lets you change your bevel angle by very small amounts.
That said, there are plenty of good jigs out there, and it doesn’t really matter which one you buy—as long as it works for you. The key is being able to set it up quickly and consistently. If you have to spend ten minutes fiddling with it, you’re going to put off sharpening—and that’s exactly what we want to avoid.
Using a Honing Board
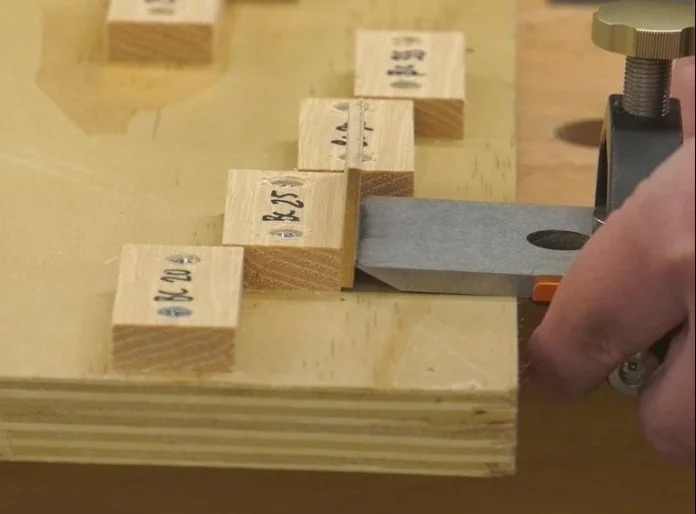
One of the best ways to set up any honing jig is with another jig—a honing board.
This is something you can easily make yourself. It holds your stones securely so they don’t slide around, and it uses stops to quickly set how far your tool protrudes from the jig—which is what determines the bevel angle.
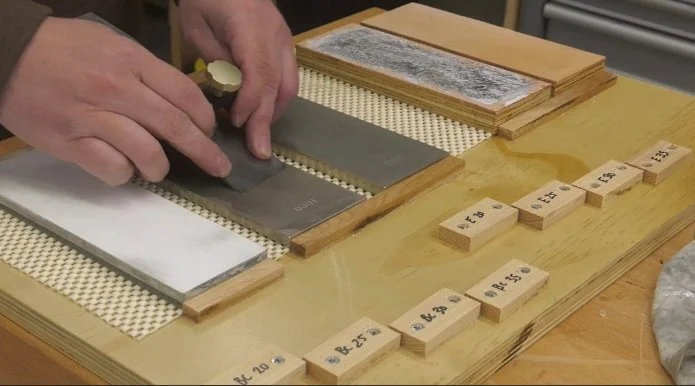
I made mine large enough to hold three stones and a couple of strops. That’s probably overkill. You can get by with one stone and one strop for routine honing. But having additional grits makes it easier to repair a damaged or very dull edge.
Whatever you do, build your board to fit the stones you use. I also recommend making it two or three inches wider on each side to help keep the mess off your bench.
I made mine from 3/4-inch plywood and added a couple of coats of polyurethane to protect it from moisture.
Setting Your Bevel Angle
The location of the stops depends on your jig, but it’s easy to figure out if you have a protractor.
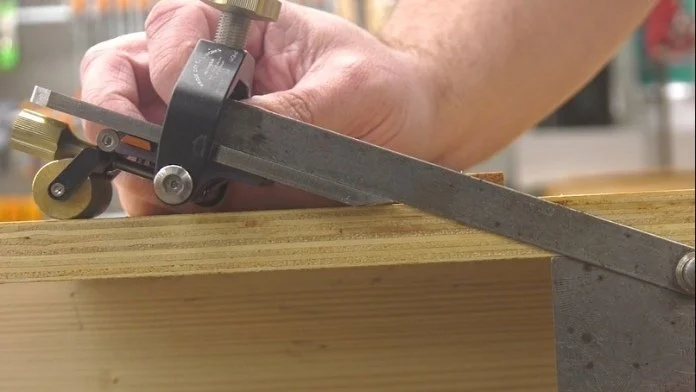
To find your angle, place the head of the protractor on the underside of your platform and across the back of your plane iron while it’s mounted in the jig. This will tell you the angle your iron is set at.
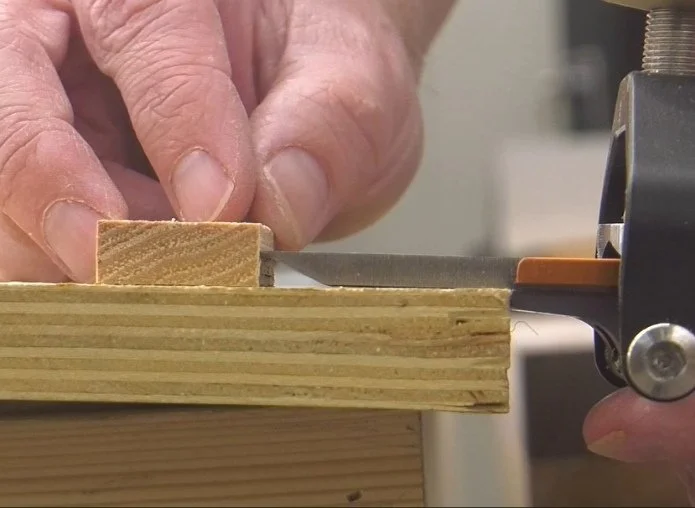
Adjust how far the iron protrudes from the jig until the protractor reads your desired angle. Then place the body of the jig against the edge of the platform and attach a stop against the edge of the iron.
If you want stops for multiple angles, simply repeat the process.
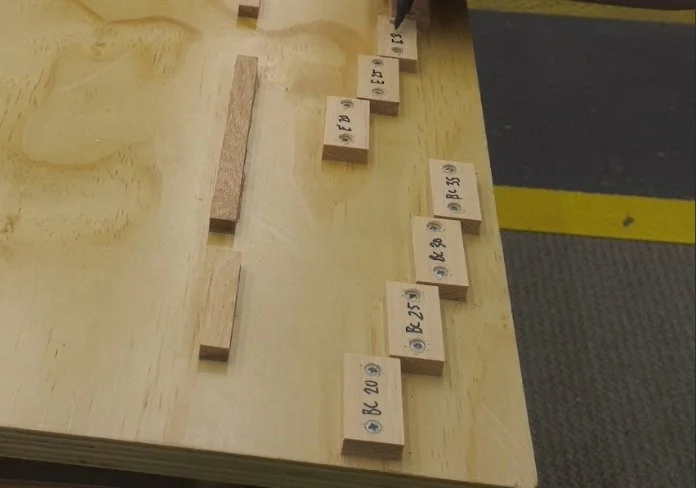
You can keep it simple or add multiple stops. I added quite a few to mine, but in practice, I don’t use all of them.
If you sharpen with sandpaper on plate glass—or simply don’t want to mount your stones—you can skip the large board and make a smaller version with just the stops.
Speeding Things Up with a Micro-Bevel
Once your setup is dialed in, sharpening becomes quick and repeatable. And you can make it even faster by adding a micro-bevel.
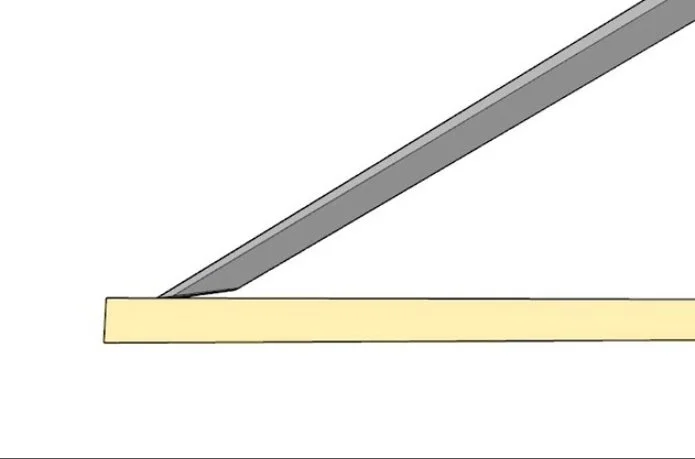
A micro-bevel is created by slightly increasing the angle so you’re only honing the very edge instead of the entire bevel. This reduces the amount of material you need to remove.
You can create one by slipping a 1/8-inch shim between your stop and the edge of the blade when setting up your jig. This raises the angle by a couple of degrees.
If you’re using a micro-adjustable jig, like the Bridge City guide, back off the adjuster before setting your tool with the stops. Then use the adjuster to raise the angle slightly instead of using a shim.
Over time, the micro-bevel will widen and become less effective. When that happens, you’ll need to restore the primary bevel using a coarse stone or grinder. While that takes more effort, the time saved during regular sharpening makes it worthwhile.
Sharpening Technique Tips
Now that your setup is complete, there isn’t much of a learning curve when using a honing jig.
Keep your fingers near the cutting edge and apply even pressure. You don’t need much force—especially with diamond stones—and too much pressure can lead to uneven sharpening.
Just keep the tool flat and steady, and you’ll be fine.
Toward the end of the process, you may want to apply a bit more pressure on one corner and then the other. This slightly tapers the edges so they won’t dig into your workpiece later. But this of course is for for hand plane irons, not chisels.
Final Thoughts
A good sharpening setup doesn’t have to be complicated—but it does need to be consistent.
Whether you use a basic jig or a premium one, the goal is the same: quick setup, repeatable angles, and minimal material removal. Get that right, and sharpening becomes less of a chore and more of a simple, efficient part of your workflow.
This post may contain affiliate links. If you make a purchase, we may receive a small commission.
Need some cool tools for your shop? Browse my Amazon Storefront for inspiration.