
EDGE BANDING PLYWOOD
Edge banding doesn’t have to be frustrating—these pro tips will help you choose the right banding, apply it cleanly, and finish it smooth. From preventing “creeping” to trimming and filing, you’ll save time and get professional-looking edges every time.
If you’ve made many cabinets, you’ve done some edge banding. If you haven’t yet, you will eventually. Sometimes a project only calls for a few pieces, but often if you’re doing any edge banding, you’re doing a lot of it—maybe on the edges of frameless cabinet boxes, plywood shelves, or even a tabletop.
Edge banding isn’t difficult, but knowing a few things before you start can save you a lot of time and frustration. This article offers edge banding tips for adhesive-backed edge banding.
Choosing the Right Banding

I buy edge banding online in rolls up to 250 feet long because it’s much more economical than the short rolls sold at home centers. It comes in various widths, including 3/4-inch. But don’t buy 3/4-inch banding if you plan to apply it to 3/4-inch plywood. You need room for error in case you don’t get it perfectly straight. Instead, buy 7/8-inch or 13/16-inch banding and trim it to width after it’s applied.
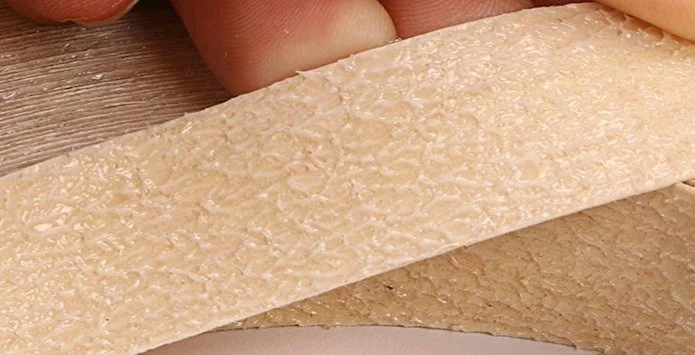
This material comes pre-glued, meaning the back is coated with a dry adhesive that softens with heat. It won’t be as durable as 1/8-inch or 1/4-inch hardwood banding that you cut and glue on yourself, but if applied properly, it will be as durable as the veneer on the plywood itself. That makes it perfectly suited for cabinetry, shelving, and many other projects.
Applying the Banding
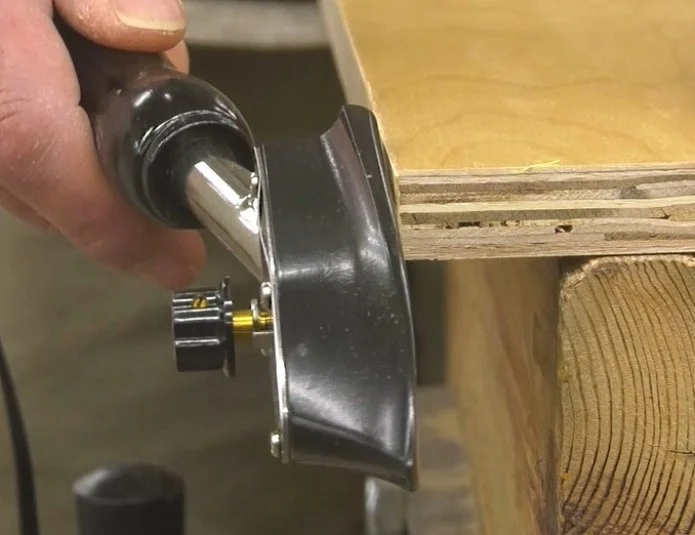
The simplest way to apply edge banding is with an iron. You can use a regular steam iron, but if adhesive gets on it and someone later uses it on a shirt, you’ll be in trouble. I prefer a small iron made for edge banding—it’s mine, it’s not borrowed, and the smaller head isn’t as unwieldy. I can see my work better and keep an eye on problems like creeping.
What’s creeping?
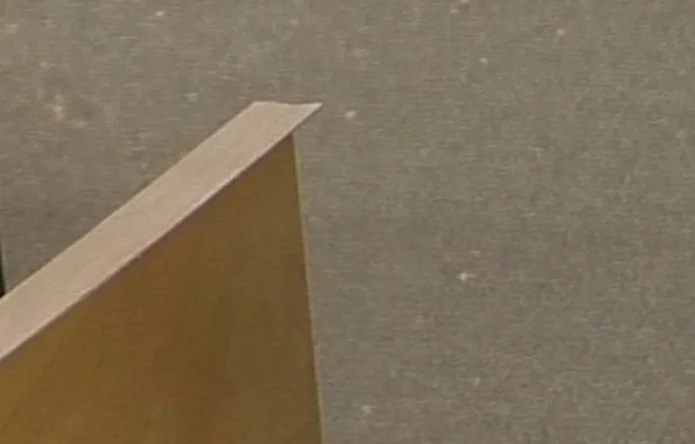
As the glue heats up, it softens and becomes pliable. The pressure of the iron pressing forward can pull the strip of banding with it. The fix is simple: cut your banding a little long and let some hang off the end where you start. You can trim it perfectly flush once you’re finished.
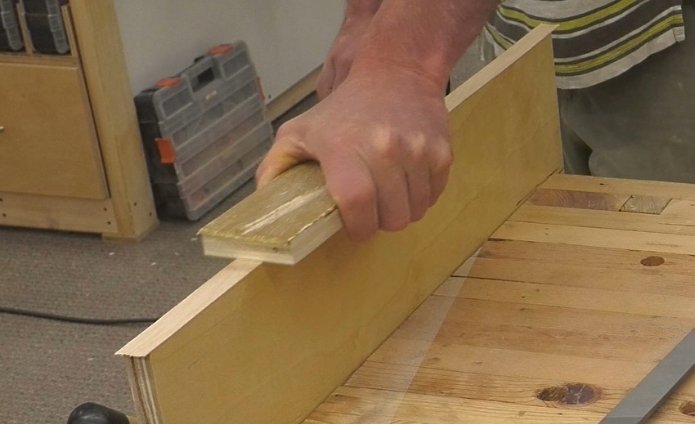
After heating, apply even pressure with a wood block or a rubber laminate roller, right up to the edges. If the banding doesn’t stick fully, add more heat and follow it with pressure. If the strip creeps out of alignment, reheat it to adjust—or even peel it off and start again.
Trimming the Banding
Once the strip is glued down, it needs trimming on both ends and edges. A proper trimming tool makes this easier. A couple of years ago, I found flush cutters from FastCap—originally for trimming pin nails flush, but they work great for cutting the ends of edge banding too.
Another favorite is an edge trimmer made specifically for trimming the banding. I like it because it ensures the ends are both square and flush.
Trimming the Edges
This part is trickier. Double-edge trimmers cut both sides at once, but I don’t recommend them because the grain in the banding often runs at an angle. On one side you might cut with the grain, but on the other, you’re cutting against it—and that can cause chips. It’s better to cut one side at a time so you can reverse direction as needed. That’s why I prefer a trimmer with a fence and reversible knives.
Finishing the Edge
After trimming, the edges need to be smoothed. A sharp edge can catch on hands or clothing and splinter. For years, I used a sanding block, which works fine. But after seeing a video from another woodworker, I tried a file—like those used for laminate—and found it works even better. It quickly shaves the wood smooth without clogging as fast as sandpaper.
A regular mill file works, but a laminate file has deeper grooves and resists clogging.
Final Thoughts
I hope these tips make your next edge banding project easier. In a future video, we may cover using a portable edge banding machine. If you have a whole kitchen or a lot of shelving to tackle, one of those can pay for itself quickly.
This post may contain affiliate links. If you make a purchase, we may receive a small commission.
Need some cool tools for your shop? Browse my Amazon Storefront for inspiration.