
HOW TO STOP WOOD FROM WARPING
Big live-edge slabs look amazing, but if you don’t understand wood movement, they’re almost guaranteed to warp, crack, or cup over time. Learn why the center of the tree is your enemy—and how reading growth rings can help you build flatter, longer-lasting projects.
This isn’t going to be a long article, but it is an important one—because it can save you a lot of frustration by teaching you two very important lessons about wood movement.
The first lesson has to do with using big slabs of wood.
The Problem With Big Slabs and Tree Slices
It’s extremely popular these days to make tables, benches, and countertops from large slabs or even full tree slices. Some folks simply attach metal legs to the bottom and call it good. Unfortunately, many of these projects turn into absolute disasters just a few years—or even a few months—down the road.
Here’s why.
In the old days, trees were huge. Some were hundreds of years old, with trunks several feet across and tight, consistent growth rings. You could get enormously wide boards from them. Today, however, most trees are much smaller. If you want a really wide board now, you often have to take a slice straight from the center of the log.
When you do that, you get both a blessing and a curse.
The Blessing: Quarter-Sawn Grain
The blessing is the outer growth rings that run perpendicular to the face of the board. This is known as quarter-sawn grain, and it’s prized for its stability. Those parts of the board tend to stay relatively flat over time.
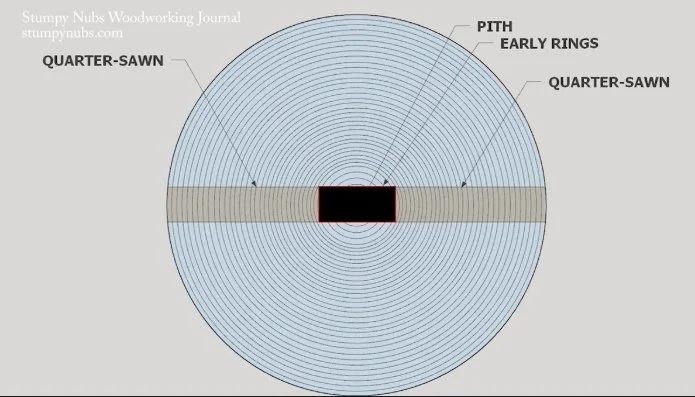
The Curse: The Pith and Inner Rings
Click to enlarge.
The curse is the tight, small rings near the center of the board—and especially the dark pith right in the middle. This is the worst part of the tree, and it can completely ruin your plans for a nice, flat tabletop.
As logs dry, they do not shrink evenly. Wood fibers shrink tangentially (parallel to the growth rings) at about twice the rate they shrink radially (across the rings). Put simply, those circular tree rings are constantly trying to flatten out.
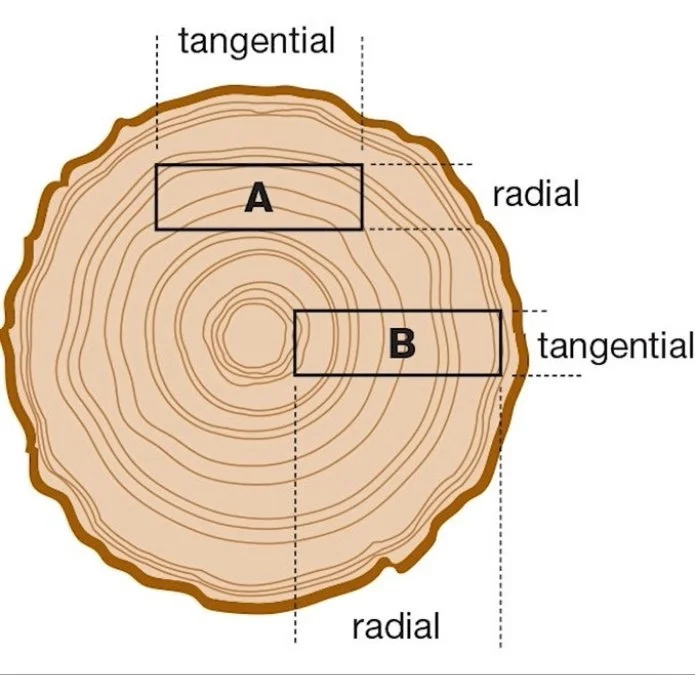
The tighter the curve of the rings, the more the wood will cup as it dries. And nowhere do the rings curve tighter than at the center of the tree.
So while the outer portions of a slab may stay flat, the board will often fold right down the pith.
And that’s not the only problem.
Why the Center of the Tree Is Especially Unstable
The pith and those inner rings represent the adolescent stage of the tree’s life—when it was young and awkward. The fibers are softer, less dense, and full of remnants of early twig growth that later became small knots.
That wood is unstable. It wants to split, crack, move, and warp.
This isn’t just a problem while a green log dries. As long as your board contains the pith or those tightly curved inner rings, you’ll have ongoing problems as humidity changes and the wood continues to swell and shrink over the years.
There’s really only one solution:
You have to cut that beautiful wide slab and remove the center section. That can be hard to accept.
A Real-World Countertop
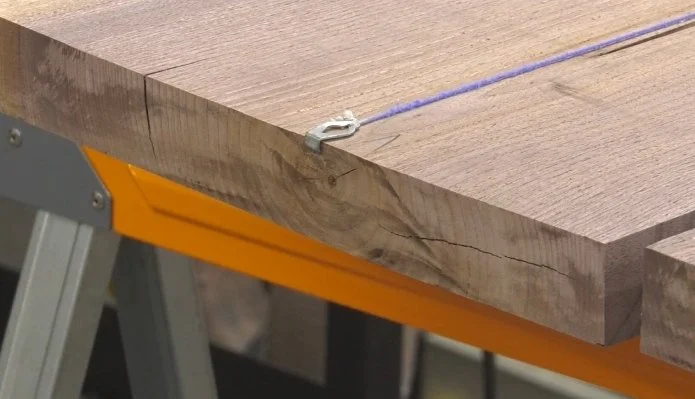
Let’s take a countertop, for example. In the above picture, you can tell that the board came directly from the center of the tree because the pith is visible near the surface.
Click to enlarge.
The adjacent board came from right next to it. Even though it didn’t contain the pith, you could still see some of the tight inner rings on the end grain—and a line of small knots from early twig growth down the center.
We really wanted to edge-glue these boards together for a countertop. The book-matched grain made it look almost like a single slab. But we knew those inner rings would cause problems down the road. The counter would likely cup or develop cracks and checks along the middle.
So instead, we ripped the two boards into four pieces, removing about a one-inch strip from the center of each board. We didn’t eliminate every knot, but we did remove the tightest, most problematic rings.
Click to enlarge.
When the boards were glued back together, the slab became far more likely to stay flat over time.
This Lesson Applies to More Than Slabs
This lesson isn’t limited to big slabs of wood.
If you can reasonably predict how wood will move, you can choose the right boards for the right places—and your projects will be much more successful.
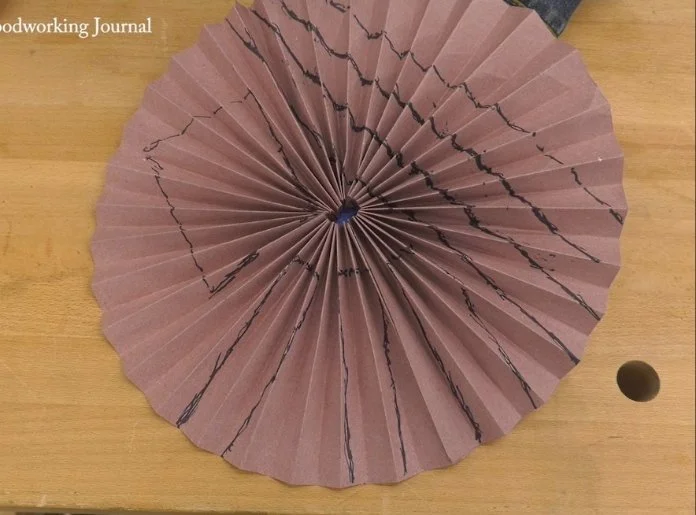
Understanding Wood Movement With a Simple Analogy
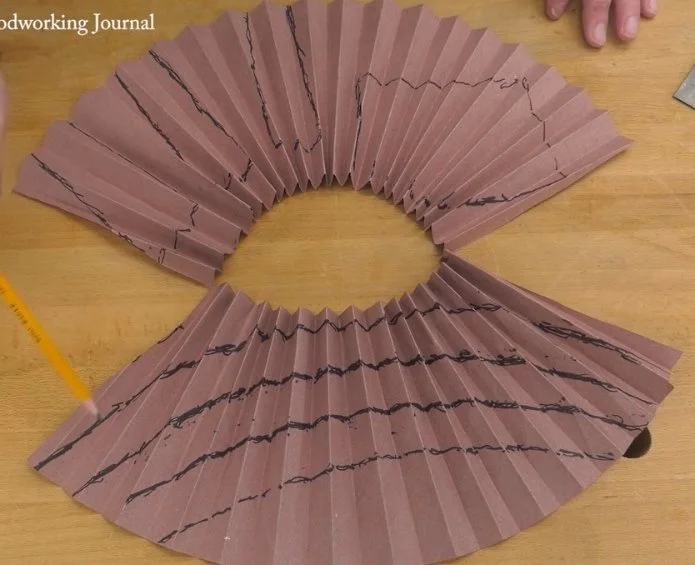
One of the best ways to understand wood movement is to take a piece of paper and fold it like a fan. When you wrap that fan-folded paper into a circle, it creates internal tension similar to what exists inside a tree.
As a log dries, it doesn’t shrink into a perfect miniature version of itself. As mentioned earlier, wood shrinks tangentially—along the annual rings—about twice as much as it shrinks radially, across the rings. This means the circumference of the log shrinks much faster than its thickness.
Those tangential stresses are very similar to the tension created by the folded paper circle.
How Different Cuts of Wood React
Now imagine boards inside that log:
At the top are flat-sawn boards
On the left is a square timber
On the bottom are quarter-sawn boards running radially from the pith
When the tension is released and the wood dries, the results are predictable:
Flat-sawn boards cup away from the center of the log
Square timbers distort in shape
Quarter-sawn boards change very little
None of this is random. Wood movement follows clear, understandable rules.
The Two Big Takeaways
So what are the lessons here?
First, avoid the unstable center rings and the pith, even if that means cutting them out of an otherwise beautiful slab.
Second, pay attention to the direction of the growth rings, even when the pith isn’t present. Understanding ring orientation allows you to predict how a board will move as humidity changes.
These are fundamental lessons that many new woodworkers never learn—but mastering them can make a dramatic difference in the quality and longevity of your work.
And ultimately, they’ll make you a much better woodworker.
Happy woodworking!
This post may contain affiliate links. If you make a purchase, we may receive a small commission.
Need some cool tools for your shop? Browse my Amazon Storefront for inspiration.