
HOW TO MAKE T-TRACK OUT OF WOOD
T-track is incredibly useful for jigs and fixtures—but buying aluminum track can get expensive fast. This guide shows how to make durable wooden T-track with two router bits, saving you serious money without sacrificing functionality.
If you make a lot of workshop jigs and fixtures, you probably already know the value of T-track. There are all sorts of clamps, hold-downs, and accessories designed to fit inside it.
The problem is that T-track can get expensive—especially if you need a lot of it. We previously built a miter station for a video series and needed about seven or eight feet of track. Depending on where you buy it, that could easily run $40–$50.
So we decided to make our own.
It does require two router bits. One you probably already have; the other is a one-time purchase. With that bit—and a couple of tips in this article—you can make miles of T-track for what amounts to pennies per foot.
Choosing the Right Wood
First, you’ll need some hardwood. No pine—it’s just not strong enough.
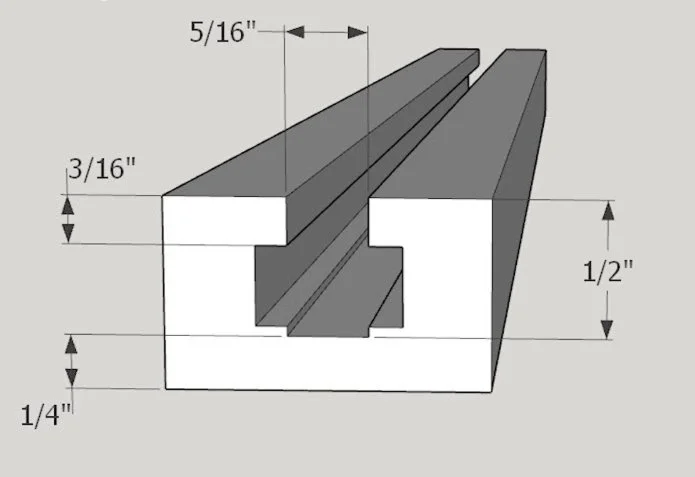
The strength of a wooden T-track is in the upper lips. The thinner these lips are, the more likely they are to break under pressure. I like the upper lips to be at least 3/16 inch thick.
You also want a thick enough bottom to prevent splitting. About 1/4 inch is just right.
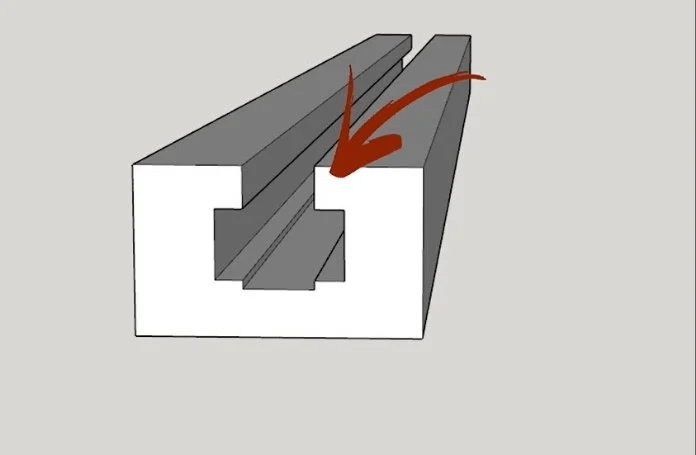
Cutting the Main Groove
The first cut is made with a 5/16-inch straight router bit.
You could probably get by with a 1/4-inch bit, but since you’ll likely be using 1/4-inch bolts in the track, I prefer the extra clearance. Set the bit to cut about 1/2 inch deep, which leaves roughly 1/4 inch of material at the bottom.
We used a power feeder on the router table, but that’s not necessary. A standard router table with push blocks works just fine.
Cutting the T-Slot
Once the initial groove is cut, swap over to a T-slot router bit.
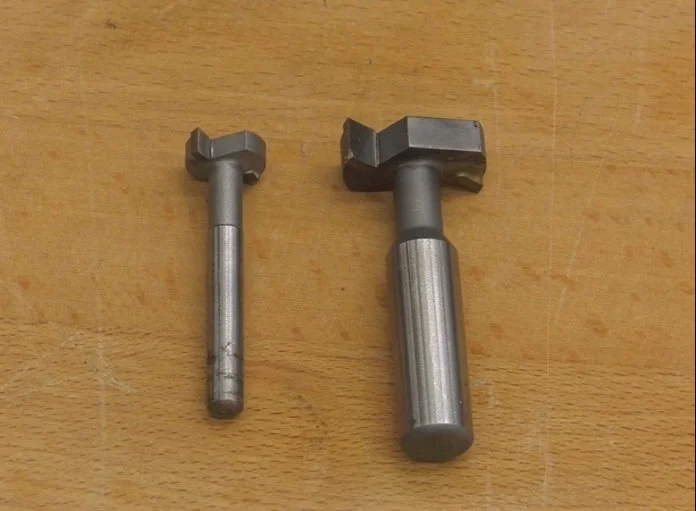
These bits typically come in two sizes. I’m using the smaller size because I’m working with 3/4-inch-thick hardwood. If you’re using thicker stock, you can use the larger bit.
The main difference between the two sizes—aside from overall dimensions—is what hardware they accommodate:
The larger bit creates a slot that will accept a standard 1/4-inch nut or the head of a bolt.
The smaller bit is sized for flat oval T-nuts and T-bolt heads.
Fence Alignment Tip
If you have to move your router table fence to install the new bit, be sure to mark its original position so you can return it to the exact same spot. You want this second pass to run perfectly centered in the first groove.
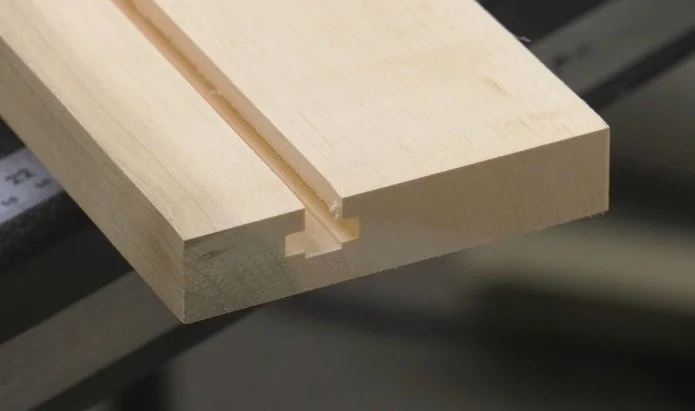
Also notice that I don’t cut quite as deep with the T-slot bit. This leaves a shallow channel at the bottom of the groove, which I find works better for flat oval T-nuts.
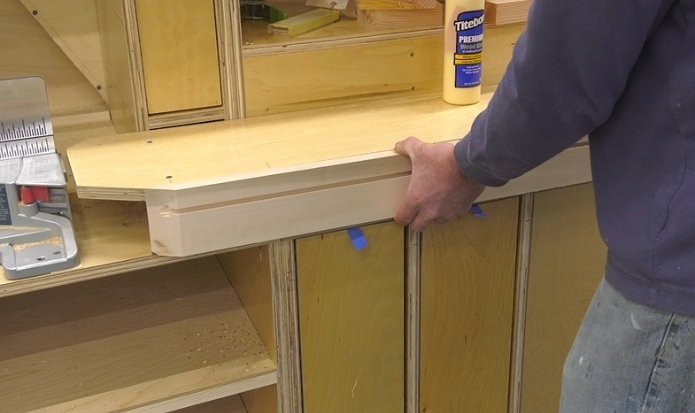
Using Your Homemade T-Track
In our case, we routed these T-tracks directly into the aprons attached to our workstation. But you could just as easily trim away the excess wood on either side and end up with a narrow, standalone wooden T-track.
It will be a bit bulkier than extruded aluminum track—but it will also be far cheaper in the long run.
If you use a lot of T-track in your shop, this is one of those techniques that pays for itself very quickly.
Happy woodworking!
This post may contain affiliate links. If you make a purchase, we may receive a small commission.
Need some cool tools for your shop? Browse my Amazon Storefront for inspiration.