
TIPS FOR WORKING WITH MDF
MDF isn’t junk—it’s a stable, flat, and incredibly useful material when you understand its strengths and weaknesses. This guide explains when MDF shines, why its joints fail, how to fasten and cut it safely, and what it takes to get smooth, paint-ready edges.
In a perfect world, everything would be built out of mahogany and rosewood so woodworkers could brag about using only the finest materials. But we don’t live in that world. There are very good reasons manufactured materials like MDF exist, and in this article I want to share some of the most important things you need to know about medium-density fiberboard.
MDF Is Not Junk
First, MDF is not junk wood. Don’t let the fru-fru woodworkers shame you for using it. You just have to know when to use MDF—and when to avoid it.
MDF is excellent for:
Large panels that need to stay flat without warping
Projects where you need stability without a natural grain direction
However, MDF lacks one critical feature of solid wood: long, continuous fibers running through the board.
Those fibers give natural wood much of its strength, and without them MDF is relatively brittle—especially at the edges and at joints.
This weakness becomes very apparent when you try to join two pieces of MDF together.
Why MDF Joints Are Weak
MDF is essentially sawdust mixed with resin and compressed into sheets. When you glue two pieces together, you’re only bonding the outer particles of one piece to the outer particles of the other. There’s very little structural integrity compared to solid wood.
You might try to reinforce a joint with screws, but that introduces another problem.
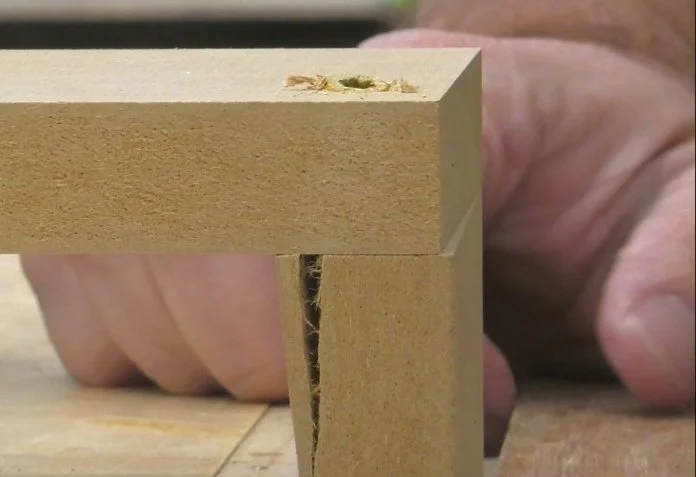
The “D” in MDF stands for density. The fibers are already compressed as much as they can reasonably handle. A screw can act like a wedge, forcing the fibers apart and splitting the edge of the board.
Tips For Using Screws in MDF
If you’re going to use mechanical fasteners with MDF, you must drill a properly sized pilot hole.
The drill bit should match the diameter of the solid shaft of the screw, NOT the threads
The hole makes room for the shaft while the threads bite into the fibers
Choosing the right screw matters, too:
Coarse-thread screws grip MDF far better than fine-thread screws
Just as important—don’t overtighten. When the screw head seats against the surface, stop driving it. Overtightening will tear the fibers loose inside the hole, leaving nothing for the threads to grab.
For this reason, I recommend:
A cordless drill, not an impact driver
Slowing down as the screw head approaches the surface so you can feel when it seats
Better Joinery for MDF
The best way to join MDF isn’t with screws at all—it’s with mechanical joinery, such as dados or rabbets. These provide far more strength and reliability than butt joints with fasteners.
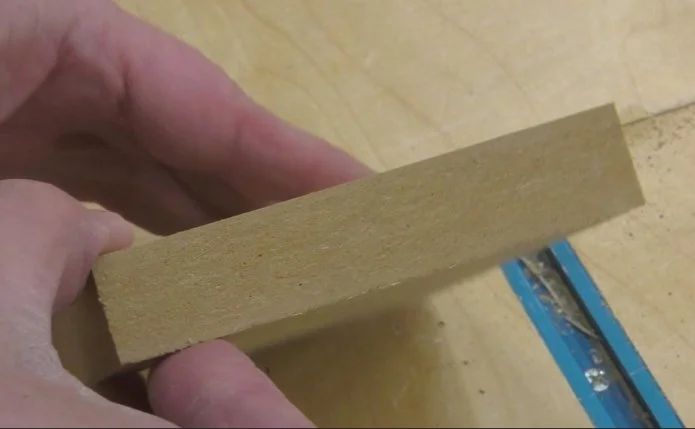
Cutting MDF: What You Need to Know
Assembling MDF projects is one thing—cutting MDF is another.
Tool Wear
MDF is highly abrasive and will dull cutting tools quickly.
Fine for cheap circular saw blades
Not recommended for your best table saw blade
If routing MDF profiles, consider using inexpensive router bits you won’t mind discarding after the project
Dust Hazards
MDF is notoriously dusty, and the chemicals in that dust can be very harmful to your lungs.
You absolutely need proper protection:
A real dust mask, not a surgical mask
At minimum, an N95 respirator that seals well around your nose and cheeks
It’s also wise to wear:
Sealed safety goggles, especially if you’re doing a lot of cutting or sanding
And remember—the danger doesn’t end when the tool stops.
MDF dust lingers in the air and settles on surfaces, where it can be stirred back up as you move around the shop. When you’re done cutting or sanding:
Leave your mask on
Vacuum the shop thoroughly
Don’t forget your clothing—you don’t want to bring MDF dust into the house
Sanding and Finishing MDF Edges
Although MDF surfaces feel very smooth, the edges are much rougher due to the manufacturing process. This is why edges require special attention if you plan to paint or apply any finish other than edge banding.
This isn’t a full painting tutorial, but here’s a reliable approach:
Sand the edges to about 220 grit
Apply drywall joint compound, pressing it into the pores with a putty knife
If you have many identical parts, stack them and do all the edges at once
Let the filler dry
Lightly sand again with 220 grit
Apply a primer
Lightly sand once more to remove raised fibers
After this process, the edges will be smooth and ready for paint with a nearly glass-like finish.
Final Thoughts on MDF
MDF can be an excellent material when used appropriately—just don’t overuse it.
For projects that will never be moved, such as built-in cabinets, MDF can be a smart choice
For furniture that may be moved or stressed over time, solid wood—especially at the joints—is usually the better option
Use MDF where its strengths shine, respect its weaknesses, and it can serve you very well.
This post may contain affiliate links. If you make a purchase, we may receive a small commission.
Need some cool tools for your shop? Browse my Amazon Storefront for inspiration.