
A TRICK TO STRENGTHEN YOUR MITERED JOINTS
Mitered corners look great—but they’re weak unless you reinforce them. This simple 2×6 bevel jig makes it fast and accurate to cut spline slots that dramatically strengthen box and frame corners while keeping the clean mitered look.
A piece of 2×6 construction lumber is one of the most important box-making tools in my shop. Why? In this article, I’ll walk you through how I use it to make perfect, strong mitered corners for boxes and frames so easily that you may never cut regular bevels and miters the same way again.
Mitered joints — like those you find on the corners of boxes and frames — provide a nice, clean appearance. But they aren’t terribly strong. The glue surface is limited, and there’s no mechanical component to the joint, which means glue alone is holding everything together. On top of that, the glue is entirely on end grain, whose strength seems to be endlessly debated these days.
If you ever want to see how strong a common miter joint really is, just drop your box or frame on its corner.
You know exactly what I mean.
Why I Reinforce Miters With Splines
That’s why I like to reinforce my corner joints with splines.
Splines are fantastic because:
They greatly increase the total surface area for glue.
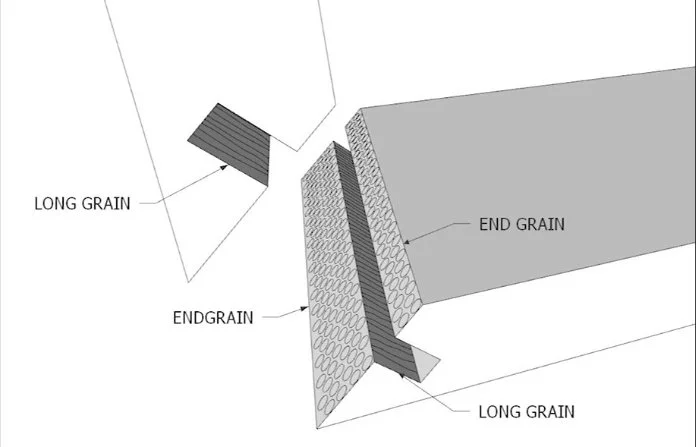
They introduce long grain into an end-grain joint.
They add a mechanical component that makes boxes and frames significantly stronger.
And the best part? The splines are hidden inside the joint, so you still get that nice, clean look on the outside.
Let me show you an easy way to accurately cut slots for those splines. I use a router table, but the same principle can be applied to a table saw.
Preparing the Workpieces
For this example, I had already cut 45-degree bevels on the ends of my workpieces. If you need help with that step, I recommend reviewing basic miter and bevel techniques first.
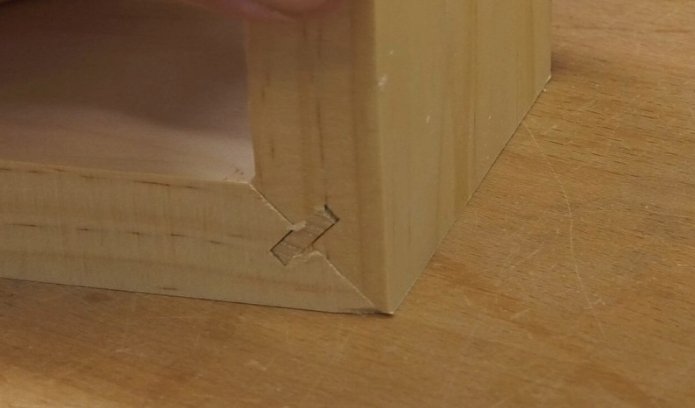
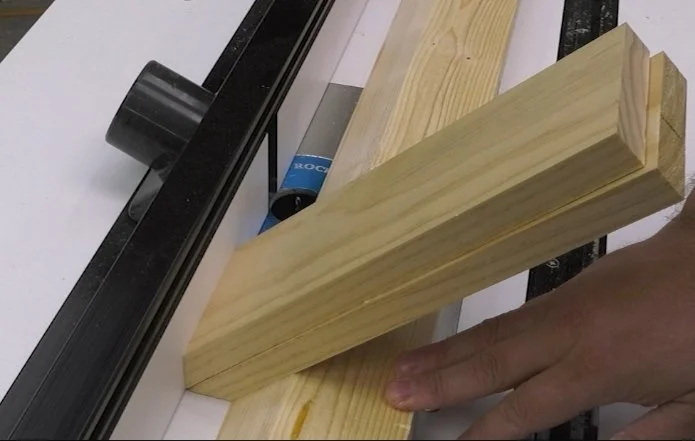
I attach two box sides back-to-back with double-sided tape, being careful to line up the sharp edges of the mating bevels.
Together, these two 45-degree bevels form a 90-degree corner that fits nicely against both the fence and the table. This means I don’t have to worry about the sharp edge slipping beneath the fence during the cut. It also gives me two reference surfaces — one on the table and one against the fence — which helps maintain the proper angle while cutting.
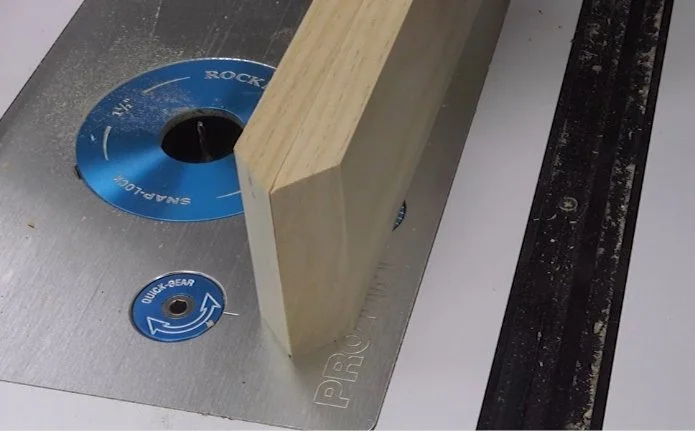
I align my router bit roughly in the center of the downward-facing bevel and lock the fence in place. The height of the bit doesn’t matter, as long as you don’t cut all the way through.
The 2×6 Bevel Fence Jig
Now here’s where that chunk of 2×6 comes in.
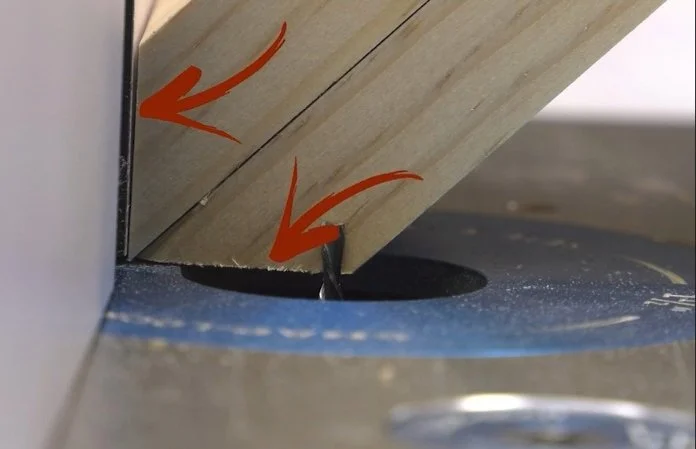
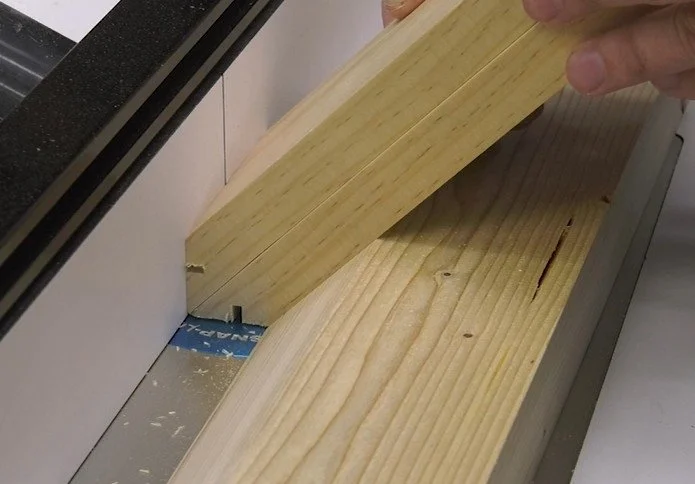
I cut a 45-degree bevel along one edge. I carefully align it parallel to my router fence, using my workpieces as spacers. A clamp on each end holds it in place. This creates a guide that stabilizes the workpiece during the cut — and as you’ll see, it makes a big difference.
Because these workpieces are fairly wide, I can easily keep the bevels flat on their reference surfaces with the help of this jig as I moved through the cut.
If your workpieces are narrower, they may want to tip sideways. In that case, consider making a push block to run behind them to help guide them through. Either way, keep your fingers well away from the bit.
Both workpieces can be slotted with the same setup by simply rotating them 180 degrees and taking a second pass.
Save this bevel fence for next time — I suggest labeling it so it doesn’t accidentally get used for something else.
A Quick Note About Splines
For greatest strength, the grain of your spline should not run parallel to the seam in the joint. It should run perpendicular to the slots.
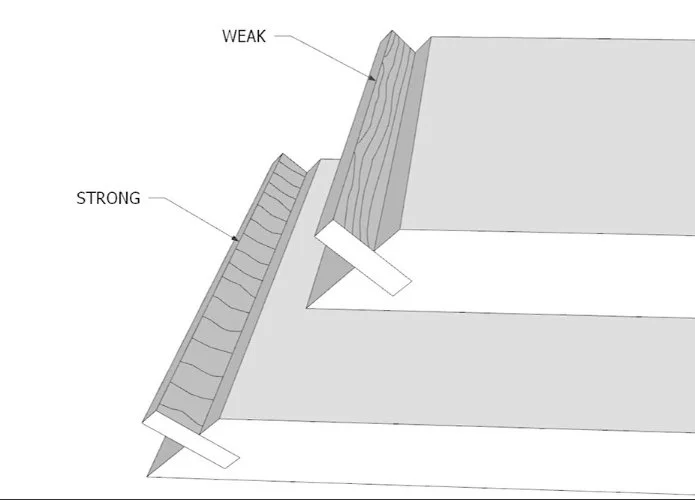
Quarter-inch plywood also makes good splines, since the grain direction alternates from layer to layer, making it relatively strong in any direction.
Give Splined Miters a Try
Try splined bevels for yourself.
Your joints will thank you.
This post may contain affiliate links. If you make a purchase, we may receive a small commission.
Need some cool tools for your shop? Browse my Amazon Storefront for inspiration.