
THESE TRICKS WILL CHANGE HOW YOU SAND WOOD
Sanding may not be glamorous, but mastering it can make or break your woodworking projects. From choosing the right grit and pressure to avoiding swirls, cheap paper, and rounded edges, these pro tips will help you sand smarter, not harder.
Understanding how to use your tools properly is critical to good woodworking. In the past, I’ve done deep dives into the essential skills of sanding, but this time I want to focus on some of the most useful tips I’ve employed over the years. These are the tips I believe can have the biggest impact on your next project.
The Pencil Tip
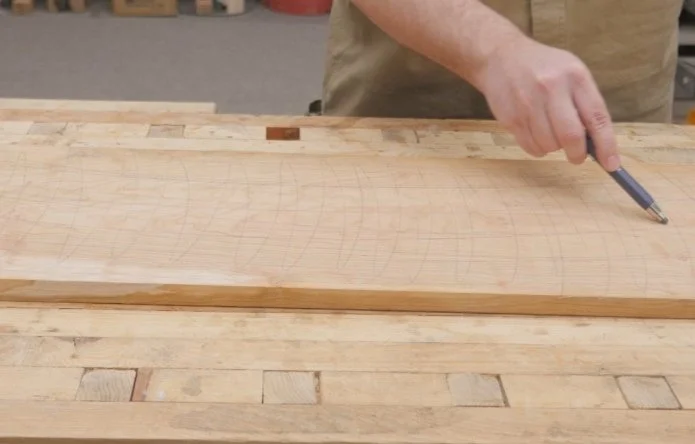
One of the best sanding tips ever is to use a pencil to help you judge your progress through the grits.
Lightly scribble on the surface of your work, then sand until the line disappears. Once it’s gone, it’s time to move on to the next grit.
Keep in mind that this trick is best for finish sanding. If you’re using 40 or 60 grit on a rough surface, you’ll likely need to remove more material than just the pencil line. At those levels, you can usually tell by eye when you’re ready to advance grits. The pencil trick shines with finer grits—80 and above—when progress is harder to judge visually.
Use Your Power Wisely
I often see tip videos showing how to use a piece of cardboard to keep a sander from marring a perpendicular surface when sanding into a corner.
The better solution? Sand your project parts before you assemble them. It’s so much easier that way.
There may be times when you have to sand after assembly, such as when cleaning up a little glue squeeze-out, or in some really small assemblies. But that can usually be done by hand. Just because you own a 5-inch random orbit sander doesn’t mean you should use it for everything.
In fact, you should always finish your project with hand sanding at the finest grit, working with the grain to eliminate any cross-grain scratches.
To that end, get yourself a foam sanding block that accepts the same sanding discs as your power tool. That way you don’t need separate paper. It’s inexpensive, and it’ll quickly become one of the handiest sanding tools in your shop.
Stop Rounding Off
I don’t worry too much about slightly rounding over edges because I usually ease them by hand during the final sanding. But sometimes you do need edges to stay crisp, and the soft pad on a random orbit sander can be a problem.
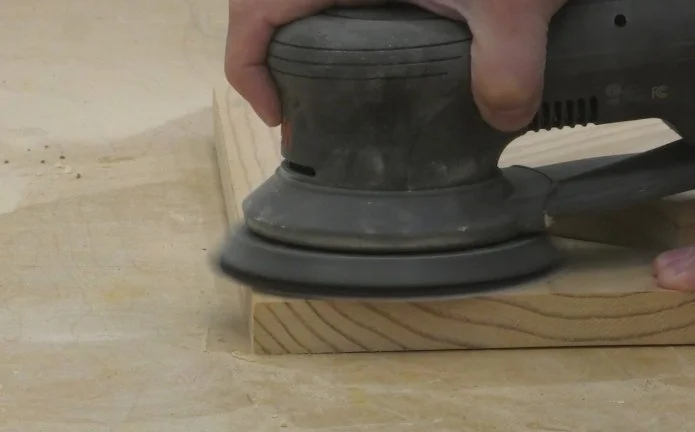
If that’s the case, avoid letting more than a sliver of the sanding disc hang off the edge of your workpiece. Or, place another board of the same thickness beside your work to support the sander and keep it flat and even.
Use the Right Grit
Sandpaper works by removing material until all the scratches are no deeper than the grit size of the paper.
Skipping grits won’t speed things up—it just makes the finer grit work harder. For example, it’s much easier to remove 80-grit scratches with 120-grit paper than with 180-grit. As a rule of thumb, don’t jump more than 50% at a time: 80 to 120, 120 to 180, and so on.
And know when to stop. A couple of coats of a film finish like polyurethane will easily fill in 180-grit scratches, so sanding beyond that might be wasted effort. But with penetrating finishes like oils, which soak in rather than build up, you may need to sand finer—220 or even 320 grit.
Cheap Paper is Expensive
Cheap sandpaper might look like a bargain, but it wears out quickly and cuts more slowly, which makes it more expensive in the long run.
If you don’t already have a favorite brand, I recommend trying 3M Cubitron II. I like the mesh version, but the multi-hole version works with most sanders as well. It cuts faster and lasts longer than anything else I’ve tried—making it, ironically, one of the cheapest papers on the market.
Sit Down and Sand
Don’t start your sander in the air before setting it on the workpiece. Lower-end sanders can spin up too quickly, damaging their bearings, and even high-end sanders can gouge your work when the spinning disc makes first contact.
Always start the sander on the surface.
Good Vibrations
Depending on the quality of your random orbit sander, it may vibrate a little or a lot. Over time, heavy vibrations can cause temporary numbness or even permanent nerve damage.
If this bothers you, or if you sand for long stretches, invest in anti-vibration gloves. I use a pair with goatskin palms and gel pads inside. They’re just enough to reduce vibration without being bulky.
Lighten Up
A lot of people think pushing harder makes a sander work faster. It doesn’t. Excess pressure interrupts the sander’s orbital pattern, reducing it to vibration.
Try this: put a mark on the edge of your sanding disc and watch how the movement changes when you push down. You’ll see how it breaks the orbit, wears out paper faster, and increases the risk of swirls.
Let the tool do the work.
Slow Down
Another common mistake is moving the sander around too quickly. This stretches out the scratch pattern into long, noticeable swirls instead of blending them into a uniform surface.
You’re not scrubbing the wood—you’re sanding it. About an inch of movement per second is ideal. If progress feels slow, switch to a coarser grit.
Speed Up
The one thing you shouldn’t slow down is your sander’s variable speed dial.
Most sanders are designed to run at full speed—10,000–12,000 RPM. The slower settings are for special situations, like sanding veneer with coarse grits or smoothing between coats of finish. Most of the time, full speed is the way to go.
Use a Vacuum
Ignore the gimmicky dust filters and bags that come with sanders. They don’t work. There’s a reason professional sanders don’t use them.
You need a shop vacuum or dust extractor to pull dust away as you work. Not only does this protect your lungs, but it also prevents dust buildup under the pad, which can create deeper scratches and swirls.
Whatever sander you use, toss the filter bag and hook up a vacuum.
Protect Your Hooks
The pad on your sander is covered with small hooks that grab the sanding discs. If they wear out, your sander is in trouble.
To protect them, store your sander with a disc on it. Better yet, use a Hookit pad saver. It attaches to your sander with loops on one side and provides a fresh set of hooks on the other. If the hooks wear out, you just replace the Hookit—not the entire pad.
It’s universal, inexpensive, and one of the best upgrades you can buy.
Final Thoughts
Sanding isn’t glamorous, but it’s one of the most important parts of woodworking. By using the right grit, the right pressure, and the right technique, you’ll save time, extend the life of your tools, and end up with a smoother finish on your projects.
This post may contain affiliate links. If you make a purchase, we may receive a small commission.
Need some cool tools for your shop? Browse my Amazon Storefront for inspiration.