
TIPS TO FIX COMMON THICKNESS PLANER PROBLEMS
Most thickness planer problems—slipping rollers, snipe, and dull blades—aren’t flaws in the machine, but issues with setup and maintenance. With a few simple fixes, you can get cleaner cuts, smoother feeding, longer knife life, and a planer that’s far more enjoyable to use.
Do you have one of these?
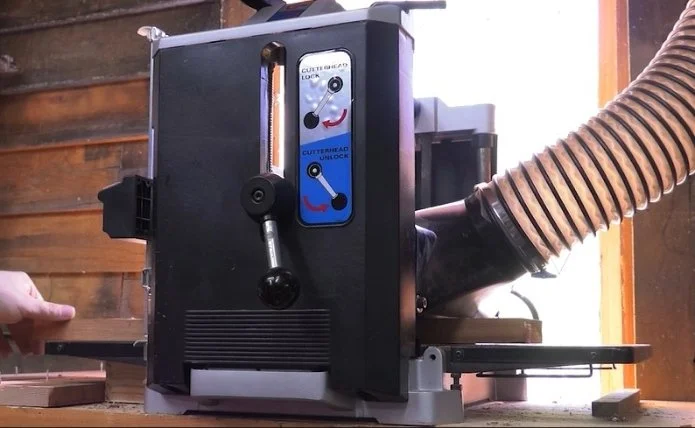
Thickness planers come in all shapes and sizes, but most of them seem to share a few things in common:
The feed rollers slip
They leave snipe at the ends of boards
The blades dull too quickly and cost too much to replace
And if you’ve spent enough time around one, you’ve probably dealt with all three.
The good news is that most of these problems are easier to solve than people think. A few simple adjustments and maintenance habits can transform a thickness planer from one of the most frustrating tools in your shop into one of your favorites.
Let’s tackle these problems one at a time.
Problem #1: Slipping Feed Rollers
If you ever find yourself pushing a board through the planer, something is wrong.
Not only is that unsafe, but uneven feed rates can:
Leave extra machine marks
Increase tear-out
Put unnecessary wear on the machine
The Most Common Cause: Resin Buildup
If you plane pine regularly, you’ve probably already seen this.
Resin and pitch build up on the rollers over time, reducing their grip until they start slipping. But other woods can cause the same problem.
The obvious solution is to clean the rollers—but there’s a lot of confusion about how to do that safely.
What Solvents Are Safe?
Planer manuals usually aren’t much help here, but this is what I’ve learned over the years:
Just because a solvent can affect rubber doesn’t mean a little bit on a rag is going to destroy your rollers. You’re not soaking them—you’re simply removing buildup.
I’ve used:
Naphtha
Mineral spirits
Denatured alcohol
…for years without problems.
Alcohol may require more scrubbing, but it works.
If you live somewhere that restricts stronger solvents, you can also use a bit-and-blade cleaner. Those products are designed to remove the same resin buildup you find on feed rollers, and many are non-toxic.
Don’t Clean Rollers Like This
I’ve seen people hold a rag against spinning rollers with the machine running.
That’s not “efficient.” That’s a great way to lose a finger.
Instead:
Unplug the planer
Clean the exposed section of the rollers
Step away from the machine
Briefly power it on to rotate the rollers
Unplug it again and repeat
It takes an extra minute, but it’s a lot safer.
Don’t Forget the Bed
While you’re cleaning things up, wipe down the planer bed with the same solvent and apply a coat of paste wax.
A slick bed reduces friction dramatically and often solves feed problems all by itself.
If your rollers are still slipping after cleaning, the rubber may have hardened and glazed over with age.
Before replacing them, try one last thing:
Lightly scuff the rollers with 80-grit sandpaper
Don’t get aggressive. You’re just roughing up the surface enough to expose fresh rubber underneath.
It’s a last resort—but I’ve seen it work surprisingly well.
Dust Collection Matters More Than You Think
Poor dust collection makes all of these problems worse.
Without good extraction, dust settles onto the board where the rollers pass over it, embedding grit into the rubber surface.
A shop vacuum often isn’t enough for a planer. Even a small portable dust collector with a 4-inch hose can make a huge difference.
Problem #2: Snipe
Now let’s talk about the planer problem everyone loves to hate: snipe.

Those little indentations at the ends of boards happen because the board dips slightly as it enters or exits the machine. When only one feed roller is still engaged, the opposite end can lift into the cutterhead at exactly the wrong moment.
Some machines are worse than others, especially if the feed rollers are spaced farther apart.
The Simplest Fix: Better Support
The goal is to keep the board flat as it moves through the planer.
Start Here:
Check your extension wings
Make sure they’re aligned properly
Eliminate any droop or upward angle
If that’s not enough, consider building a longer support bed.
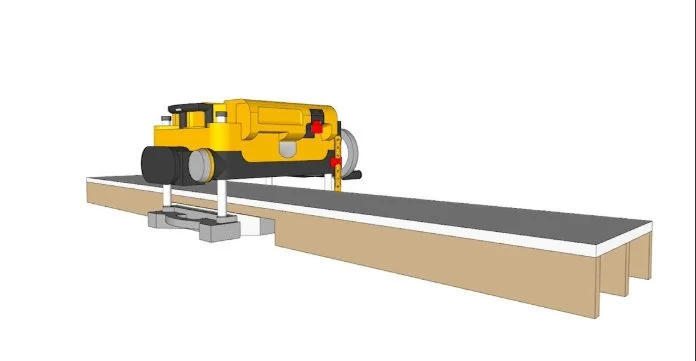
Melamine works especially well because it’s slick and stable.
Roller Stands Can Help… or Hurt
For long boards, roller stands are useful—but only if they’re adjusted correctly.
If they’re too high or too low, they can actually cause more snipe instead of preventing it.
Take a minute to dial them in carefully.
The Scrap Block Trick
Here’s an old trick that works surprisingly well:
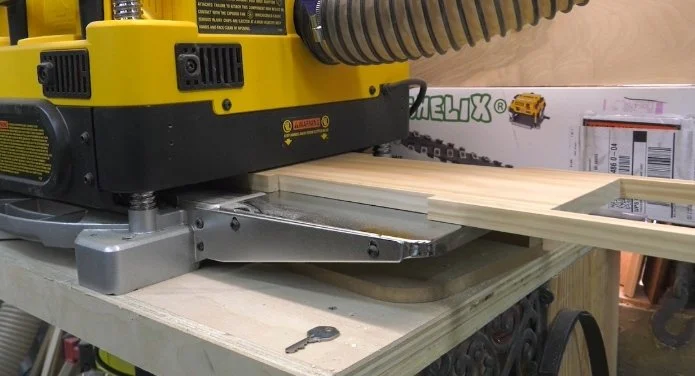
Attach scrap blocks to the ends of your workpiece with hot glue or double-sided tape.
Make them extend about four inches beyond the board.
Now the planer applies any snipe to the scraps instead of your actual workpiece.
Simple. Cheap. Effective.
Problem #3: Dull Knives
You’ve already helped yourself somewhat by fixing the feed rollers and improving dust collection. Cleaner feeding means less wear on the cutters.
But there are other things that shorten knife life, too.
What Dulls Planer Knives Fastest?
A lot of people blame hardwoods, but that’s usually not the real problem.
The biggest knife killers are:
MDF
Particle board
Plywood
Dried glue
Old finishes
Dirty lumber
Rough lumber is especially bad because grit and dirt can become embedded in the surface fibers.
Before milling rough stock, I always hit it with a wire brush first.
That little step can save a surprising amount of wear on your knives.
Sharpen or Replace?
Eventually, your knives will dull no matter what you do.
Technically, many planer knives can be sharpened. But by the time most people notice a problem, the knives are usually worn unevenly enough that sharpening becomes difficult.
And many portable planers don’t provide an easy way to compensate for tiny differences in blade height afterward.
So realistically, you usually have two choices.
Option 1: Keep Spare Knives on Hand
One of the best things you can do is buy an extra set before you need them.
Because nothing is more frustrating than being halfway through a project and discovering:
Your blades are dull
Your replacements are backordered
Your planer model was discontinued ten years ago
If you own an older machine, it’s worth locating a reliable knife source like My Wood Cutters now while parts are still available.
Option 2: Upgrade to a Helical Cutterhead
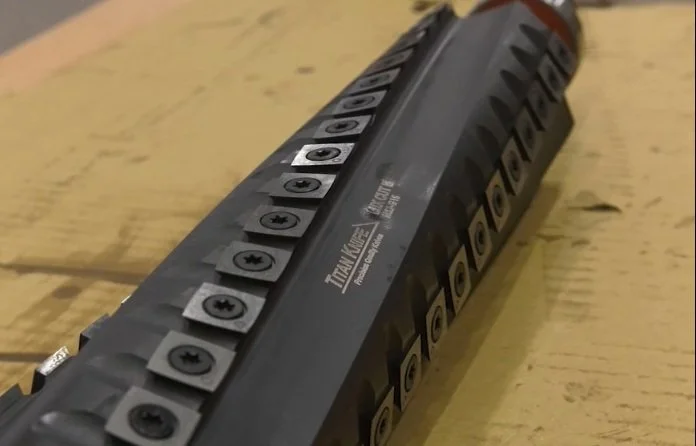
This is the expensive option—but also the one most people end up wishing they had done sooner.
A helical carbide cutterhead:
Lasts dramatically longer
Produces a cleaner cut
Improves dust collection
Reduces noise substantially
If you use your planer regularly, the upgrade pays for itself faster than most people expect.
Final Thoughts
Thickness planers have a reputation for being finicky machines—but most of their common problems come down to maintenance, setup, and feeding technique.
Clean rollers.
Support the board properly.
Keep dust under control.
Avoid feeding dirty stock.
Do those things, and your planer suddenly becomes smoother, quieter, cleaner-cutting, and a whole lot less frustrating to use.
Happy woodworking!
This post may contain affiliate links. If you make a purchase, we may receive a small commission.
Need some cool tools for your shop? Browse my Amazon Storefront for inspiration.