
CLEVER TRICKS WITH FORSTNER BITS
Forstner bits can drill incredibly clean, precise holes—but only if you control heat, speed, and chip buildup. Learn how rim styles, drilling techniques, and a few simple tricks can dramatically improve accuracy, reduce tear-out, and extend the life of your bits.
In woodworking, standard drill bits are typically used for smaller holes—usually up to about 1/2 inch. For anything larger, you’re looking at hole saws, spade bits, or Forstner bits. Each has its place, but most of the time, I reach for a Forstner.
Why?

Because they cut cleanly with minimal tear-out, leave a flat bottom, and can handle overlapping holes, angled cuts, and waste removal around joinery. They’re incredibly versatile—but only if you use them correctly.
So let’s walk through a few tips that will help you get the best performance out of your Forstner bits—and avoid burning them up in the process.
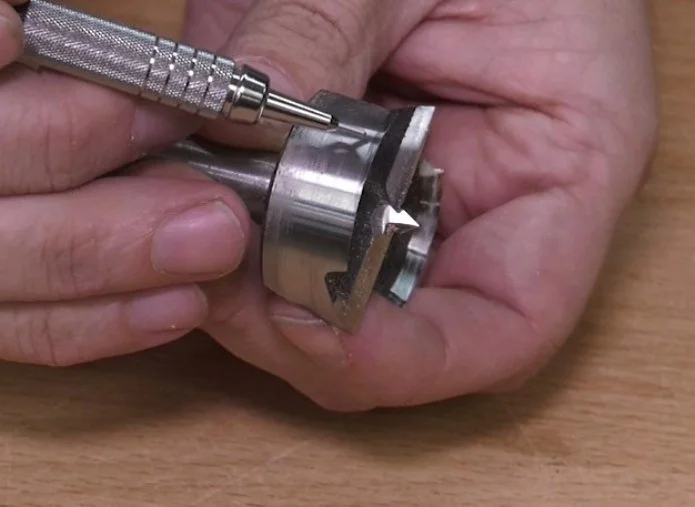
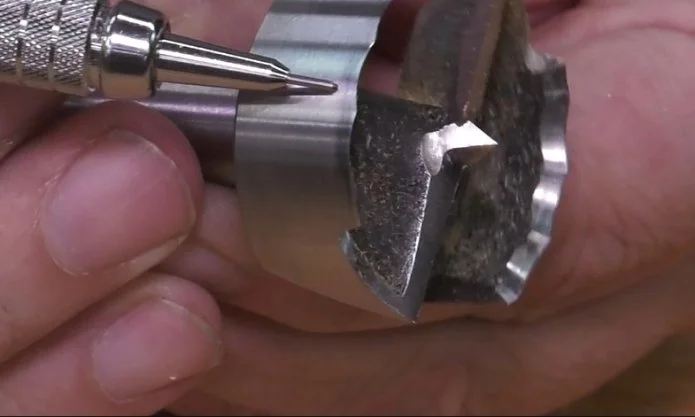
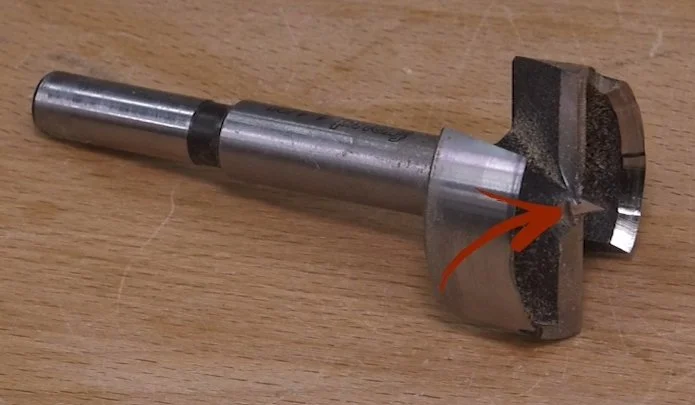
The Feature That Matters Most: The Guide Rim
If you understand one thing about Forstner bits, make it this:
The guide rim does most of the important work.
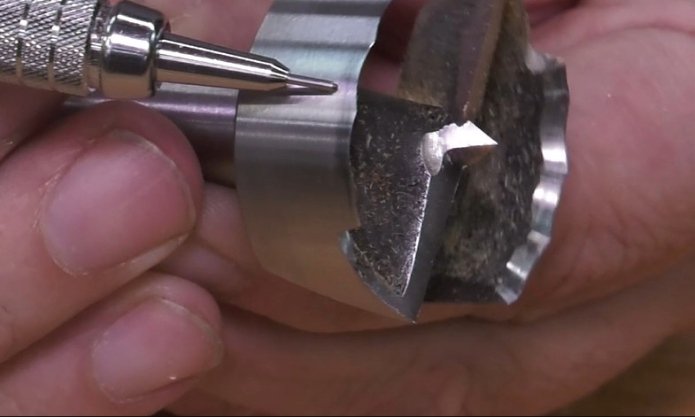
It severs the wood fibers around the perimeter of the hole before the cutters remove the waste. That’s what gives you those clean edges instead of tear-out.
There are three common rim styles, and each behaves a little differently.
Saw-Toothed Rims
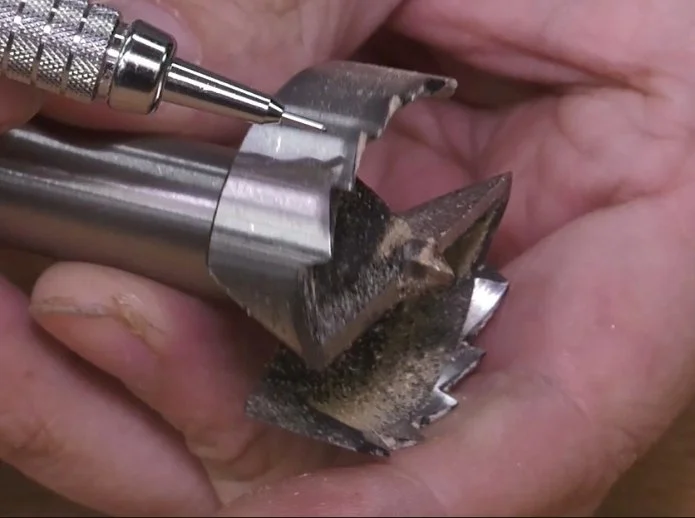
Saw-toothed rims only cut at the tips of the teeth, which reduces friction.
That means:
Less heat buildup
Faster cutting speeds
More aggressive feed rates
But there’s a trade-off.
Those teeth can chatter when they first contact the wood, which may leave a slightly rough or marred edge. They’re also not great for angled cuts or overlapping holes.
Continuous Rims
Continuous rims act more like a knife edge, slicing cleanly into the surface fibers.
They:
Enter the cut smoothly
Excel at angled boring
Perform well with overlapping holes
The downside is heat. That continuous edge creates more friction—especially on larger bits—so you need to slow things down and avoid being too aggressive.
Wavy Rims (My Go-To)
Wavy-rim bits strike a balance between the two.
They:
Cut cleanly like a continuous rim
Reduce friction like a toothed rim
Break up chips more effectively
That last point matters more than you might think. Better chip ejection means less heat buildup—and heat is what dulls your bits.
If you want one style that performs well in almost every situation, this is it.
Heat Is Your Enemy
Most problems with Forstner bits come down to one thing: heat.
Too much heat dulls the cutting edge, and large bits—being more expensive—hurt a lot more when they go bad.
So controlling heat should always be on your mind.
Start with Speed
The bigger the bit, the slower it should spin.
Click to enlarge.
Your drill press likely has a speed chart under the belt cover. If it doesn’t, it’s worth printing one out and keeping it nearby.
If you’re using a handheld drill:
Use variable speed
Don’t just feather the trigger constantly (that can overheat the motor)
Give the drill a break every few minutes
Clear the Chips
Packed chips trap heat.
Make it a habit to:
Lift the bit out periodically
Let chips clear from the hole
It takes a few extra seconds, but it dramatically extends the life of your bit.
Use the Spur Point to Your Advantage
That little center spur isn’t just for locating the hole—it can help you avoid tear-out completely.
Drilling Clean Through-Holes
If the hole will be visible on both sides:
Drill until the spur just pokes through the back.
Stop.
Flip the workpiece.
Use that tiny exit hole to guide the bit from the other side.
Result: clean edges on both faces. No blowout.
Enlarging an Existing Hole
This is where things get tricky.
A Forstner bit relies on its center spur for stability—so what happens when the hole is already there?
Method 1: Tape Trick (Best for Drill Press)
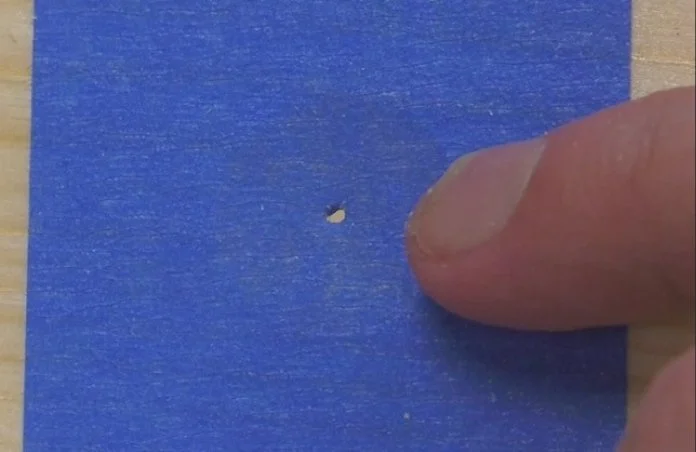
Cover the hole with tape
Use a matching bit to locate the center by piercing the tape
Switch to the larger bit and drill
This works well when the drill press keeps everything aligned.
Method 2: Scrap Guide (Best for Handheld Drills)
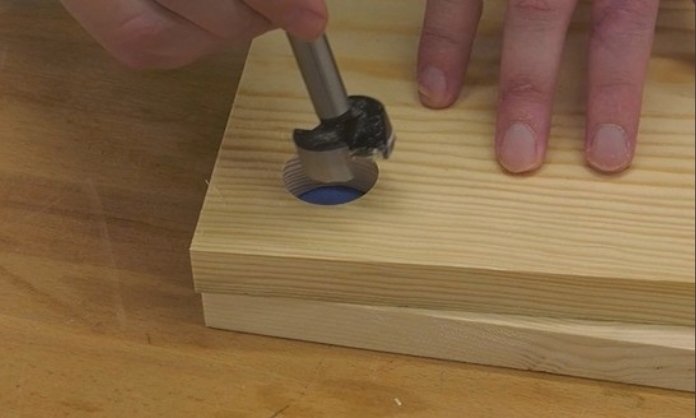
This is the more reliable option when working freehand:
Drill a hole with your larger bit into a scrap piece
Use tape the same was as in Method 1
Position that scrap over your existing hole and align the spur with the hole in the blue tape
Clamp it in place
Use it as a guide
Now your bit won’t wander when it starts cutting—and you’ll get a much cleaner result.
A Simple Trick for Cleaner Entry
Even when you’re not enlarging a hole, Forstner bits can sometimes shift when starting a cut—especially with a handheld drill.
The fix is simple:
Drill a guide hole in scrap
Clamp it to your workpiece
Use it to guide the bit
Bonus: it also supports the wood fibers, reducing tear-out on the surface.
Handling Large Bits Safely
Big Forstner bits can be a handful.
They:
Put more strain on your drill
Generate more heat
Can catch and twist the drill out of your hands
Reduce the Load
Instead of going straight in with the big bit:
Drill a smaller pilot hole first
Stop just before breaking through
Flip the workpiece
Align the spur and then finish with the larger bit
This removes most of the waste ahead of time, making the larger cut easier, cooler, and safer.
Final Thoughts
Forstner bits are one of the most useful cutting tools in the shop—but they demand a little respect.
If you:
Choose the right rim style
Control your speed
Clear chips regularly
Use simple guides when needed
…you’ll get cleaner holes, better results, and a lot more life out of your bits.
And considering how expensive the larger ones can be, that alone makes it worth the effort.
This post may contain affiliate links. If you make a purchase, we may receive a small commission.
Need some cool tools for your shop? Browse my Amazon Storefront for inspiration.