
Homemade router table
This post contains affiliate links. If you click or make a purchase, we may receive a small commission.
Some time back, I made a video about a simple box joint jig for the table saw. Maybe you call them finger joints — it doesn’t matter to me. But you have to admit, it came out looking pretty nice. And a lot of people found the jig really helpful because it was easy and inexpensive to make, and it worked wonderfully.
But some viewers said, “I don’t have a dado set. Show us how to do this with just a router table.”
So I decided to make a quick and easy box joint jig for the router table. But then I remembered this is the internet, and some folks will still complain that they don’t have a router table either.

Finally, I decided to make a box joint jig that would work with just a handheld router. But as I was building it, I realized what I was actually making was a low-cost, quick and easy, portable router table that can do much more than just cut box joints.
So let’s solve that problem first.
In this article, I will walk you through the build of this adorable little portable router table. Later, I’ll make a separate post about a cool box joint attachment for it.
This isn’t just a router table for people who don’t already have one. It’s also the perfect second router table for folks who want something that can be stored on a shelf, tossed in the back of the truck, or dedicated to a specific task they do often.
It only requires a few scraps of wood — something you probably already have in your shop. And it can be adapted to almost any router you own, even an inexpensive trim router. In fact, that’s what I’m using here, making this the ultimate budget-friendly router table.
Alright — you get why I’m excited. Let’s get started.
Making the Router Top
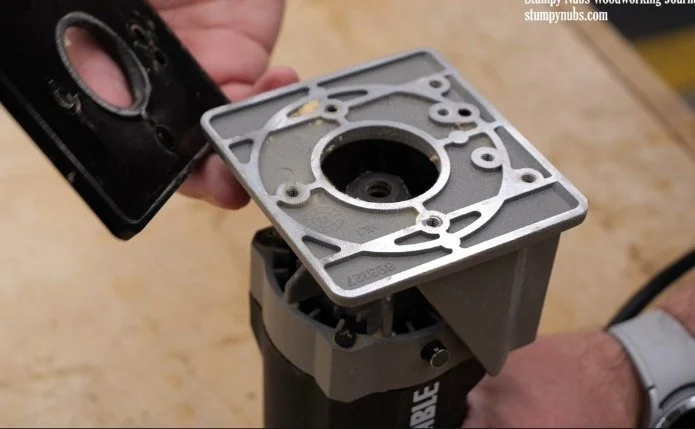
I’m removing the base plate from my trim router because we’re going to replace it with a piece of 1/4-inch MDF. You can use plywood instead, but make sure it’s as stiff as possible — especially if you’re adapting this to a full-size router. The extra weight could cause sagging if the material is too thin.
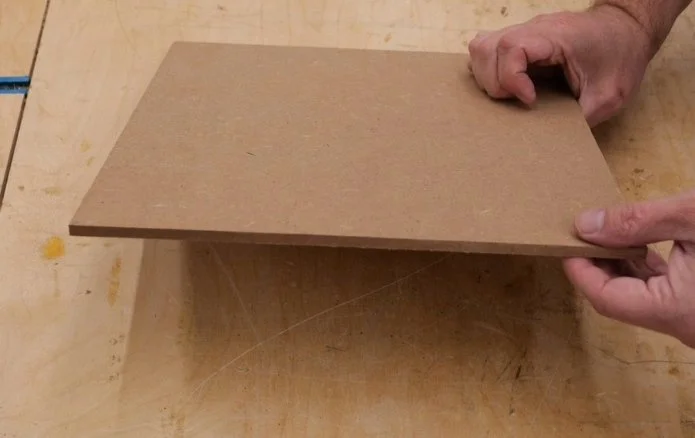
Mine is 12 inches by 12 inches square. You may want to go a bit larger if you’re using a bigger router. The exact size isn’t critical, but the two dimensions must be exactly the same. If it’s 12 inches wide, it must be precisely 12 inches long.
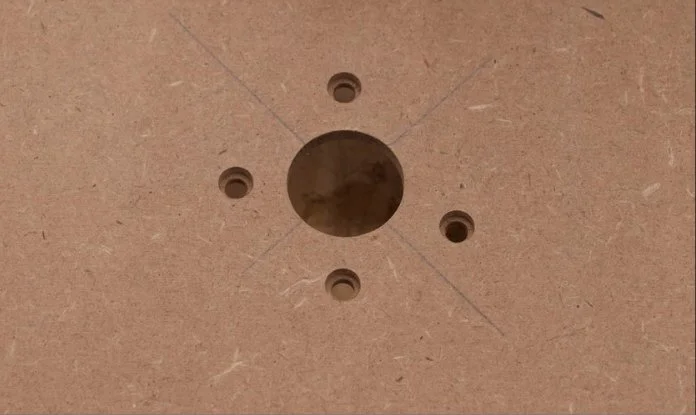
Align the original router plate dead center and mark the mounting hole locations. The large center hole gets bored all the way through. The screw mounting holes need to be counterbored: a larger hole partway through for the screw head, and a smaller hole the rest of the way through the center. This lets the screw heads sit below the surface and gives you some adjustment room.
Your original router plate likely has this same hole configuration — we’re just duplicating it. Use whatever drill bits match your hardware.
Attach the new MDF plate to your router. You can align it by eye with the collet, but it’s best to center it perfectly if possible. This makes it easier to remove and reinstall the router later without losing alignment.
Centering cones are inexpensive and very helpful for this. I recommend using one anytime you change a router’s base plate.
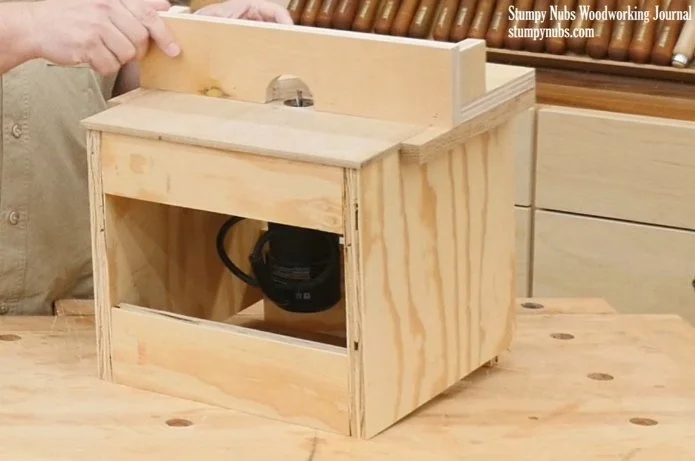
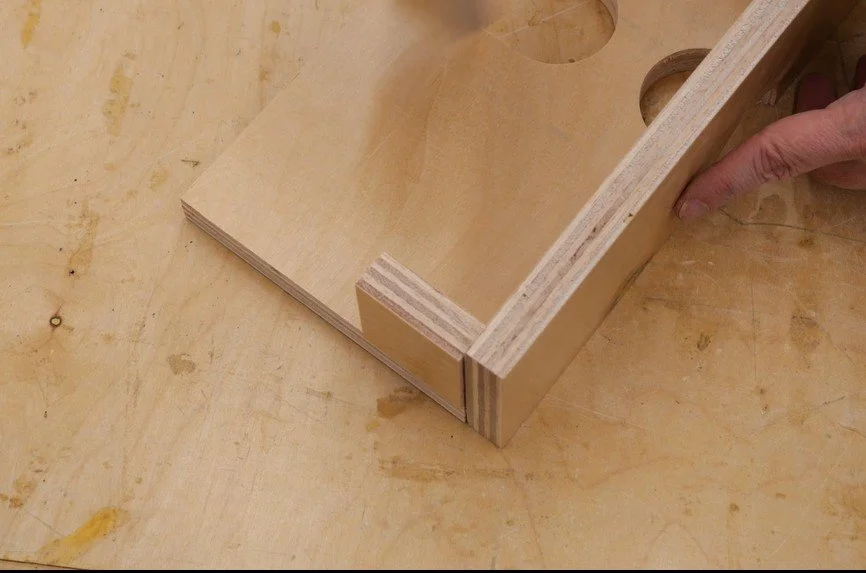
Building the Box
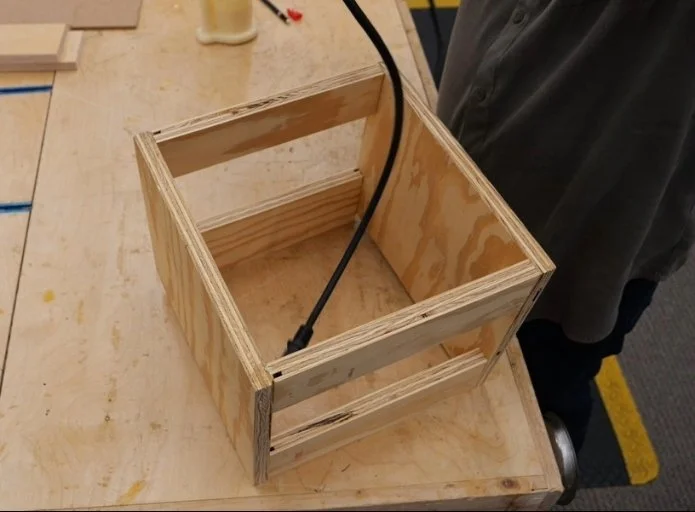
The router table itself is simple. It’s essentially a wooden box with two solid side panels connected by four rails.
Notice that one lower rail is mounted about an inch lower than the side panels. I’ll explain why in a moment.
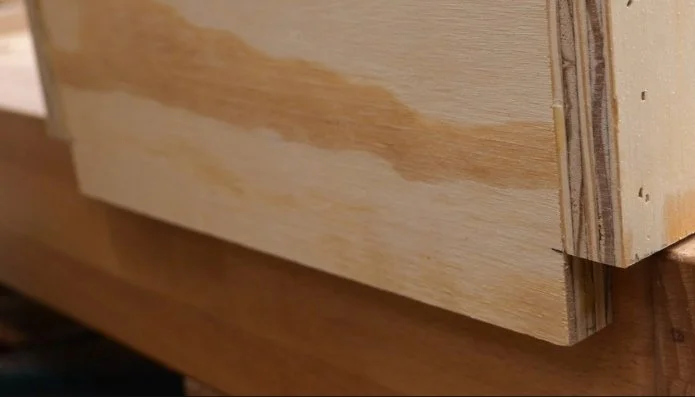
The size of your box depends on your router and top plate. The outer dimensions must be slightly smaller than the top plate, leaving a small overhang on all four sides. The height is determined by your router — you just want it suspended above the bench surface.
Once the box is assembled, apply glue around the rim and drop the router into place. Make sure you have a consistent overhang on all four sides. Once aligned, secure it with a few nails while the glue dries.
Finally, apply a coat of paste wax to the top surface. Before waxing the edges of the top plate, sand them smooth. Be careful not to oversand — each edge must remain parallel to its opposite edge.
That’s it for the table. Now let’s make a fence.
Building the Fence
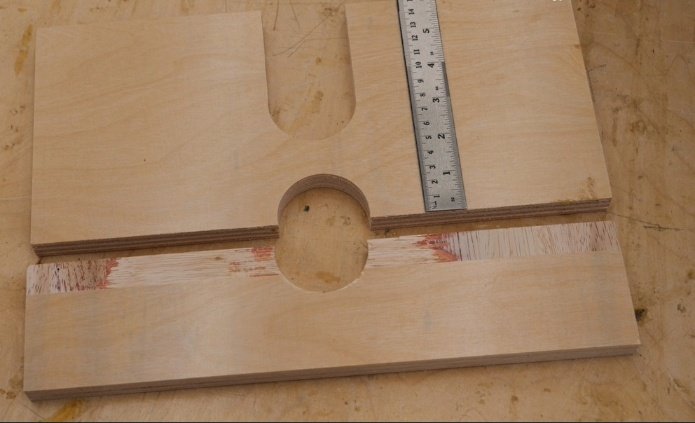
The fence consists of two main pieces that are about 1-1/2 inches wider than the router table’s top plate.
The size of the cutouts isn’t critical. I used the largest Forstner bit I had to cut the arcs and then removed the waste with a bandsaw. You can adjust dimensions to suit your tools and materials.
Once the cutouts are made, attach the two pieces together. To ensure they’re square, add small blocks at each end to lock in a 90-degree angle.
Adding the Runners
Next, attach two hardwood runners. Mine are 3/4-inch square and about 9 inches long. These must be mounted precisely.
If you have it, use super glue with accelerator so it sets quickly and minimizes movement. Mount the first runner perfectly flush with one end of the fence. I added a few nails to ensure it wouldn’t shift.
Place that runner against the edge of the router table’s top plate. Then attach the second runner to the opposite side beneath the other end of the fence. Again, I used super glue for a quick set, followed by a few nails.
Finally, reinforce everything with screws to make sure nothing ever shifts.
The fence should slide smoothly forward and back. You should also be able to rotate it 90 degrees and slide it side to side. If it’s too tight, lightly sand the edge of the top plate until the fit is just right.
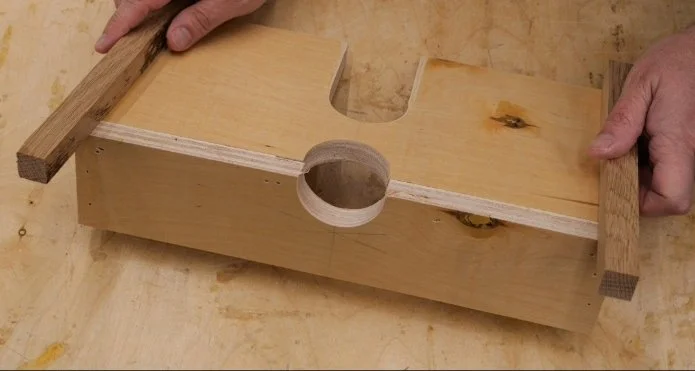
How It Works
It’s only a trim router, so you won’t be spinning massive bits, but you can use a wide variety of profiles — either guided by a bearing or with the fence in place.
A clamp on the back locks the fence wherever you need it.
Remember that lower rail that extended an inch below the sides? If you hook that over the front edge of your workbench, it prevents the table from sliding backward when feeding stock. Rotate the table 90 degrees and hook it on the end of your bench when feeding the other direction.
If you have a vise, you can clamp the box inside and it won’t move at all. If you don’t, consider adding strips to the bottom so you can clamp it securely to your bench.
A Router Table for Everyone
This whole project can be built in about an hour. If you save plywood scraps like I do, it should cost practically nothing.
Now, the next time I post a router table tutorial, you can’t say you don’t have one.
You can even toss this in the trunk of your car and never be without a router table again.
Next time, I’ll show you how to cut perfect box (or finger) joints with your new trim router table.
This post may contain affiliate links. If you make a purchase, we may receive a small commission.
Need some cool tools for your shop? Browse my Amazon Storefront for inspiration.